FLPSUG Last meeting May 15th on “PowerShell Azure SQL Database”

FLPSUG Lync meeting Thursday May 15 2014 – Session: “PowerShell Working w/Microsoft Azure SQL Database” Speaker Maximo Trinidad (MVP) and Co-hosting Adnan Cartwright (MVP).

In this presentation I will be covering how to subscribe to Azure, setup PowerShell to connect to your subscription, use scripting to create a SQL Database Server and then use SMO with PowerShell push data to your SQL Azure tables. All this using PowerShell scripting plus showing some editor, scripting techniques, and tips to avoid issues when working and setting Azure with PowerShell. (live demo with Windows Azure). Thanks to Adnan for assisting me in this meeting.

Here’s the Powerpoint presentation, demo scripts, and link to the recorded video. The video is the full and unedited meeting: https://onedrive.live.com/redir?resid=7FD7082276C66197!31206&authkey=!AIbxWUhyiUth7Dg&ithint=file%2c.zip

Video link: http://youtu.be/9-fMxXY7DcQ

Co-host Adnan Cartwright link: http://www.fisg.us/


IT Palooza South Florida Great Success – PowerShell Rules!

Great event on 12/12/2013 in South Florida with most IT Community User Groups showcasing their stuff. It was full of people and friends.

Florida PowerShell User Group represented!
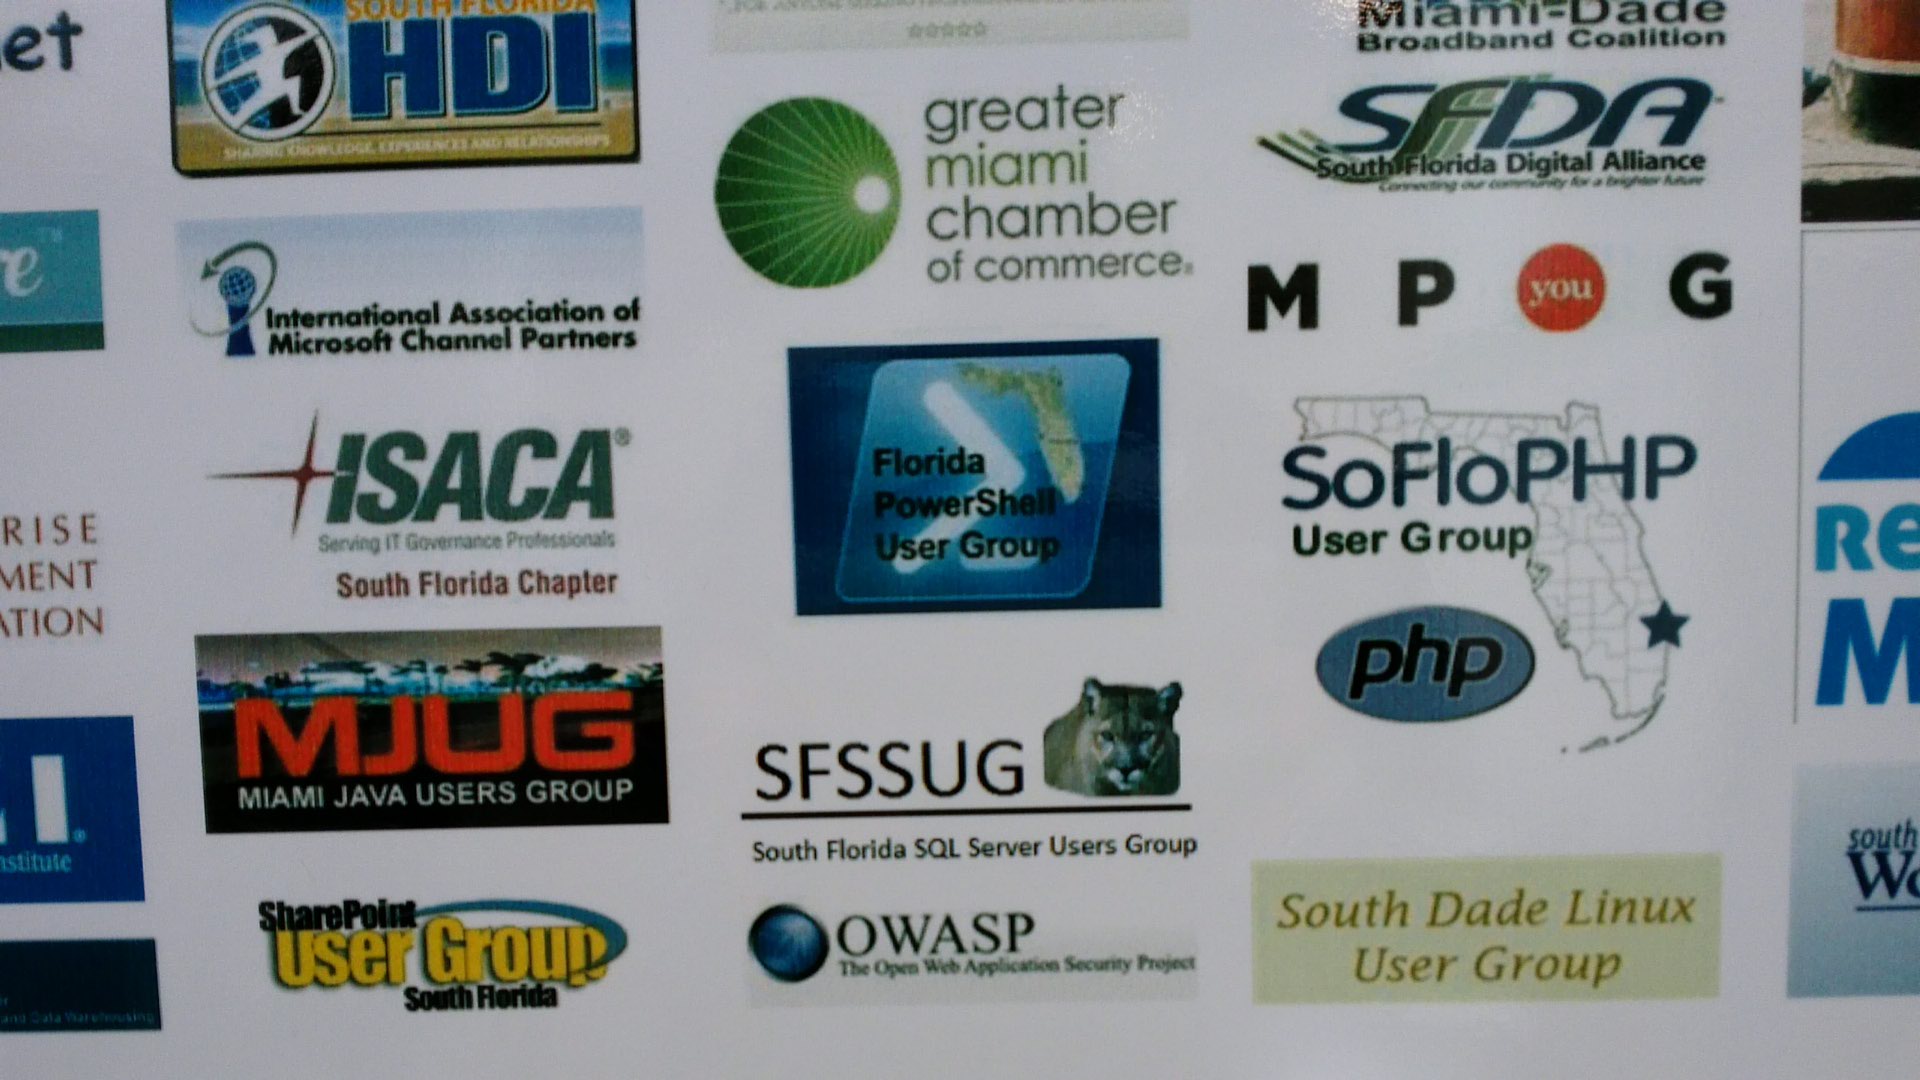
List of community IT User Groups
At Nova University, Davie FL.
At Nova Southeastern University, Davie FL.

Thanks to Nova Southeastern University and organizers (specially Alex Funkhouser) for having me as a speaker present a little bit of PowerShell.

Me with Microsoft IT Pro Evangelist Blain Barton.
Sharing table with Microsoft.

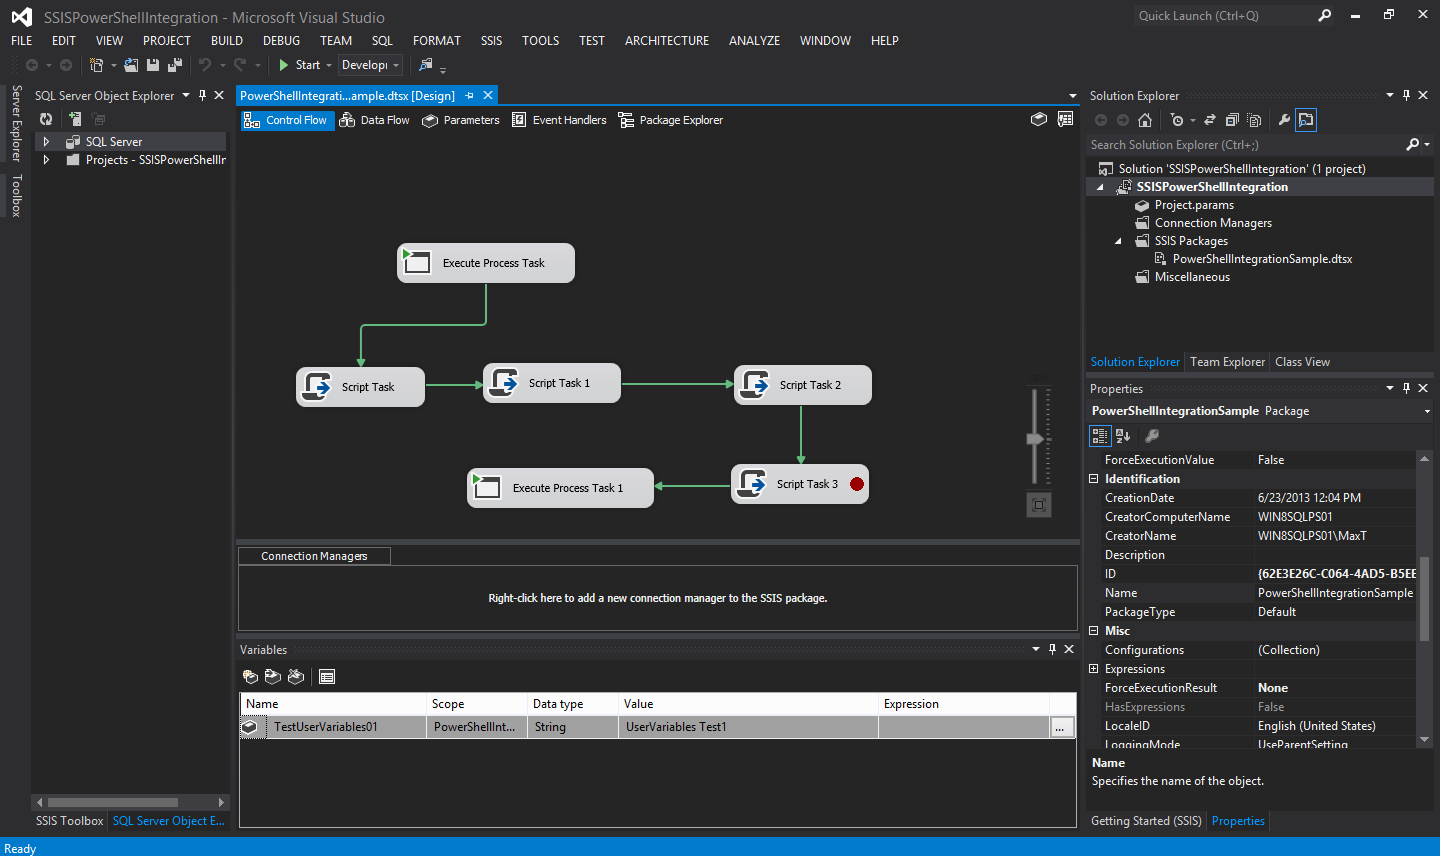
Also, thanks to all who attended my session on “Integrating PowerShell in SSIS Script Task“. It was a great to pass some knowledge and see everyone participating.

Thank You!

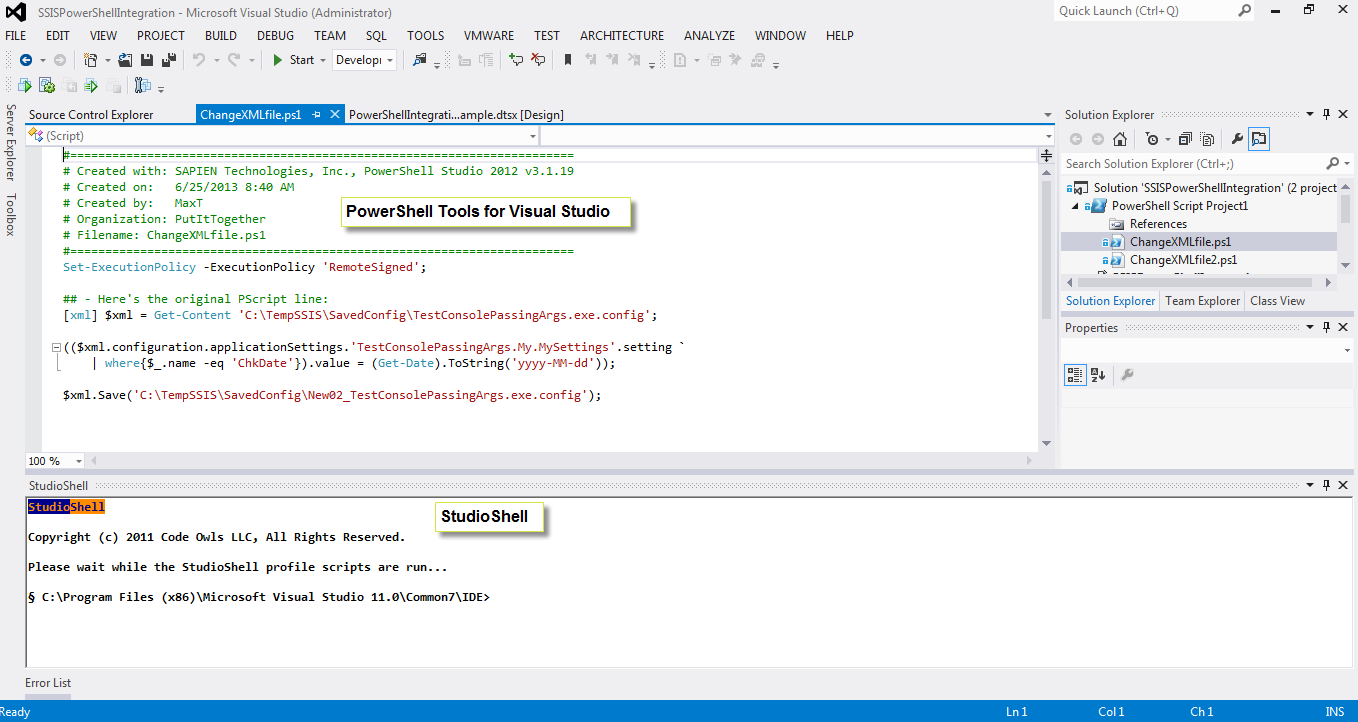
PowerShell Community Tools loaded in SQL Data Tools BI.

Here’s the presentation (fully loaded):

This presentation contains LOTS of goodies in it.

1. It contains a .NET console solution.
2. SSIS solution (no-NONsense).
3. Sample PowerShell scripts
4. Sample .NET code both C# and VB.NET (code snippets)

All this material so you can study it. Take your time and make it your own.

This folder (C:\TempSSIS) need to be copied to the root of the C:\ drive.

Things to pay attention too. Here’s some other important updates for Visual Studio 2012:
1. Visual Studio 2012 Team Explorer 8/2/2012 – http://www.microsoft.com/en-us/download/details.aspx?id=30656
2. Visual Studio 2012 Update 4 11/12/2013 – http://www.microsoft.com/en-us/download/details.aspx?id=39305

Don’t forget to Team Foundation Online (free up to 5 users): http://www.visualstudio.com/products/visual-studio-online-overview-vs

Plus two PowerShell community tools you should consider using with Visual Studio:
1. “PowerShell Tools for Visual Studio” by Adam Driscoll (PowerShell MVP) – http://visualstudiogallery.msdn.microsoft.com/c9eb3ba8-0c59-4944-9a62-6eee37294597
2. “StudioShell” by Christopher Beefarino (PowerShell MVP) – http://studioshell.codeplex.com/

Keep learning PowerShell!

Nice DOTNETZIP Integration with PowerShell

Let me share a script I built two years ago, and I just created a function for it named “New-ZipFile“. Basically, this PowerShell function script will create a blank zipped file and copy the files to it. At the same time if you run it again (after updating an existing file) will overwrite the file any existing files previously on the existing zipfile. Also, there’s no prompt.

This is an example of what PowerShell can provide at an excellent tool for providing creative solutions. Also the community is very active is helping everyone.

I agree that sometime is not easy but definitely not impossible. And there’s lots of other possible good alternative. But, using PowerShell let you customized your solution with an opportunity for enhancements giving you some level of control over what you want to accomplish.

I’m using the DOTNETZIP from Codeplex for this example. By the way, they provide good documentation on how to use the API’s. (hint: copy all the “Tools” folder to “Program Files (x86)\DotNetZip\..” folder)

You can download DOTNETZIP at the following link: http://dotnetzip.codeplex.com/

Here’s the sample script. Just change the variables values to your need, and make it your own:

[sourcecode language=”powershell”]
## – Beginning of Script:
Function New-ZipFile{
PARAM
(
[String] $SrcFolder,
[String] $DestFolder,
[string] $DestZipName,
[String] $FileExtToZip,
[string] $ZipPurpose,
[string] $StoredInZipFolder,
[string] $DeleteFiles = $null
)
#$TodaysDate = Get-Date -uformat "%Y-%m-%d-%Hh%Mm%Ss.zip";
#$ZipFileName = $ZipPurpose + "_" +$DestZipName + "_" + $TodaysDate;
$ZipFileName = $ZipPurpose + "_" +$DestZipName + ".zip";

if (Test-Path $DestFolder){
## – Create Zip file or it won’t work:
if (Test-Path ($DestFolder+"\"+$ZipFileName)) { del ($DestFolder+"\"+$ZipFileName) }
new-item ($DestFolder+"\"+$ZipFileName) -ItemType File
}
else
{
Write-Host "Destination Folder [$DestFolder] doesn’t exist" -ForegroundColor ‘Yellow’;
Break;
};

## – Loads the Ionic.Zip assembly:
[System.Reflection.Assembly]::LoadFrom("C:\Program Files (x86)\DotNetZip\Ionic.Zip.dll") |

out-null;
$zipfile = new-object Ionic.Zip.ZipFile

## – AddSelectedFiles with source folder path:
## – ($false grab files in source folder) & ($true grab files & subfolder files)
$zipfile.AddSelectedfiles($FileExtToZip,$SrcFolder,$true) | Out-Null;
## – UseZip64WhenSaving, when needed, will create a temp file compress large number of files:
$Zipfile.UseZip64WhenSaving = ‘AsNecessary’
$zipfile.Save($DestFolder+"\"+$ZipFileName)
$zipfile.Dispose()

If ($DeleteFiles.ToUpper() -eq ‘YES’){
## – Remove all backed up files:
Write-Host "Deleting files after zip!";
get-childitem ($SrcFolder+"\"+$FileExtToZip) | remove-item
}
};

### – variables:
$DestZipName = "BackupMyTempSSIS";
$FileExtToZip = "name = *.*";
$DestFolder = "C:\MyBackupZipFolder";
$SrcFolder = "C:\TempSSIS";
$DeleteFiles = $null;
$StoredInZipFolder = "MyBackupZip\";
$ZipPurpose = "BackUp";
#or $ZipPurpose = "Save";

New-ZipFile -DeleteFiles $DeleteFiles `
-DestFolder $DestFolder -DestZipName $DestZipName `
-FileExtToZip $FileExtToZip -SrcFolder $SrcFolder `
-StoredInZipFolder $StoredInZipFolder -ZipPurpose $ZipPurpose;

## – End of Script
[/sourcecode]

This is about having flexibility over what you want to do.  This is a good example how you can use an existing API with PowerShell.  As long there’s good API documentation then the rest just follows thru.

DotNETzip_APIDoc

In the above sample script you can have is Scheduled in either Task Scheduler or in SQL Server Agent. This code becomes portable.

This script the folder for the zipped file most exist or it will display a message that the folder doesn’t exist, and has the ability to delete the files after its done. (feel free to modify)

I hope you’ll find it useful!

Maximo Trinidad (MVP – Windows PowerShell)
Mr. PowerShell

Trap missing IP Address for SQL Database Server Firewall Rule

As I work on my second blog piece for the “Getting Ready with Windows Azure SQL Database Server PowerShell and SMO Part – 2/2“, I came up with a way to trap the current IP Address with PowerShell scripting.  When using the Portal for creating your SQL Database Server, it will ask you if you want to create the Firewall rule for you.  But you may want to automate this step using PowerShell and there’s no cmdlet to identify  the “current” IP Address of your Windows Azure connection.

Here’s an example of how the Portal message when is asking for the current IP Address to be added to the Firewall rules:

WindowsAzure2SQLdb

WindowsAzureMissingIPrule

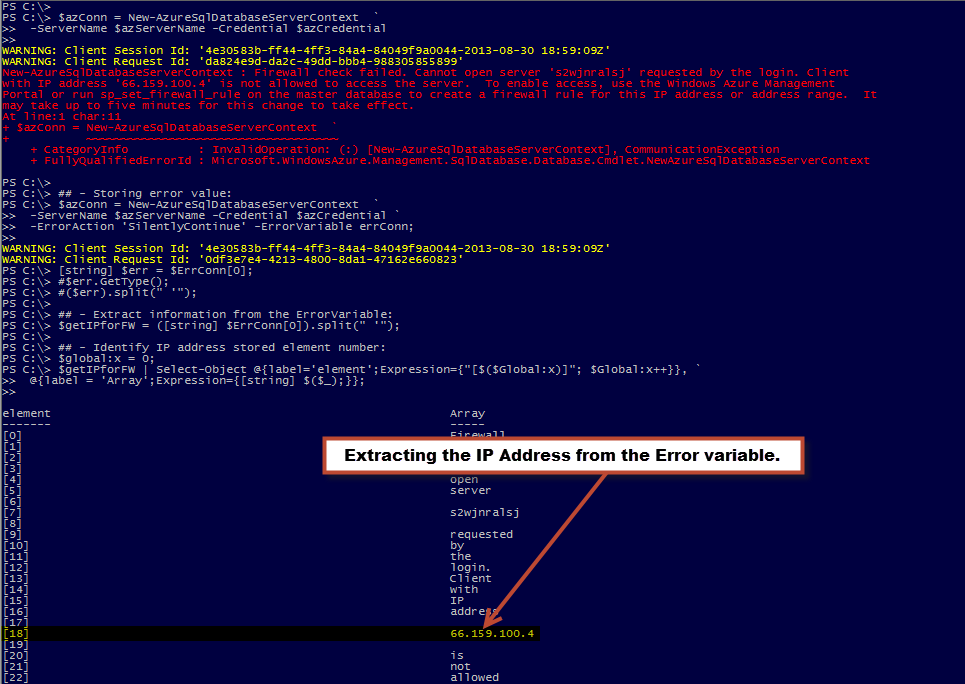
I’m going right to the point with this small blog piece.  Basically,  I’m trapping the error message from the “New-AzureSqlDatabaseServerContext” which will fail to connect to your Azure SQL Database. Then, I’m dissecting the string to get the IP Address in error.  This is my way of trapping the IP address.  I know there might be a better way but for now it works.

I’m assuming the connection to Windows Azure has already been established and you are trying to use the “New-AzureSqlDatabaseServerContext” for connecting to the database.  If you haven’t created the rule then it won’t connect.

Note: Again, stay tuned for the next “Windows Azure SQL Database Server with PowerShell and SMO” blog part 2/2.

In the “New-AzureSqlDatabaseServerContext” I’m including the following two parameters: -ErrorAction ‘SilentlyContinue’ and -ErrorVariable errConn.  The “ErrorAction” results in not displaying the message.  The “ErrorVariable” define the PowerShell variable you will be storing the error message.  Notice the “ErrorVariable” name doesn’t include a “$” but its needed to view it (ie. $errConn).

[sourcecode language=”powershell”]
## – Storing error value:
$azConn = New-AzureSqlDatabaseServerContext  `
-ServerName $azServerName -Credential $azCredential `
-ErrorAction ‘SilentlyContinue’ -ErrorVariable errConn;
[/sourcecode]

The additional script code shown next will dissect the error message string from $errConn variable. It will take the string to create an array which will help identify the element position where the IP Address is stored.  In this case I’m assuming the error message will not change so the IP Address will always be located in the same place (Right!).  So the first time this code execute, it will find the IP Address in element #18.

Note: Please run first the code to identify the element position in case the “Culture” settings might change the location of the IP Address.

[sourcecode language=”powershell”]
## – Extract information from the ErrorVariable:
$getIPforFW = ([string] $ErrConn[0]).split(" ‘");

## – Display all variable stored in the array and identify where the IP address is stored:
$global:x = 0;
$getIPforFW | Select-Object @{label=’element’;Expression={"[$($Global:x)]"; $Global:x++}}, `
@{label = ‘Array’;Expression={[string] $($_);}};

## – Run once to confirm IP value is stored in element #18:
$getIPforFW[18].Trim();
[/sourcecode]

TrappingIPfromError

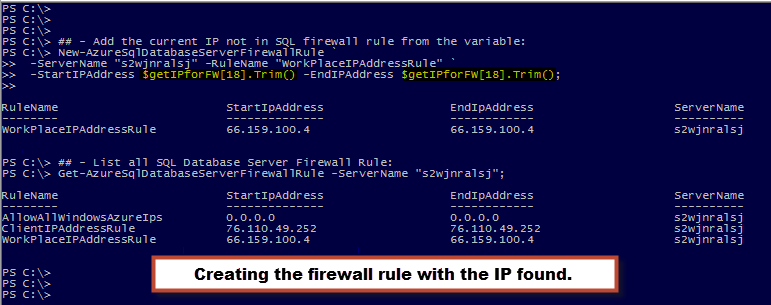
The rest is easy.  After extracting the IP value then you can use the “New-AzureSqlDatabaseServerFirewallRule” to create the firewall rule to include the current IP Address.

[sourcecode language=”powershell”]
## – Get current IP and added it to the SQL Database Firewall Rule:
New-AzureSqlDatabaseServerFirewallRule `
-ServerName "YourServerName" -RuleName "YourClientIPAddressRule" `
-StartIPAddress $getIPforFW[18].Trim() -EndIPAddress $getIPforFW[18].Trim();
[/sourcecode]

CreateFilewallfromIPfound

You can refine this script code to suit your need.  Just make sure to test a few times and verify you are getting the results you need.

Here’s a few more commands you could use to work with these rules.  The “Remove-AzureSqlDatabaseServerFirewallRule” to remove any existing rule(s) and the “Get-AzureSqlDatabaseServerFirewallRule” to list them all.

[sourcecode language=”powershell”]
## – List all your SQL Database Firewall Rules:
Get-AzureSqlDatabaseServerFirewallRule -ServerName "YourServerName";

## – Removing existing SQL Database Firewall Rule:
Remove-AzureSqlDatabaseServerFirewallRule `
-ServerName "YourServerName" -RuleName "YourClientIPAddressRule"";
[/sourcecode]

So, at the end, you will have the ability to automate the process without the need of using the Portal.  Most can be done using PowerShell scripting.

Stay tuned for more Windows Azure SQL Database Server.

That’s it for now!

Maximo Trinidad
Mr. PowerShell
🙂

Great PowerShell sessions at SQLSaturday SoFla on June 29th 2013

Yes! On Saturday June 29th, I’ll be presenting two interesting PowerShell sessions:

1. DBA Track – PowerShell Working with XML

2. SSIS Track – Integrating PowerShell in a ScriptTask component

These session come full of demos and reference information.  The important one is the  “SSIS – Integrating PowerShell in a ScriptTask component” which help you to include your already existing PowerShell script file in a SSIS solution using SQL Data Tools 2012.

I’ll be show existing exciting tools such as SAPIEN Technologies:

1. PrimalXML 2012

2. PrimalSQL 2012

3. PrimalScript 2012

4. PowerShell Studio 2012

5. Open Source .NET development tool – SharpDevelop ( and you’ll see WHY!)

Also, I will be giving away some exciting stuff you don’t want to miss.

Please come and join us in this Great SQLSaturday event.  Here’s my presentation for both sessions.

Quickblog on PowerShell Here-String/Splatting simple formatting

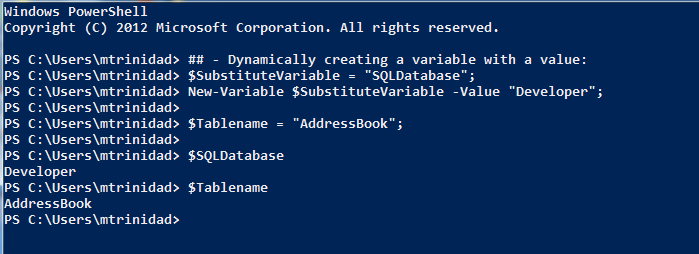
Sometime is nice to find simple samples that can make life easy. Here’s a quick sample on how you can use this string manipulation to make it readable. Also, I included a way to dynamically create a PowerShell variable from an existing (it may be useful for someone) just as a proof-of-concept.

In this sample I’m going to create a T-SQL script and display it in my PowerShell console. First, let’s create some variables that will be use to replace some values in our string:

[sourcecode language=”powershell”]

## – Dynamically creating a variable with a value:
$SubstituteVariable = "SQLDatabase";
New-Variable $SubstituteVariable -Value "Developer";

$Tablename = "AddressBook";

[/sourcecode]

The above code will create three PowerShell variable but we are end up using only the $SQLDatabase and the $Tablename in our T-SQL script.

The next few PowerShell code will show you a simple ways to initialize a string variable holding the T-SQL scripts.

1. One-liner sample – All acceptable except when using complex Multi-line T-SQL Scripts.

[sourcecode language=”powershell”]

## [1] – Normal string one liner:
$SQLquery = "Select [firstname], [lastname] from [$SQLDatabase].[dbo].[$Tablename]";
$SQLquery;

[/sourcecode]

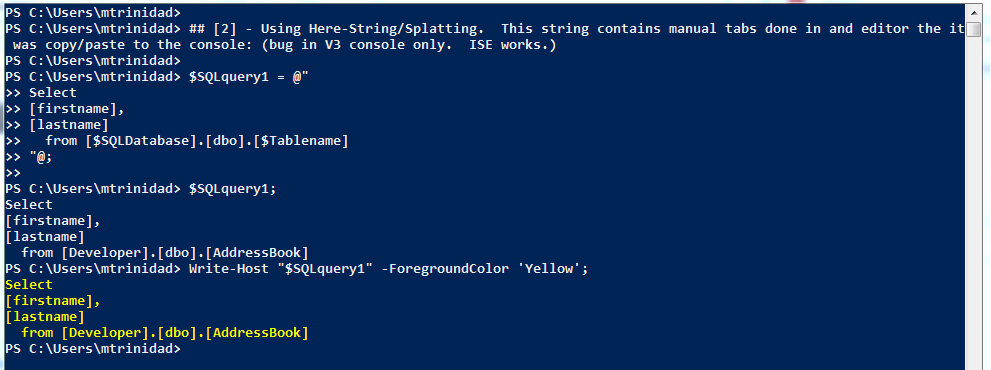
2. Using Here-String/Splatting, you can change the above sample and make it a multi-line string. This still is a One-liner, and it use the tab in front of the column names. *note: In PowerShell V3.0 the tab will be ignore but in PowerShell V2.0 it will work OK.

[sourcecode language=”powershell”]

## [2] – Using Here-String/Splatting. This string contains manual tabs done in and editor the it was copy/paste to the console: (bug in V3 console only. ISE works.)

$SQLquery1 = @"
Select
[firstname],
[lastname]
from [$SQLDatabase].[dbo].[$Tablename]
"@;

$SQLquery1;
Write-Host "$SQLquery1" -ForegroundColor ‘Yellow’;

[/sourcecode]

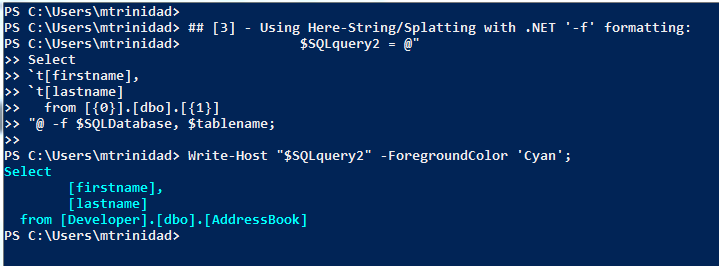
3. The last Here-String sample we are using the .NET ‘-f’ string formatter which will allow you to replace the values for {0} and {1} place holder. In this sample code inside the string i’m hard coding tab as `t (tick symbol plus t) which in this case it works OK in both PowerShell V2 and V3:

[sourcecode language=”powershell”]

## [3] – Using Here-String/Splatting with .NET ‘-f’ formatting:
$SQLquery2 = @"
Select
`t[firstname],
`t[lastname]
from [{0}].[dbo].[{1}]
"@ -f $SQLDatabase, $tablename;

Write-Host "$SQLquery2" -ForegroundColor ‘Cyan’;

[/sourcecode]

4. When using a PowerShell editor (ISE or others) an invalid Here-String variable PowerShell will give an error if you try to use tabs on each line of the code: (can’t use white space in editor with Here-String)

[tab] $x = @”
[tab] Testing
[tab] Testing
[tab] “@;

Basically, Here-String variable works great when you want to store a multi-line string but have some caveats:

1. PowerShell v3 console only. Manual tabs are ignored.
2. When using splatting (@”..”@) the @” can begin in any column position but the terminating “@ ends on the beginning of the new line. See sample #3.
3. When using a PowerShell editor Whitespaces in a Here-String block of code are not allowed.

Add from one XML data to another existing XML file

This topic came up after my SQLSaturday presentation in Tampa last weekend. In an scenario when (for some reason) someone is supplying an single XML file containing one series of information, or I should say, one record at the time. Maybe we can’t have the client to provide us with an XML file containing a series of records. This will force us to be creative and build a solution to accumulate and/or append all the individual XML files.Well, here’s how I think it can be done. I’m creating two PowerShell XML objects with one single record containing two fields: FirstName and LastName.

Here’s an image showing how to load an XML into a PowerShell object:
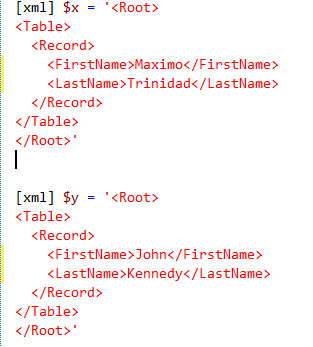
Notice I’m using the “xml” (inside square-brackets) accelerator to create the object of type ‘XML’. To verify the type of object use the following .NET object method ‘.GetType()‘.

PS C:\Users\Max> $y.gettype()

IsPublic IsSerial Name BaseType
——– ——– —- ——–
True False XmlDocument System.Xml.XmlNode

If you want to find more information about the PowerShell object you created use the ‘Get-Member‘ command to all of its Methods and Properties.

$x | Get-Member;
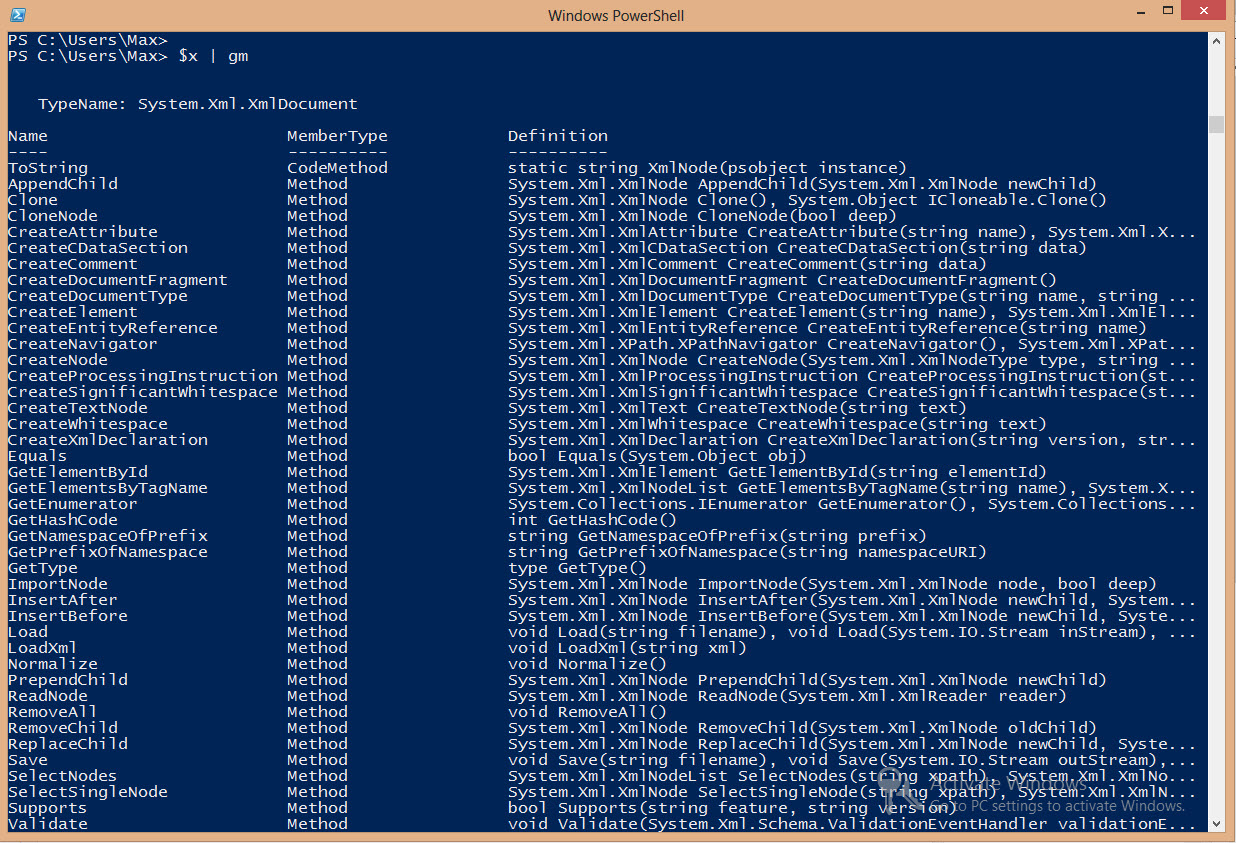
Now we have our two XML objects created: $x and $y. We want to add the record information from $y into $x. First, we need to make sure that the XML structure are the same in both objects:

PS C:\Users\Max> $x.Root.Table.Record

FirstName LastName
——— ——–
Maximo Trinidad

PS C:\Users\Max> $y.Root.Table.Record

FirstName LastName
——— ——–
John Kennedy

As you can see both XML objects contains the “Record” elements content: FirstName and LastName.

So, instead of processing these two objects separately, we are going the extract the “Record” elements from $y and inserted into $x. We can accomplish this process in two steps:

1. Creating another object that will hold the extracted elements:

$z = $x.ImportNode(($y.root.table.Record), $true);

2. Use the ‘.AppendChild()‘ method to add the extracted elements to the destination XML object (ie. $x):

$x.Root.Table.AppendChild($z);

Or, you can simply create a oneliner command to do this:

$x.Root.Table.AppendChild($x.ImportNode(($y.root.table.Record), $true));

To verify that all the “Record” elements from $y has been included in $x we can use the following command:

PS C:\Users\Max> $x.Root.Table.Record

FirstName LastName
——— ——–
Maximo Trinidad
John Kennedy

As you can see, we have successfully added the “Record” elements data.

Now, all this information have been modified in memory. To save this object to a file, then we use the ‘.Save()‘ method:

$x.Save(‘C:\Temp\XML\MultiRecord.xml’);

Finally, to display the content of the file, use the ‘ii‘ which is the Alias for ‘Invoke-Item‘ command:

ii ‘C:\Temp\XML\MultiRecord.xml’;
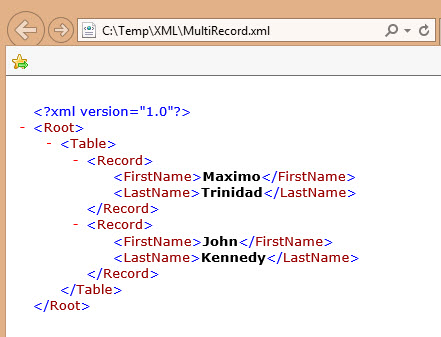
As you can see we have added new records from one XML into another. Here’s the end result:

Florida PowerShell User Group Virtual Meeting is using Office 2013 Lync …

Tomorrow night (Nov. 14th) I will be relaunching our virtual PowerShell chapter.  For all who wants to join me here’s what you need to attend our “PowerShell working with SQL Server SMO” session at 7:00 PM.

1. Download and install “Microsoft Lync 2010 Attendee – User Level Install” from the following link: http://www.microsoft.com/en-us/download/details.aspx?id=15755

2. Then, when connecting to the meeting, you need to go the “Share” menu and select “stage”.

I’m excited to use Office 2013 Lync for our PowerShell virtual meeting.

I will be providing the virtual meeting link on Wednesday about 1 hr before the meeting.  Link will be provided here: http://www.FLPSUG.comhttp://www.powershellgroup.org/Florida , and Twitter.

Here’s tonight meeting information:

Join Lync Meeting: (meeting start at 7:00PM)
https://meet.lync.com/flpowershellug/maxt/XXXXXX

Stay tuned.

QuickBlog: Finding all SQL Server DMV’s with PowerShell

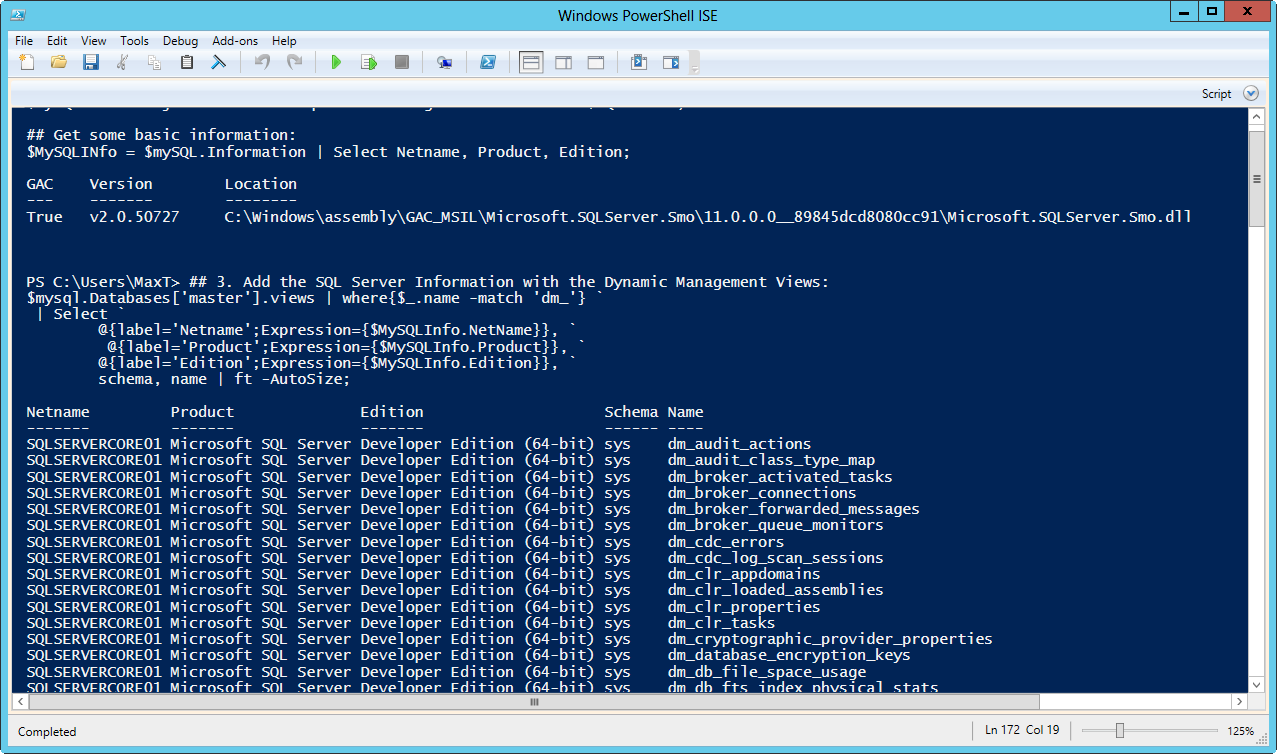
Execute the following PowerShell with script SMO to quickly list all your Dynamic Management View’s from your SQL Server instance.  Let’s do this!

[sourcecode language=”powershell”]
## – Loads the SQL Server SMO Assembly:
[system.reflection.assembly]::LoadWithPartialName("Microsoft.SQLServer.Smo")

## – Initialize the variable and loads the SQL Server objects:
$SQLServer = ‘SQLServerInstanceName’;
$mySQL = new-object Microsoft.SqlServer.Management.Smo.Server $SQLServer;
## Get some basic information:
$MySQLINfo = $mySQL.Information | Select Netname, Product, Edition;

## 1. List all SQL Server views:
$mysql.Databases[‘master’].views | Select schema, name | ft -AutoSize;

## 2. List all SQL Server Dynamic Management Views:
$mysql.Databases[‘master’].views | where{$_.name -match ‘dm_’} `
| Select schema, name | ft -AutoSize;

## 3. Add the SQL Server Information with the Dynamic Management Views:
$mysql.Databases[‘master’].views | where{$_.name -match ‘dm_’} `
| Select `
@{label=’Netname’;Expression={$MySQLInfo.NetName}}, `
@{label=’Product’;Expression={$MySQLInfo.Product}}, `
@{label=’Edition’;Expression={$MySQLInfo.Edition}}, `
schema, name | ft -AutoSize;
[/sourcecode]

List SQL Server DMV's

Go ahead and give it a try!