Tools to Help Document Azure Resource Groups

Sometimes is a good to go back an review any fundamental concepts. This way you can refresh and improve your skill sets. It’s true that practice makes perfect!

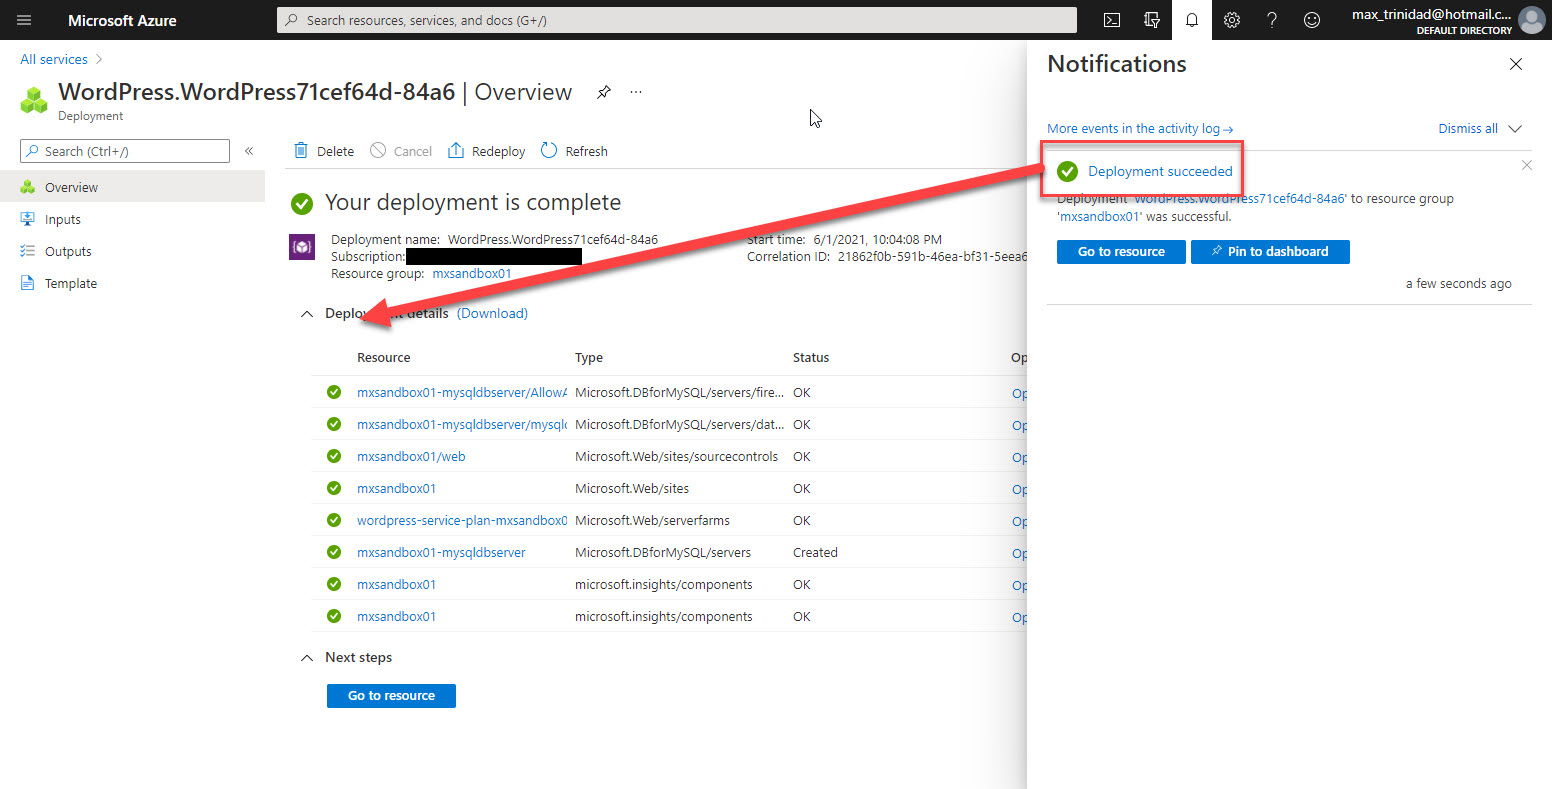
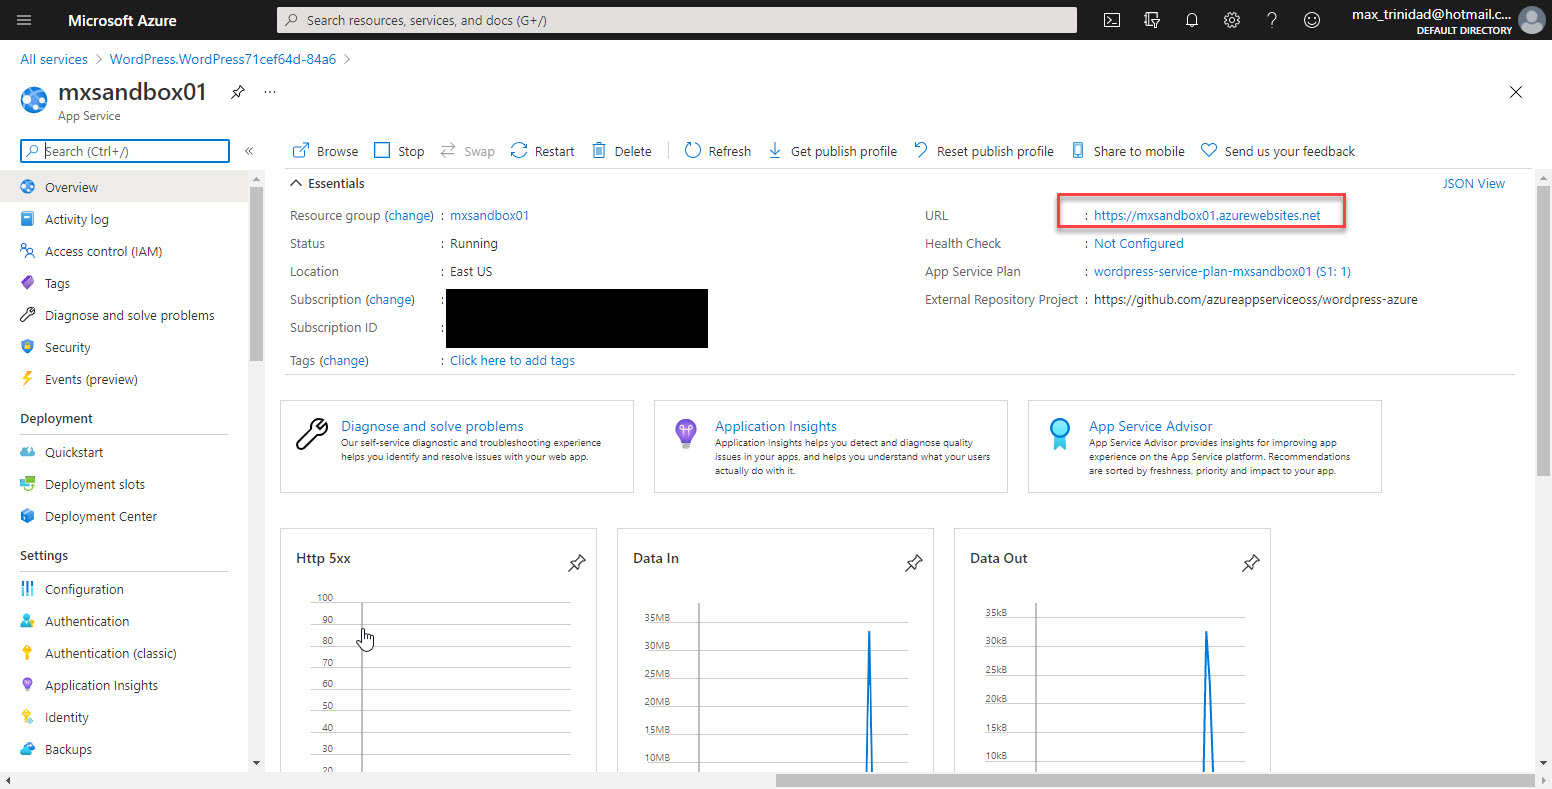
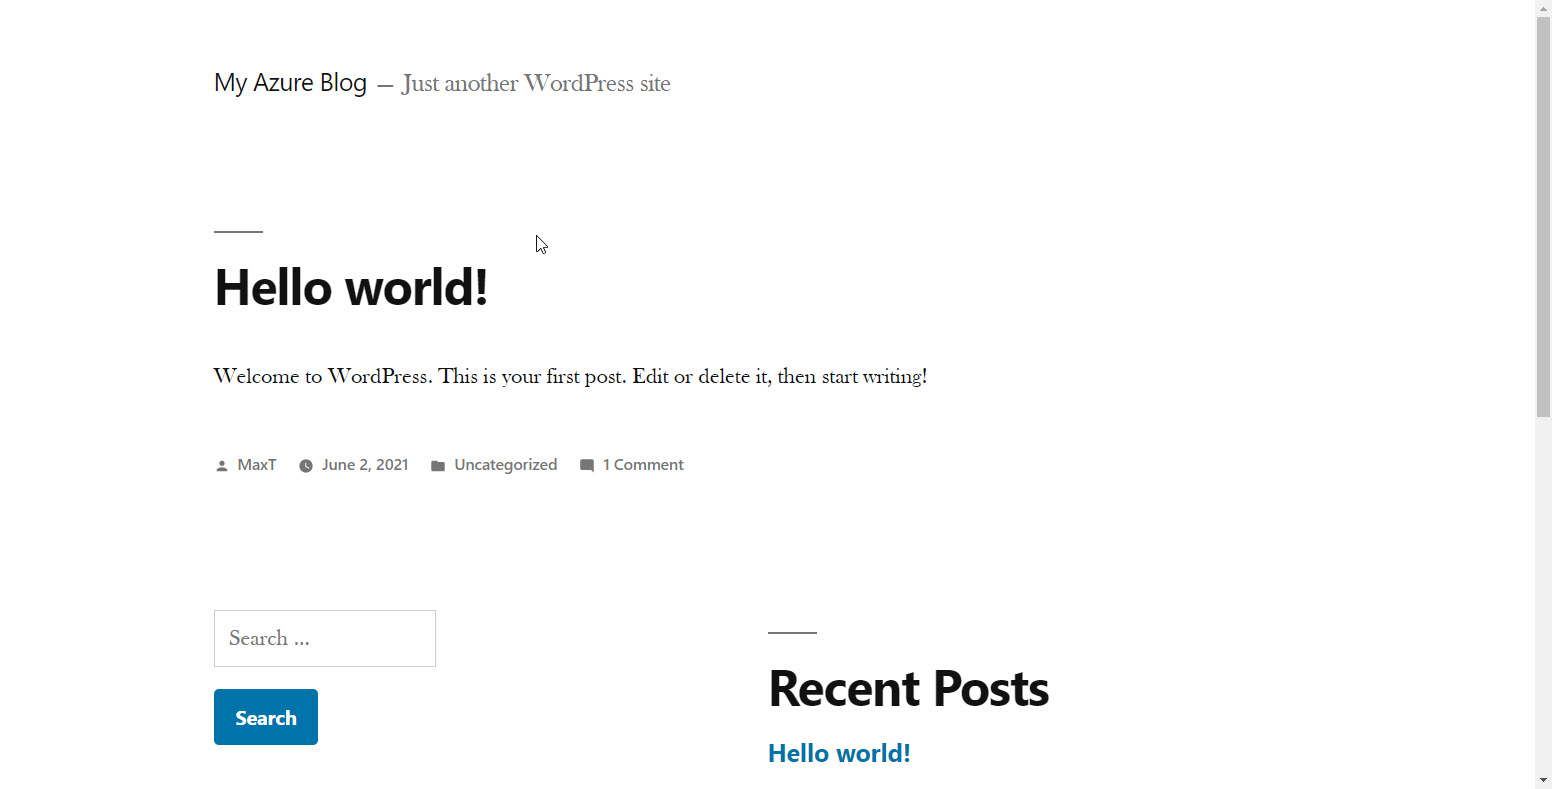
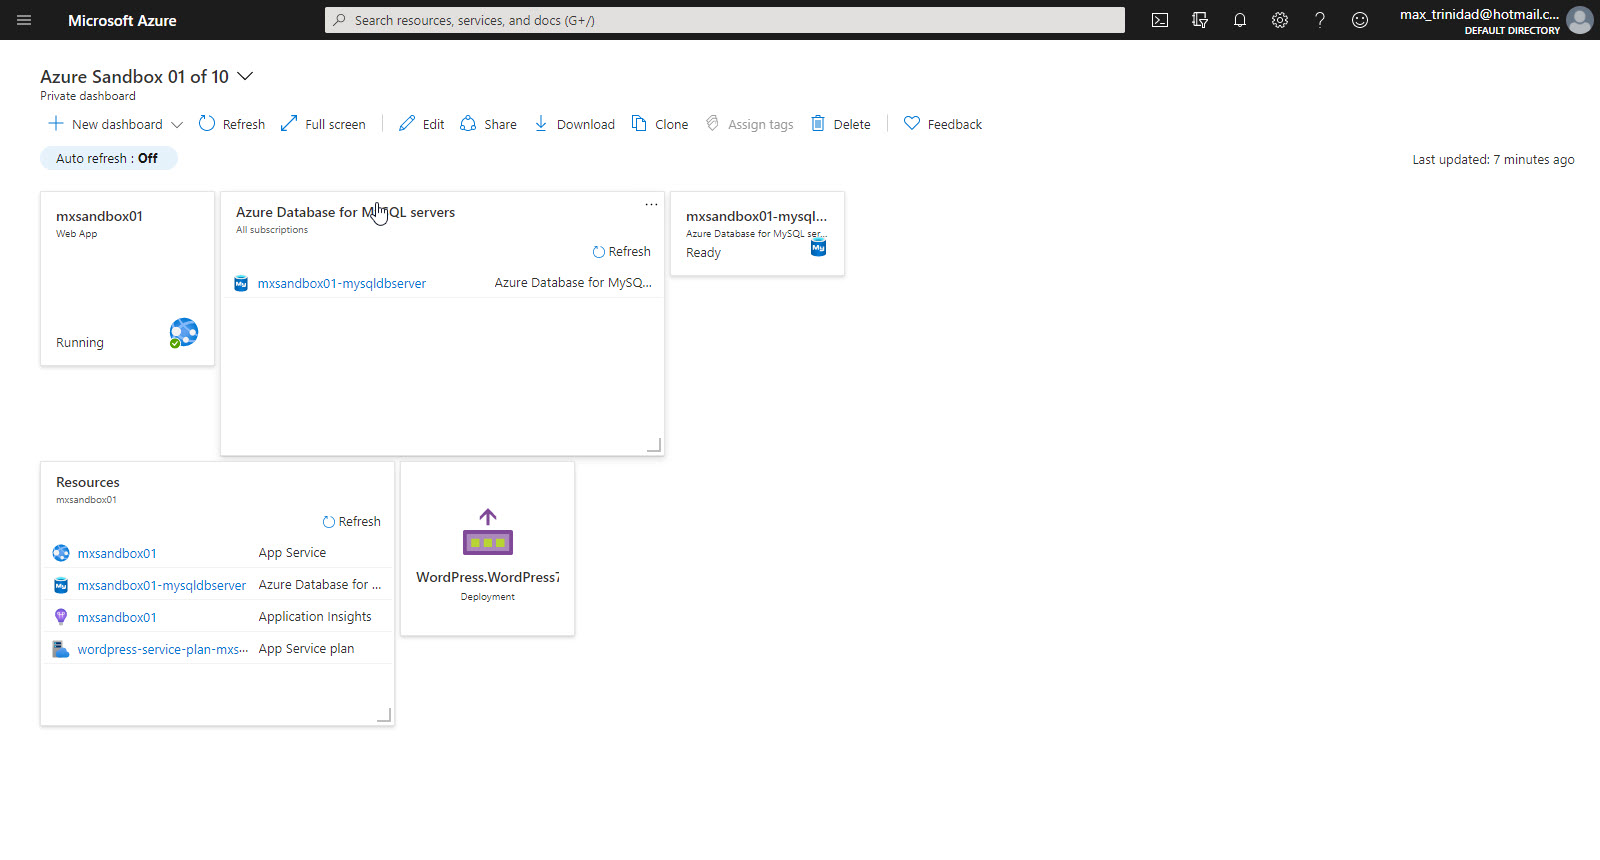
So, while reviewing the Microsoft Docs “Azure Architecture Fundamentals” . Here it discuss the use of Dashboards you can customized and organized your Azure resources. This course will help you setup a sandbox environment, so you can build a WordPress web application.


I went ahead to create my dashboard  documenting this exercise. Just keeping it simple!

For more information click on Azure Dashboard. You can create up to 100 ‘Private’ dashboards per user.

The next tool has recently got some attention: AzViz PowerShell module. This is module has the ability to generate a visual representation of your Azure Resources.

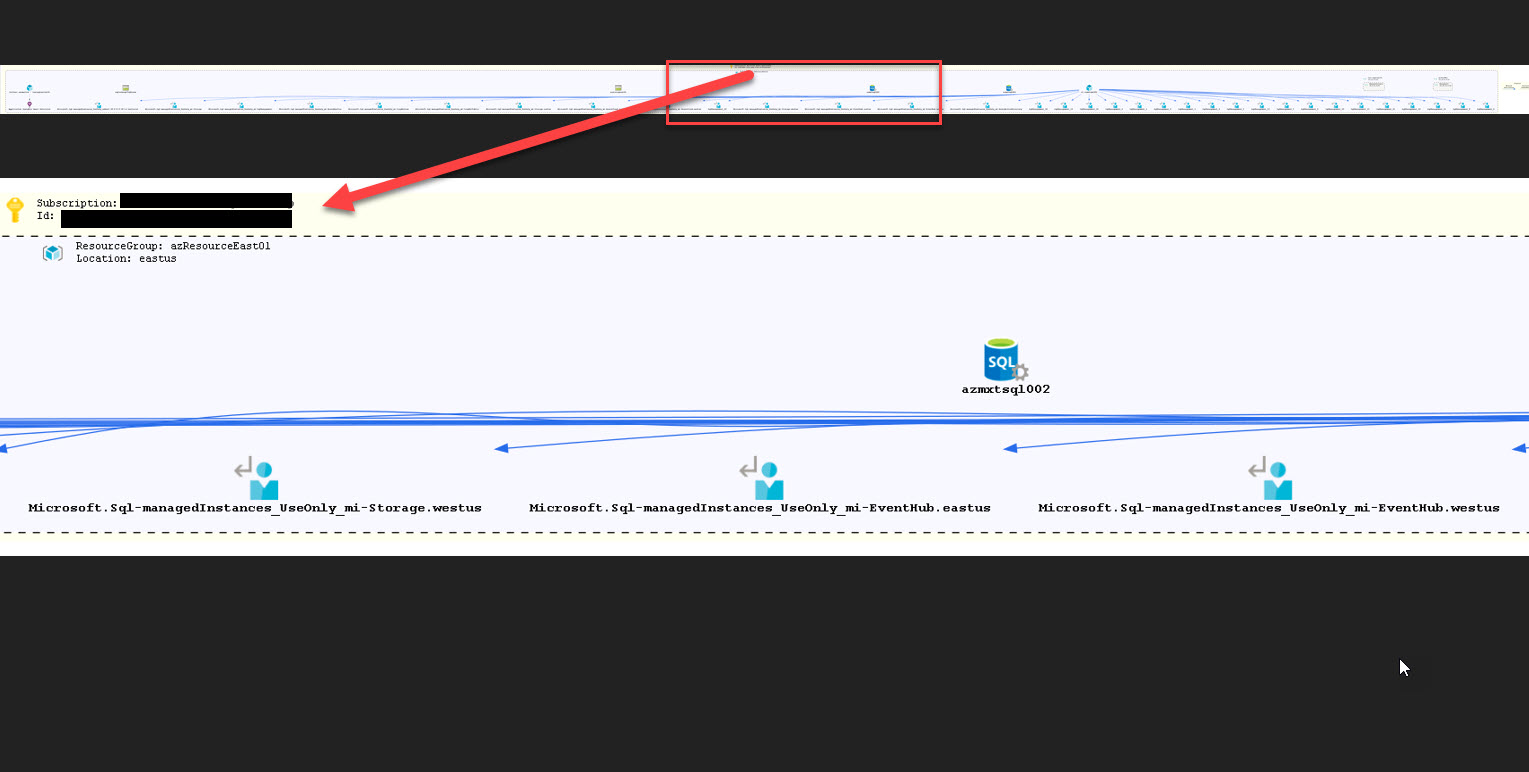
What was Great about this PowerShell module? For some time, I’ve created many sample demo resource assets within my subscription. This module show me the mess I have with my Azure assets in the cloud. See below image.

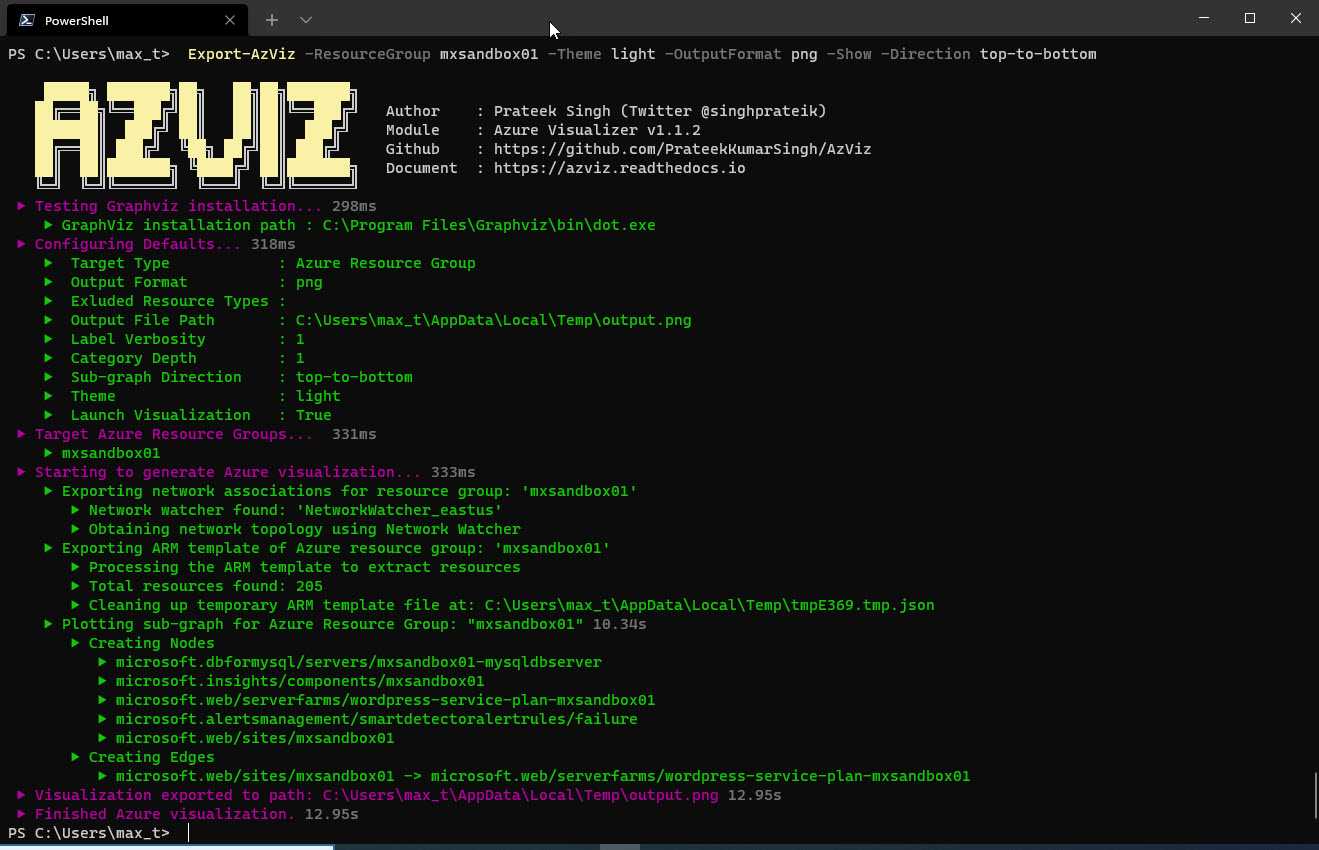
This is great tool for documenting your Azure Resources Group with a single one-liner help you create the the an image file of your Azure Resources Group assets.

## - AzViz example, after connecting to your Azure Subscription:
Import-Module AzViz
Export-AzViz -ResourceGroup 'your-azresourcegrp' -Theme light -OutputFormat png -Show -Direction top-to-bottom

Note: Keep in mind, you’ll need to manually rename the output.png file.

As you can see, much better picture presentation compare to the messy one.

This module will can be installed from the PowerShell Gallery, and any issues reported in Github.

As you can see, these tool not only help you to document, but also manage and organize your workloads.

Go Ahead and Try it!

PowerShell 7 GA is Here!

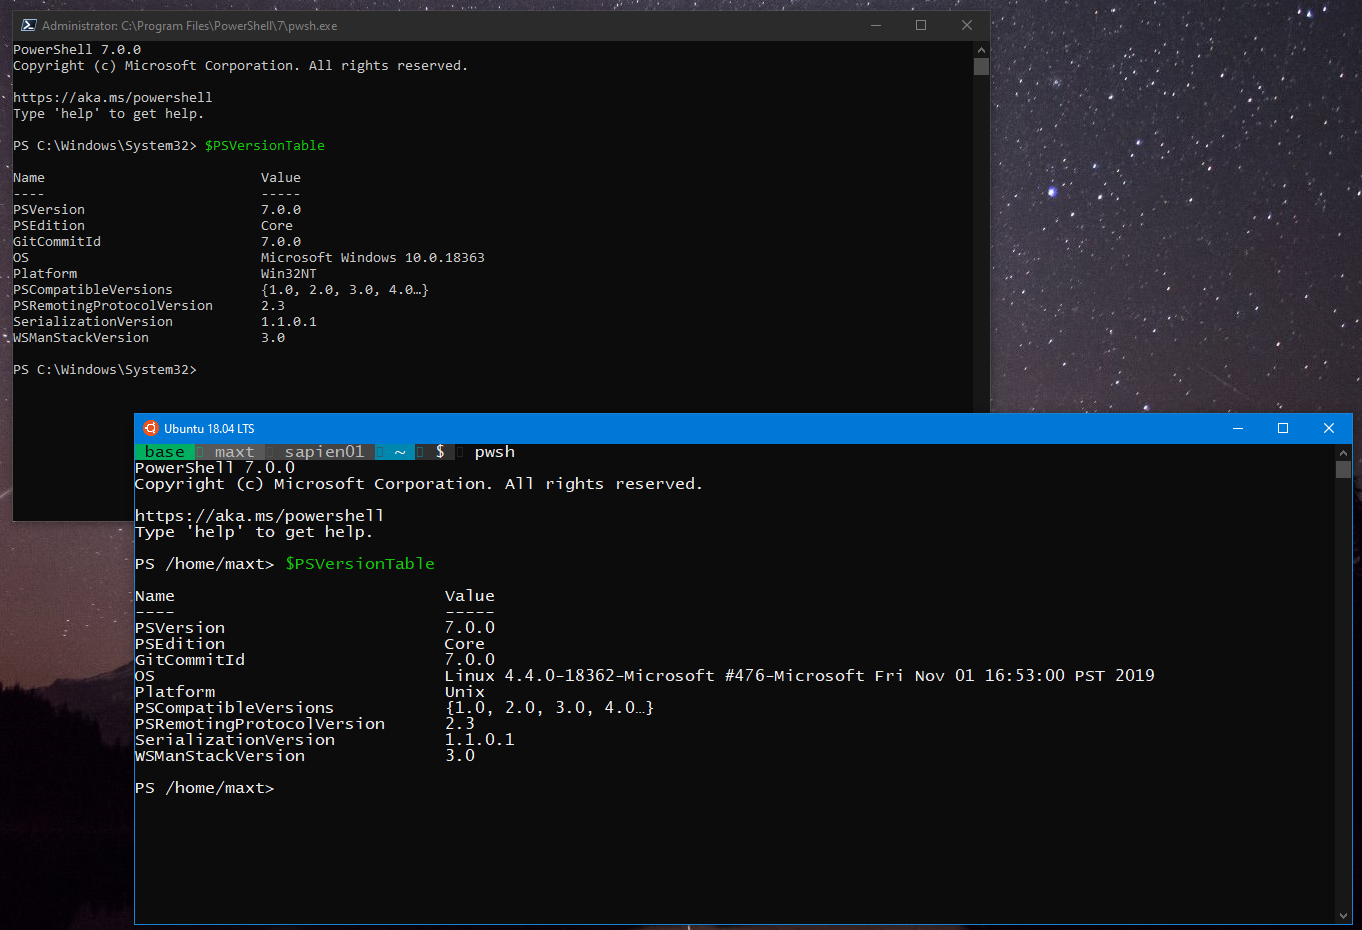
Finally is here, PowerShell 7 GA (Generally Available) is available for download for Windows, Linux, and macOS. Go and get it!

Installation

I suggest to manually uninstall all previous PowerShell versions and remove all existing folders that will be left behind under the “C:\Program Files\PowerShell” folder. This will guarantee a clean installation of PowerShell 7 GA.

This version will replace any previous GA version of PowerShell. In other words, if you already had PowerShell v6.2.4 installed, it will be replaced with PowerShell v7.0. This is by-designed!

You can find more information about PowerShell 7 GA in the following links:

Update your PowerShell Notebook

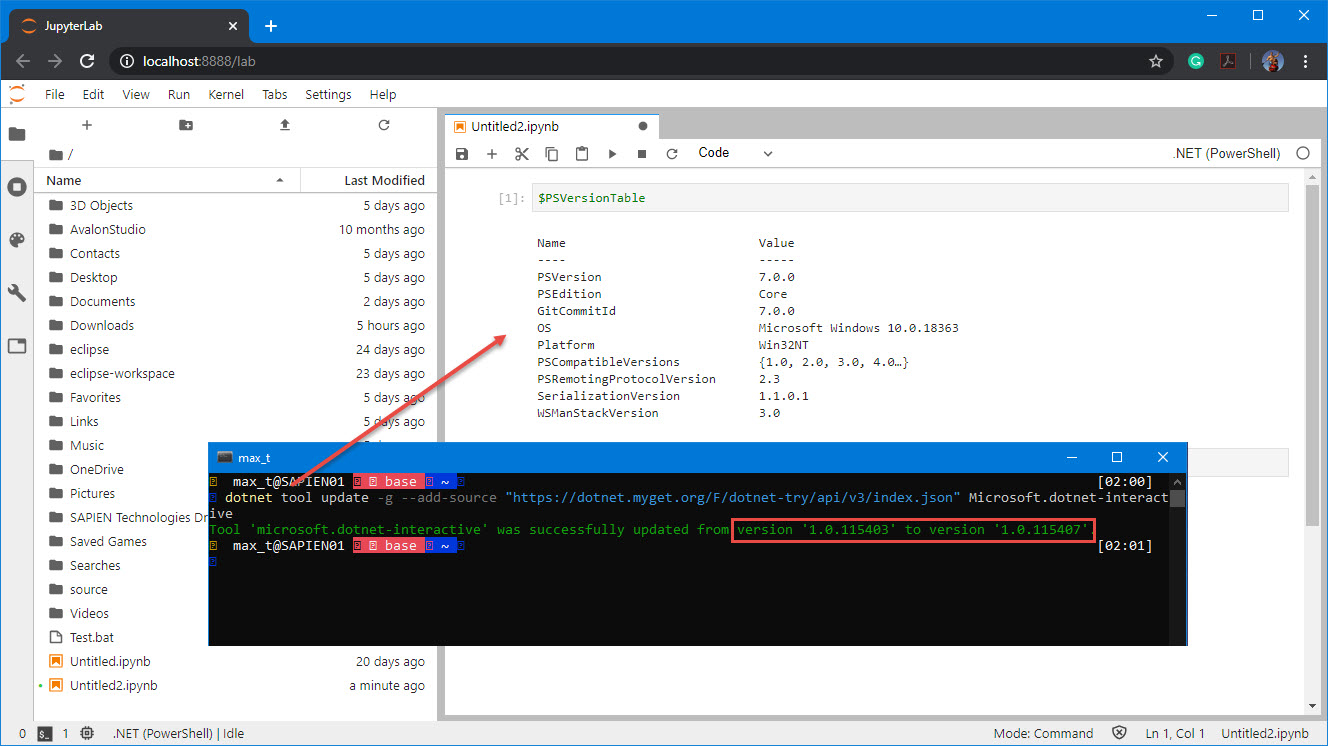
Also, check out .NET Interactive/PowerShell Notebook, as it has been updated to support the PowerShell 7 Kernel.

If you have previously installed .NET Interactive, to get the latest PowerShell Kernel, run the following command:

dotnet tool update -g --add-source "https://dotnet.myget.org/F/dotnet-try/api/v3/index.json" Microsoft.dotnet-interactive

For more information here, .NET Interactive/PowerShell Notebook.

Wait, there’s more!

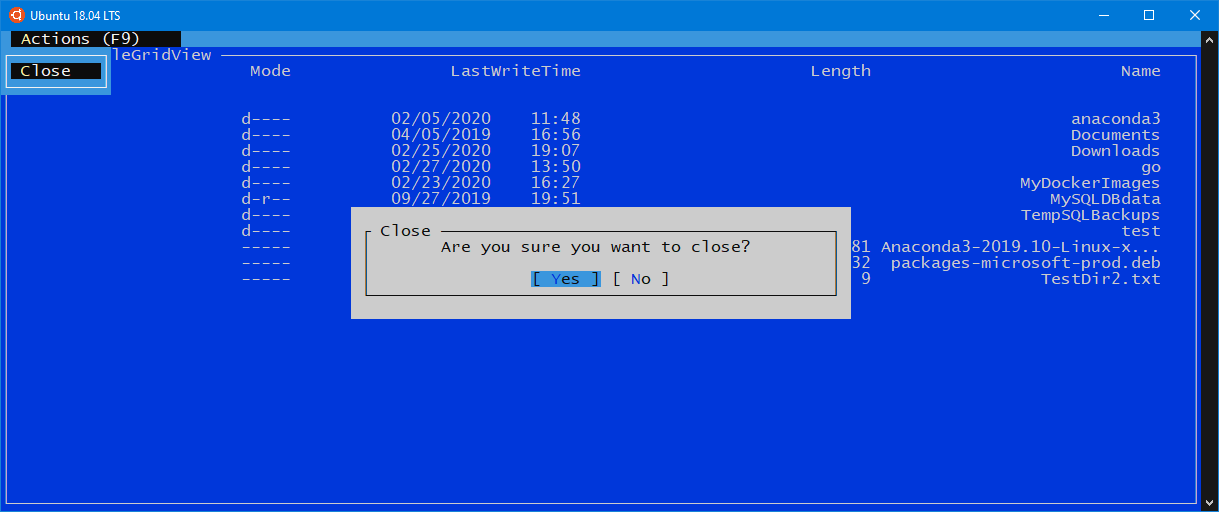
Things are getting better! Check out the preview of the ConsoleGuiTools module for PowerShell 7 but, for now, only available for Linux and macOS.

It’s never too late to learn PowerShell!

PowerShell Core – Working with Persistent Disk Storage in Docker Containers

This quick blog post will hope to give you a heads up in how to work with container(s) disk data. It’s a known fact that container(s) storing data will not persist if the container is removed. Yes! If you build a container to store your data, it will be gone.

Containers are perfectly suited for testing, meant to fast deployment of a solution, and can be easily deployed to the cloud. It’s cost effective!

Very important to understand! Containers disk data only exist while the container is running. If the container is removed, that data is gone.

So, you got to find the way to properly configure your container environment to make the data persist on disk.

Persisting Data

There are *two quick way to persist data when working with container(s):

1. Create a docker volume.
2. Or, use a local machine folder area.

*Note: There are other solution to help with persisting data for containers, but this a good starting point.

I’m using the docker command line for now. Later, I will be creating some blog post about using Docker Compose and Kubernetes.

I love to use PowerShell Core with Docker command line!

Docker Create Volume

Using docker command “docker volume create <nameofvolume>” will create the volume to help persist data on your local machine.

docker volume create MyLinuxData

Use the following docker commands to check your newly created volume:

* To list all existing docker volume(s):

docker volume ls

* To check “inspect” a docker volume(s) to provide detail information:

docker volume inspect MyLinuxData

Using the “docker volume inspect <VolumeName>.” command line, it will show the volume mount location:

“Mountpoint”: “/var/lib/docker/volumes/MyLinuxData/_data”,

In this case, the mount location is on the Linux box under the Docker Volumes folder. This means all data can persist on you local machine.

Local Machine Folder

This option seems straight forward as there’s no need to create a Docker Volume. Just use the ‘-v’ switch in the Docker Run command line.

In the following command line I’m activating the Docker container with previously configured Microsoft SQL Server instance. I include the ‘-v’ switch to mount a folder on my local machine.

docker run -p 1455:1455 -v /home/maxt/TempSQLBackups:/home/TempSQLBackups --name sql2k19ctp23_v02 -d sql2k19_ctp2.3_sandbox:CTP2.3-Version02

Notice in this case, to verify that my SQL Server container has mount to my the local machine folder, I can execute the following command:

docker exec -i sql2k19ctp23_v02 ls /home/TempSQLBackups

Using “docker exec -i <containerid/name> ls <containerfolderlocation” will display the results of all the files back to the screen. Now, anything you add to that local folder will be accessible to the container.

Summary

This is a good starting point when learning how to work with Docker data in containers. You’ll still go thru trails-and-errors while learning how to build container images, and make data persist for your application. But, it’s much faster and easier to rebuild images. This is one of a most to learn technology.

References

Check out the following blog post as it help me understand about “Persistent Storage”:

Getting the latest Tools for PowerShell SQL Server Automation

You all know how important is to have the tool that can make our life easy do our system administration, and become a hero in our organization. Here’s a startup helper guide to get you going with some PowerShell and SQL Server tools.

What is available for automation!

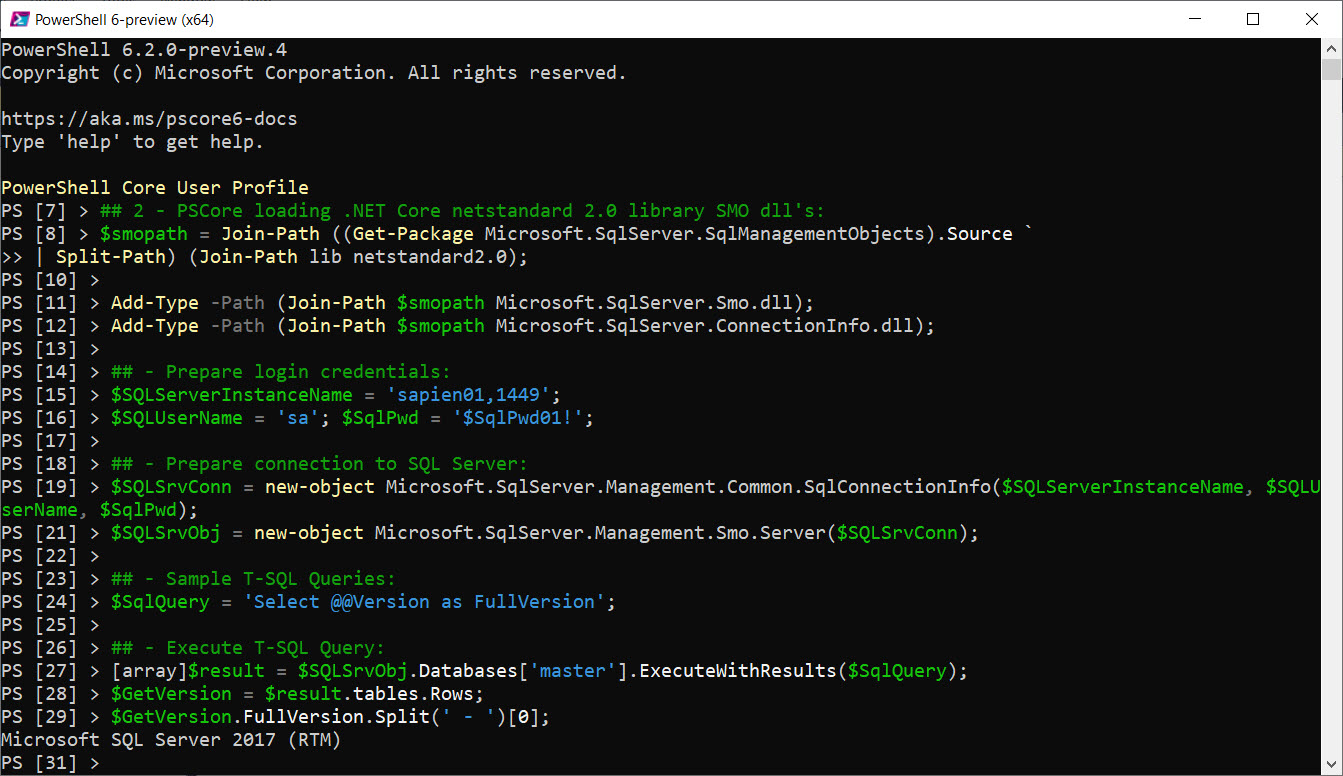
For script automation we could install either or both version of PowerShell Core: (As of February 19th, 2019)

Here are some important PowerShell Modules to use for SQL Server management scripting:

  • *SQLServer – This module currently can be use on SQL Server 2017 and greater.
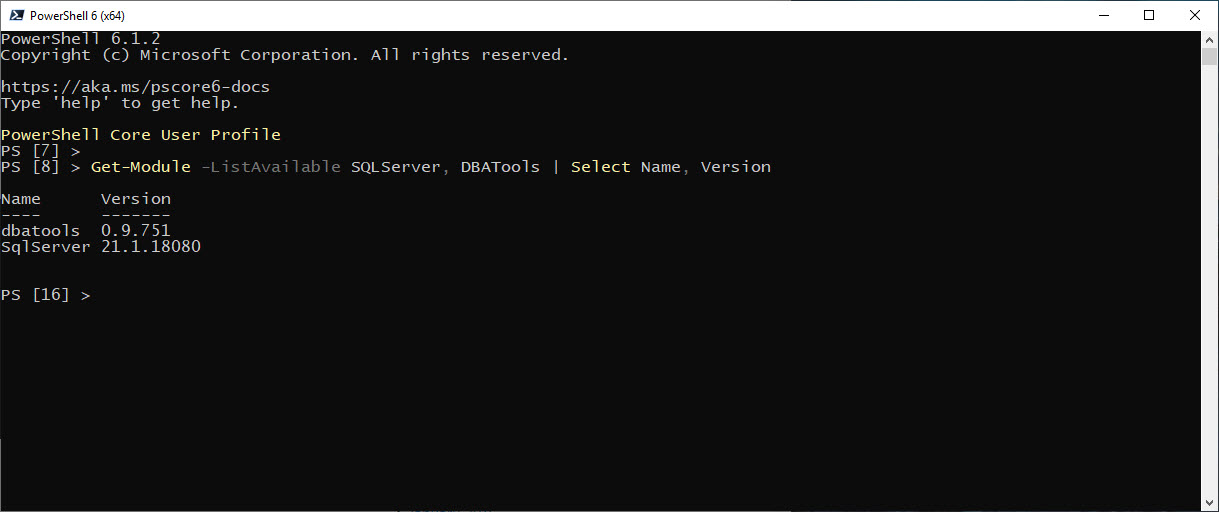
  • *DBATools – This a community supported module that will work with SQL Server 2000 and greater.
  • DBAReports – Supports for Windows SQL Server.
  • DBCheck – Support for Windows SQL Server.

*Note: This module is coming popular in cross-platform systems (non-Windows)

All of the above module can be downloaded from the PowerShell Gallery from the PowerShell console using the Install-Module cmdlet.

Install-Module -Name SQLServer -Force -AllowClobber;

Now, when working with older versions of SQL Server (2008->2017), you will find the SQLPS module is loaded during the SQL Server installation.

Just remember, since SQL Server 2017, Microsoft has change the PowerShell SQLPS module to SQLServer module downloadable from the PowerShell Gallery. This module is not available in PowerShell Gallery, only available during the SQL Server installation.

When PowerShell SQL Server Module can’t provide a script?

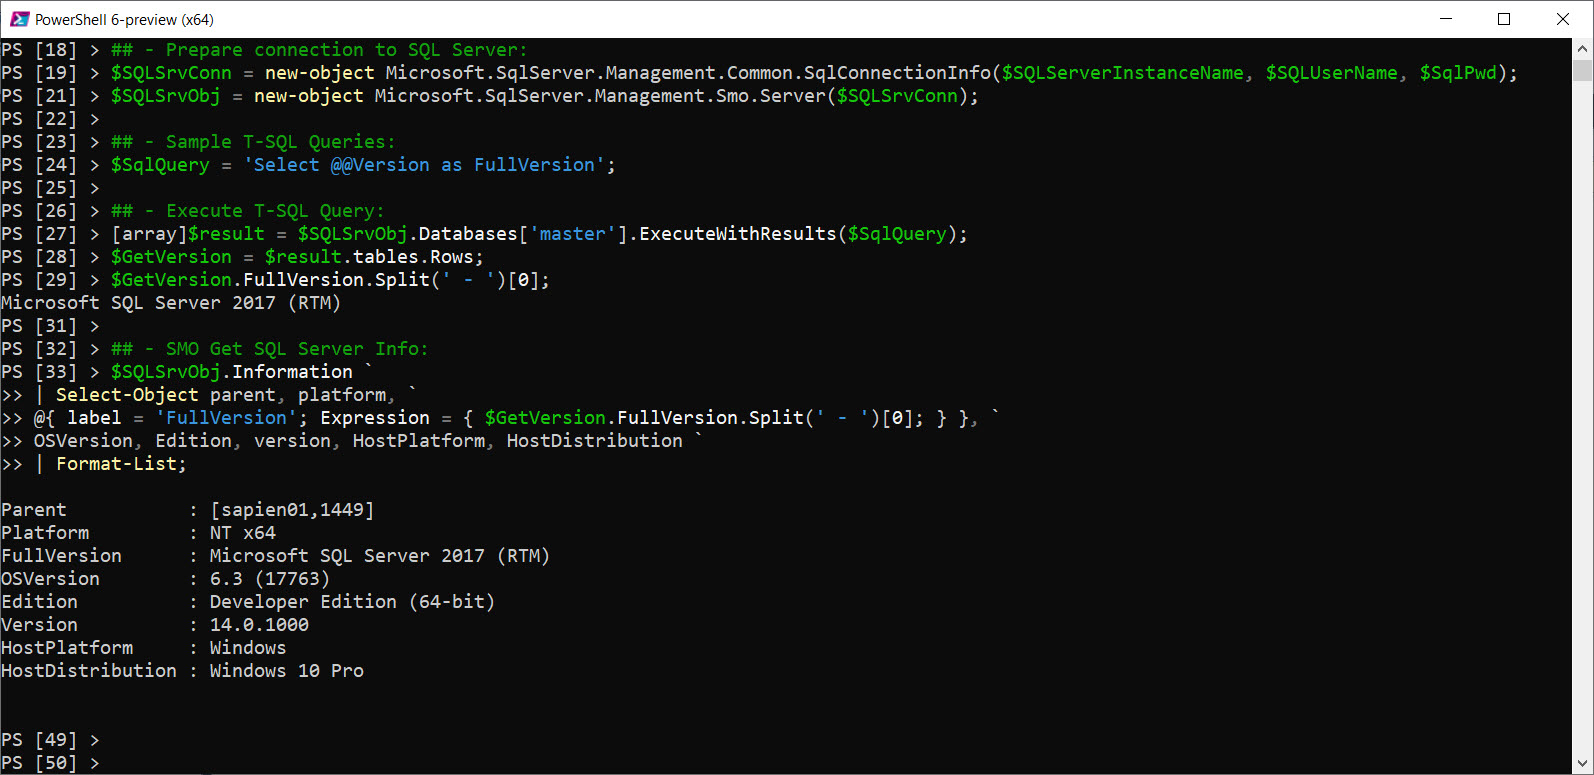
It won’t hurt to install the SQL Server Management Objects (SMO) library in case you want to be creative and start building your own SQL PowerShell scripts. This library is already available cross-platform, meaning that it will work in Windows, Linux and MacOS environments.

In this case, you can install the SQL Server SMO library “Microsoft.SqlServer.SqlManagementObjects” from the PowerShell Console using the Install-Package cmdlet.

Install-Package -Name Microsoft.SqlServer.SqlManagementObjects -AllowPrereleaseVersions;

Wait! There is more

As you already know, to manage SQL Server in Windows environment, we use the SQL Server Management Studio. But, this
application won’t work cross-platform.

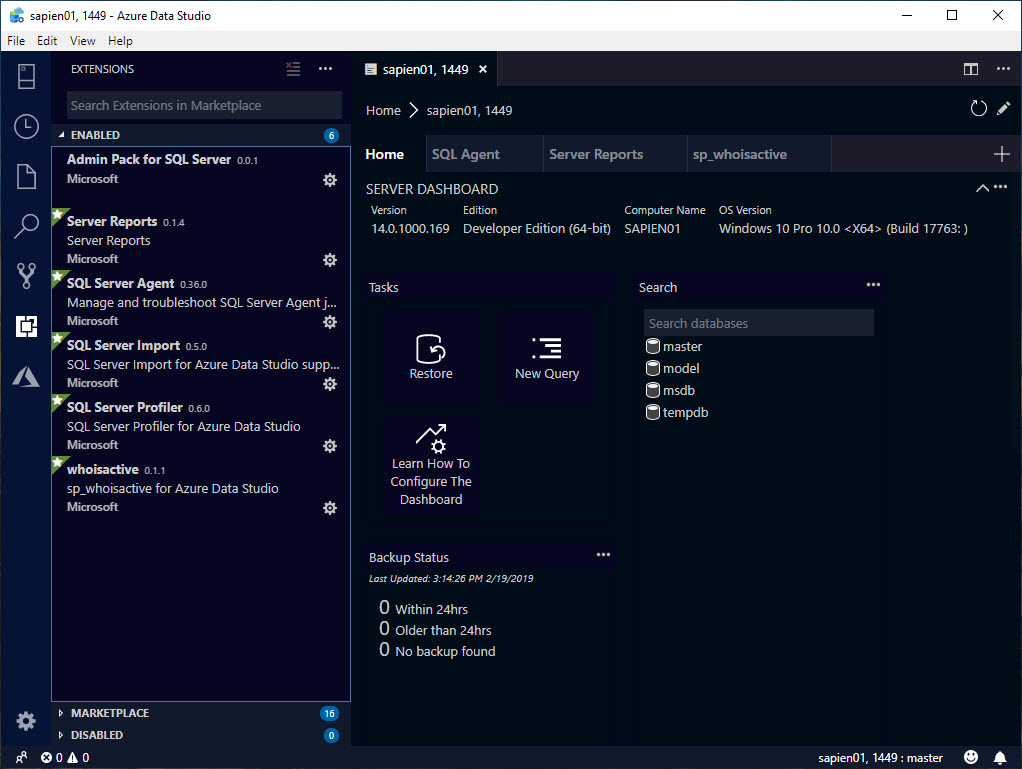
So, the cross-platform option available is Azure Data Studio (February edition):

Don’t forget to include for following extensions:

What about Python?

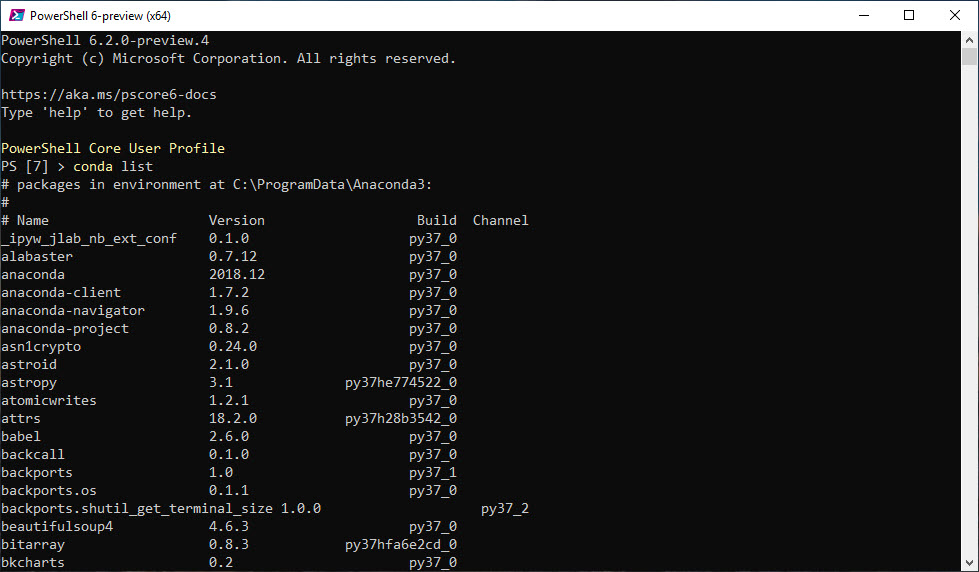
By now you should already know that Python has been around for many year as cross-platform interpreted object-oriented high-level language. And, its popularity keeps increasing.

I would recommend to take a look at the Anaconda Distribution, and specifically the one with the latest version of Python (v3.7).

Download Anaconda for data science platform:

This installation will include *All* Python packages available to build an application.

And, Python can interact with PowerShell too!

Ah finally Containers!

Yes! Containers has become popular and can’t be ignored. It can be use in both Windows, Linux and any cloud environments. Go ahead to learn how to work and manage Docker containers.

Docker site to Download the Docker CE.

Don’t forget to check Docker Hub to find the latest Docker Container images available for download. And, you will need to create an account before downloading images.  The image below shows how-to search for the SQL Server image.

In Summary

As technology will keep improving, make sure stay up-to-date. This give us the opportunity to improve our job position and be of value for the organization that hire us.

Don’t forget to look for the nearest technology event in your areas, as this is the opportunity to learn for free and gain invaluable knowledge.

PowerShell Core Ubuntu 18.04 Using Docker Containers

Containers have been popular for some time now in the industry. It’s becoming as important as learning PowerShell.  Have you try it?

Installing Docker

While learning about Docker Container, I notice that is much easier to installed on a Linux system. In Windows, Hyper-V is a requirement to install Docker, and specially if you want to use the “Windows Subsystem in Linux” WSL feature, there’s more setup to complete. So, I’m not using Hyper-V, I’m using VMware Workstation.  To keeping simple, I created an Ubuntu 18.04 VM using VMWare Workstation.

You can find the Docker CE installation instructions in the following link.

If you’re using Ubuntu 18.04. make sure to install Curl, as it isn’t included in the OS.

$ sudo apt install curl

After the Docker CE installation completes, make sure to run the “hello-world” to test the container runs.

If  you have Hyper-V and you’re interested in pursuing making Docker CE works in Windows 10 WSL (Windows Subsystem for Linux), check the following link on “running-docker-on-bash-on-windows“.

Use PowerShell Core

Make sure you have the latest PowerShell Core installed. If it was previously installed, then use the “$ sudo apt upgrade” to get the latest version. Of course, this all depends on which installation method you previously chose to install PowerShell

Or, just go to the Github PowerShell page to get the latest version(s) for either GA (Generally Available) or the Preview.

Now, before starting to working with Docker as a non-root user, you will need to add the current user to the “Docker” group, by using the following command line:

$ sudo usermod -aG docker your-userid

Then, open a PowerShell Core session to start working with Docker containers.

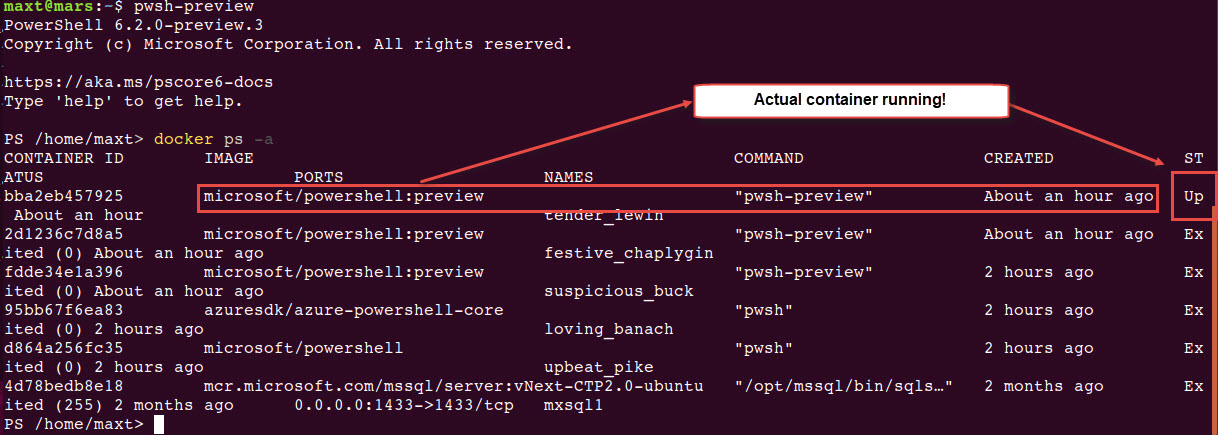
The following docker commands are the essentials to work with containers and can be executed from within the PowerShell Core session:

1. Listing active container

PS /> docker ps -a

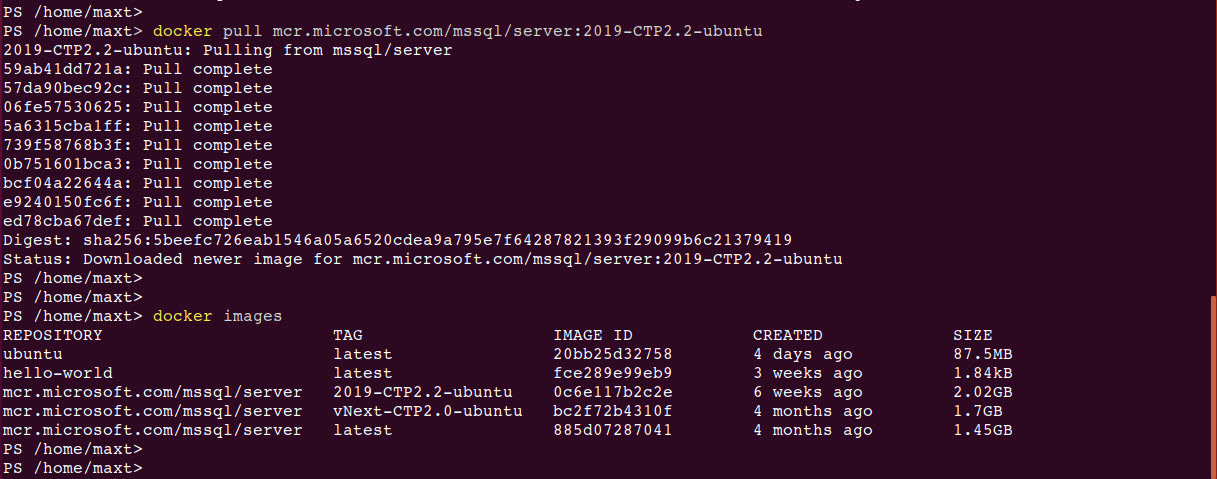
2. Listing images in your system

PS /> docker images

3. Get an container image

PS /> docker pull image-name (not GUID)

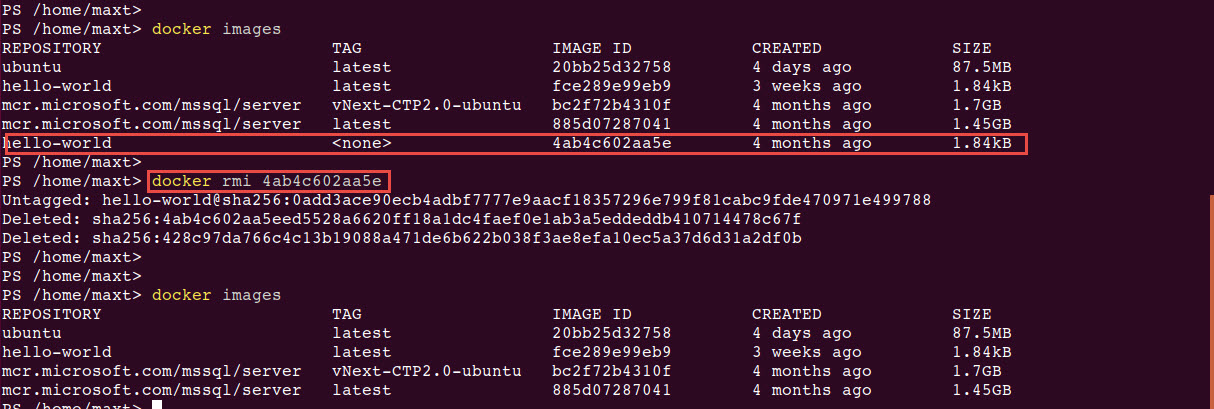
4. Image(s) cleanup

PS /> docker rmi image-GUID

If you want to find a particular image, then go to Docker Hub site. An account is required in order to login to the Docker Hub.  In there you’ll find certified images that can download using the “docker pull <imagename>” command line.

Docker PowerShell Containers

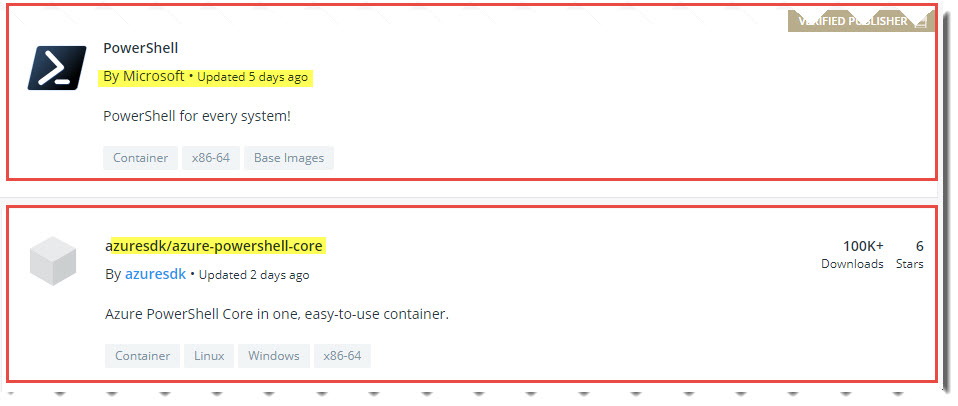
Interesting enough, while doing a search in Docker Hub, I found ta couple of PowerShell Core containers available that caught my attention.

1. “PowerShell” (Verified Publisher).

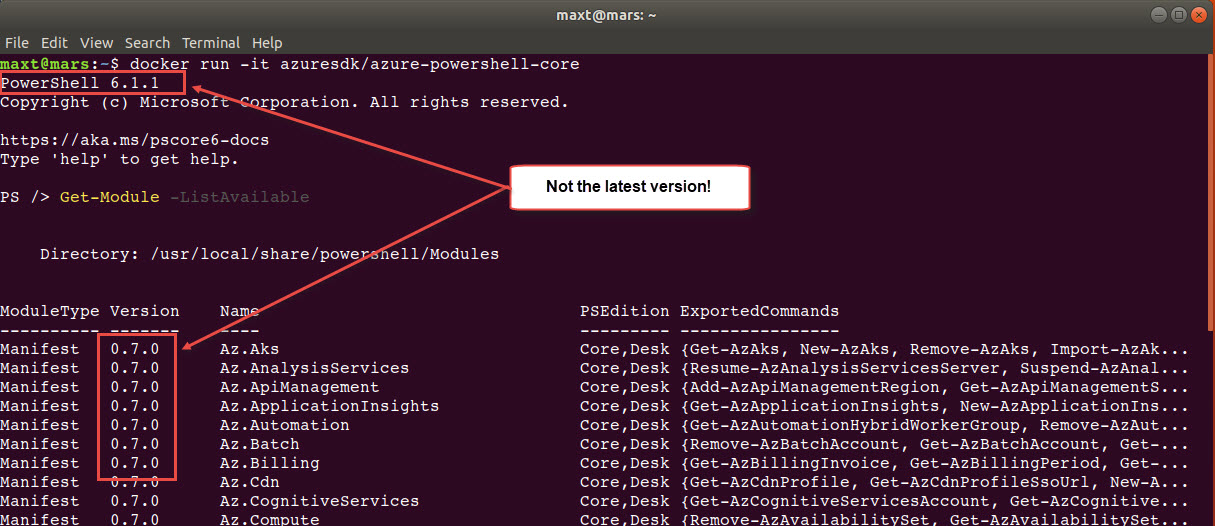
2. “azuresdk/azure-powershell-core”.

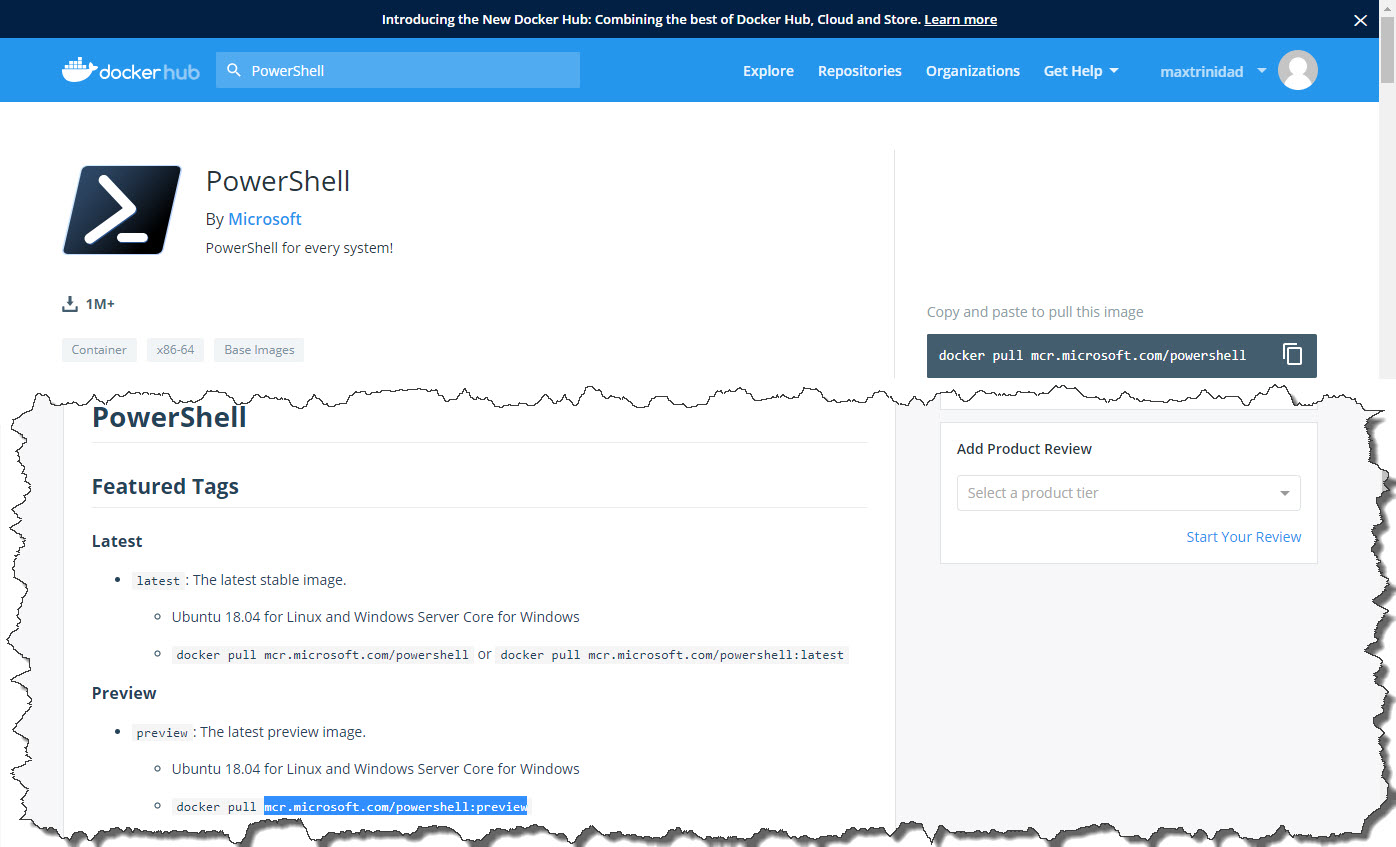
Also, “PowerShell-Preview” is available under the PowerShell Core container page

To try them out, just execute the following command:

1. PowerShell – Read documentation. Then execute the following command line to pull the container to your system.

PS /> docker pull mcr.microsoft.com/powershell

2. Azure-PowerShell-Core – As of now, current documentation is out-dated. (

PS /> docker pull azuresdk/azure-powershell-core

3. PowerShell-Preview

PS /> docker pull mcr.microsoft.com/powershell:preview

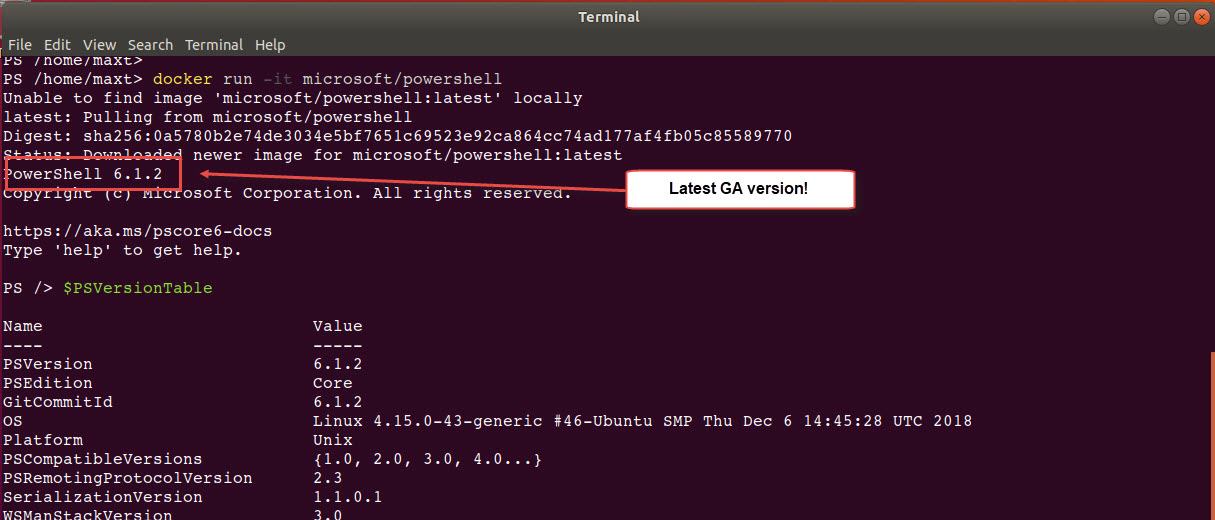
After completing pulling the docker images, then we are ready to check the containers by executing the following command:

1. Execute PowerShell Core GA

docker run -it microsoft/powershell

2. Execute *Azure-PowerShell

docker run -it azuresdk/azure-powershell-core

3. Execute PowerShell Core Preview (latest)

docker run -it microsoft/powershell:preview

Note: It seems the Azure-PowerShell container is not currently up-to-date for both PowerShell Core GA and the Azure modules version. Just check for upcoming updates on these repositories later.

Summary

As you can see, working with Docker containers and PowerShell makes it a convenient test environment. Either way, if you’re want to use Linux terminal session with or without PowerShell, there’s no reason why not to try it.  So, after you have created the linux VM and complete the installation of Docker CE, you’ll get it working in minutes.


Useful PowerShell Azure Connect CLI Options with Az Module Version 1.0

Recently, Microsoft Azure team release the new version of the AzureRM Module can be install in both Windows PowerShell and PowerShell Core. Now, with the new version renamed from AzureRM to ‘Az‘, Microsoft is encouraging everyone to download and start using this refreshed module moving forward. Just make sure to keep reporting any issues on this module.

Don’t forget to check out the recent blog about the Azure PowerShell ‘Az’ Module version 1.0.

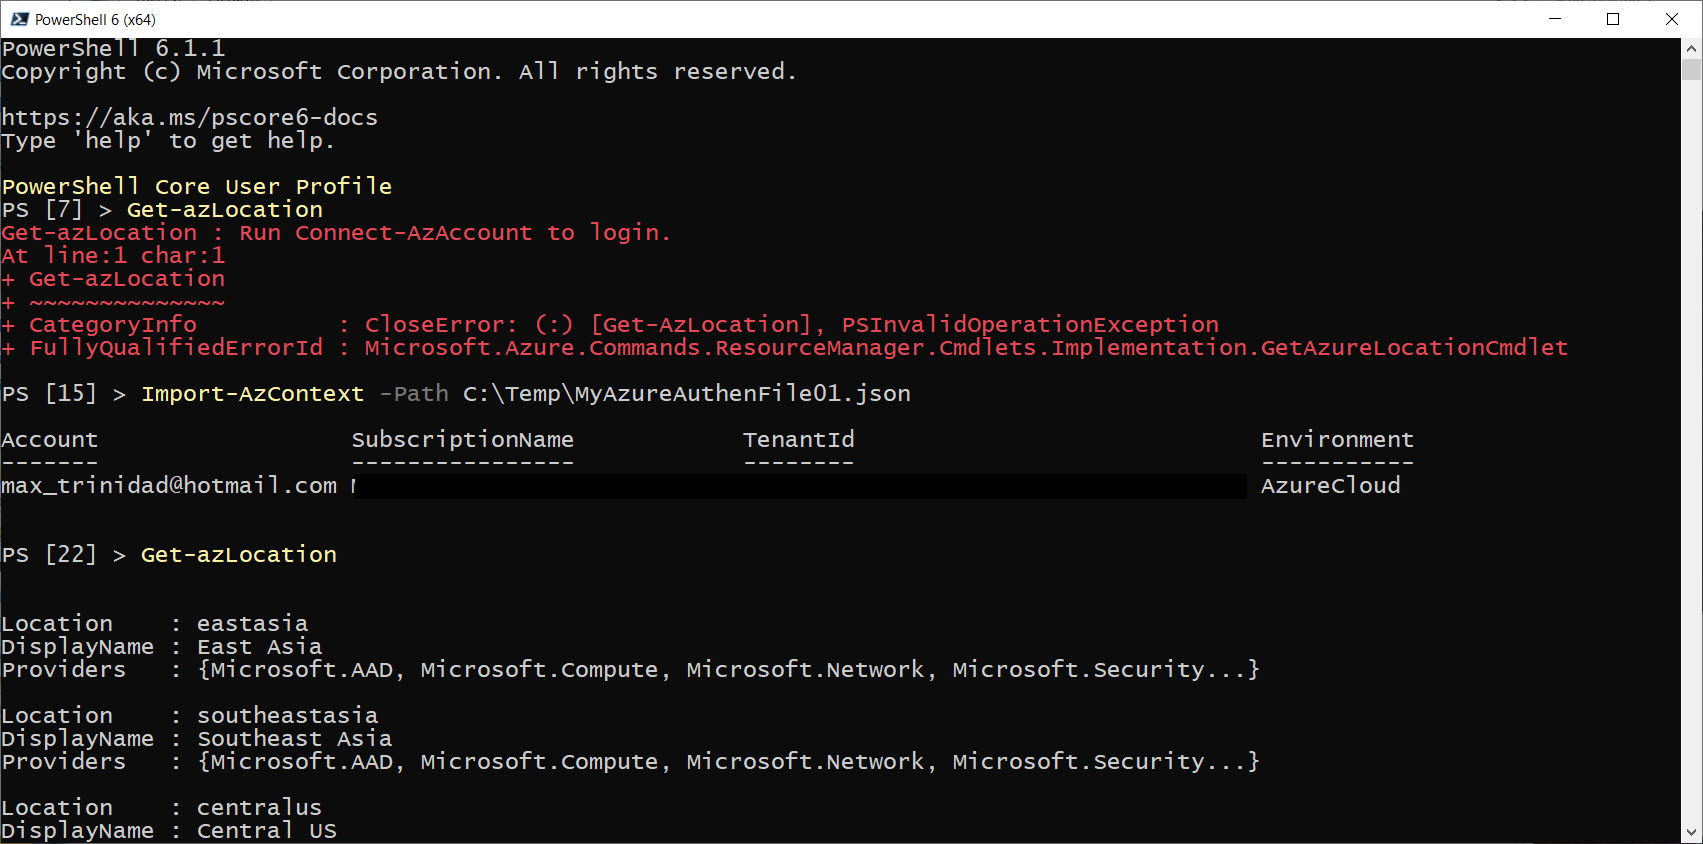
One of the most important fix was the issue experiencing with the TokenCache Initialization when using the cmdlet Import-AzContext. This issue was causing many DevOps to go back and use older version of the AzureRM module to get their script to work again.

The “TokenCache initialization” issue was reported in Github for some time, and finally it has been fixed.

Now, let’s take a look on how to connect to Azure.

Azure Connection CLI options

The following cmdlets can assist you with Azure connectivity:

  • Connect-AzAccount
  • Save-AzContext
  • Import-AzContext
  • Enable-AzContextAutoSave
  • Disable- AzContextAutoSave

All of these cmdlets belongs to the “Az.Account” module which is included in the Az Module. Here’s where you can use find different ways to connect to Azure.

Below is the full list of all Az modules installed from the PowerShell Gallery:

PS [118] > Get-Module -ListAvailable Az.* | Select Name, Version

Name Version
---- -------
Az.Accounts 1.0.0
Az.Aks 1.0.0
Az.AnalysisServices 1.0.0
Az.ApiManagement 1.0.0
Az.ApplicationInsights 1.0.0
Az.Automation 1.0.0
Az.Batch 1.0.0
Az.Billing 1.0.0
Az.Cdn 1.0.0
Az.CognitiveServices 1.0.0
Az.Compute 1.0.0
Az.ContainerInstance 1.0.0
Az.ContainerRegistry 1.0.0
Az.DataFactory 1.0.0
Az.DataLakeAnalytics 1.0.0
Az.DataLakeStore 1.0.0
Az.DevTestLabs 1.0.0
Az.Dns 1.0.0
Az.EventGrid 1.0.0
Az.EventHub 1.0.0
Az.HDInsight 1.0.0
Az.IotHub 1.0.0
Az.KeyVault 1.0.0
Az.LogicApp 1.0.0
Az.MachineLearning 1.0.0
Az.MarketplaceOrdering 1.0.0
Az.Media 1.0.0
Az.Monitor 1.0.0
Az.Network 1.0.0
Az.NotificationHubs 1.0.0
Az.OperationalInsights 1.0.0
Az.PolicyInsights 1.0.0
Az.PowerBIEmbedded 1.0.0
Az.RecoveryServices 1.0.0
Az.RedisCache 1.0.0
Az.Relay 1.0.0
Az.Resources 1.0.0
Az.ServiceBus 1.0.0
Az.ServiceFabric 1.0.0
Az.SignalR 1.0.0
Az.Sql 1.0.0
Az.Storage 1.0.0
Az.StreamAnalytics 1.0.0
Az.TrafficManager 1.0.0
Az.Websites 1.0.0

PS [169] >

There’s a total of 45 ‘Az‘ modules are installed in your system.

Simple Connection

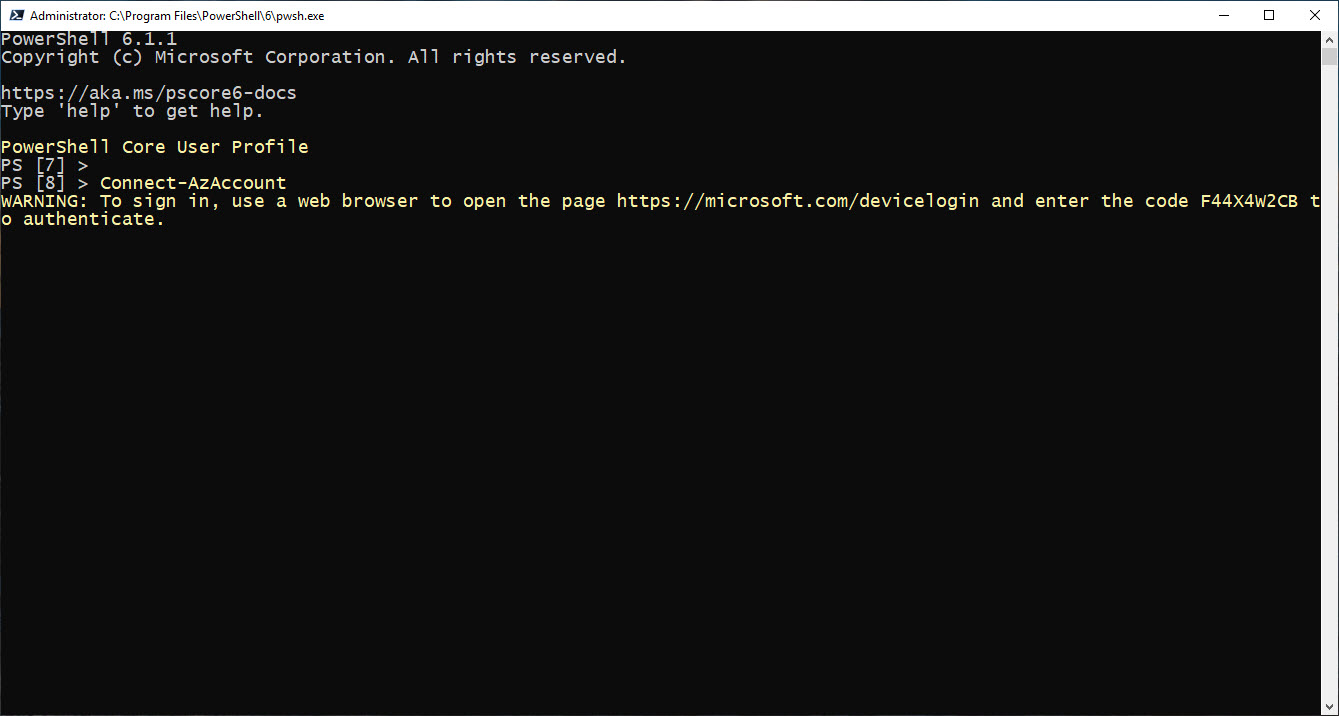
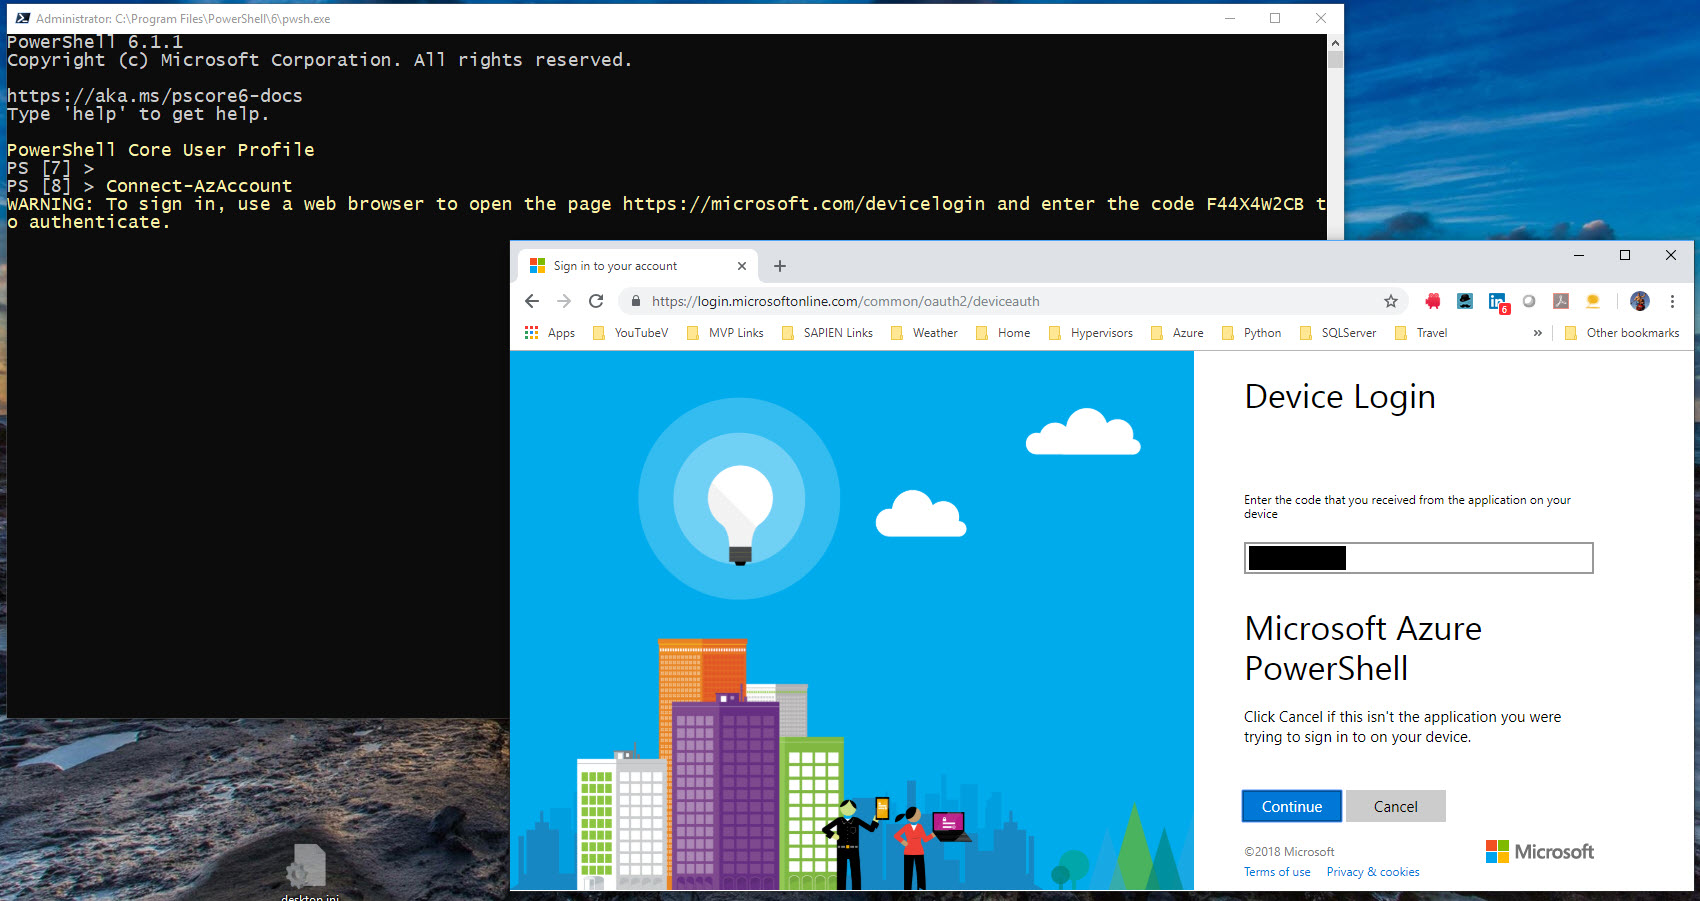
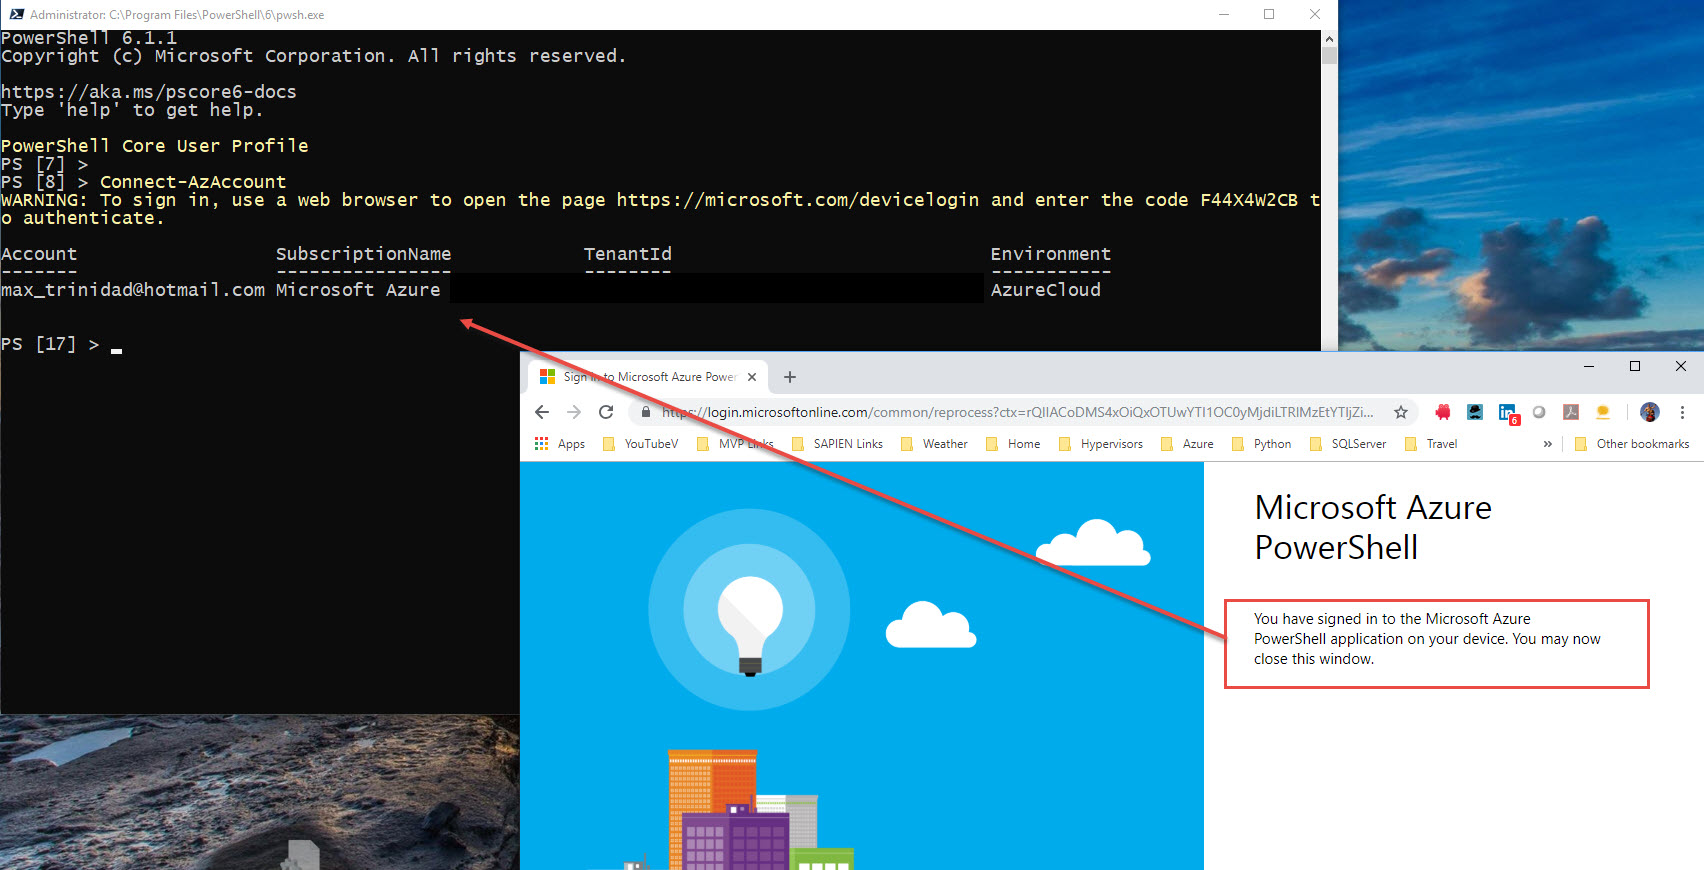
First time connecting to your Azure subscription, you’ll use the “Connect-AzAccount” cmdlet. This cmdlet will asked you to open a browser, then copy/paste a URL and a code that will authorized your device to connect to azure.

So, after the device has been authorized, you can start start working with Azure commands from any of the PowerShell Consoles.

Now, using this cmdlet will create the “.Azure” folder under the user profile directory containing the following files:

c:\Users\username\.Azure
AzInstallationChecks.json
AzurePSDataCollectionProfile.json
AzureRmContext.json
AzureRmContextSettings.json
TokenCache.dat

But, using the Connect-AzAccount cmdlet, the connection only last while your PowerShell session is active. So, as soon as you close the console, and you’ll have to repeat the whole process to connect to Azure again.

Reusing Azure Authentication

We can reuse Azure Authentication in order to avoid the steps of re-opening the browser. Using the following cmdlets: Save-AzContext and Import-AzContext. These two cmdlets are very useful, as the Import-AzContext loads Azure authentication information from a JSON previously saved when using the Save-AzContext cmdlet.

So, as soon as initially set the connection with the Connect-AzAccount and setup all the necessary configuration (resource groups, storage accounts, Availability Sets…), proceed to use the Save-AzContext to save the Azure Authentication information to a folder location of your choosing.

Then, after exiting your PowerShell session, in order to reconnect again, just use the Import-AzContext cmdlet. I’m sure this one of the way many Azure DevOps are using the Import-AzContext to automate script in PowerShell.

Just make sure to occasionally refresh the file as you’ll be making changes the Azure account(s) by adding/removing resources.

Staying Connected to Azure Account

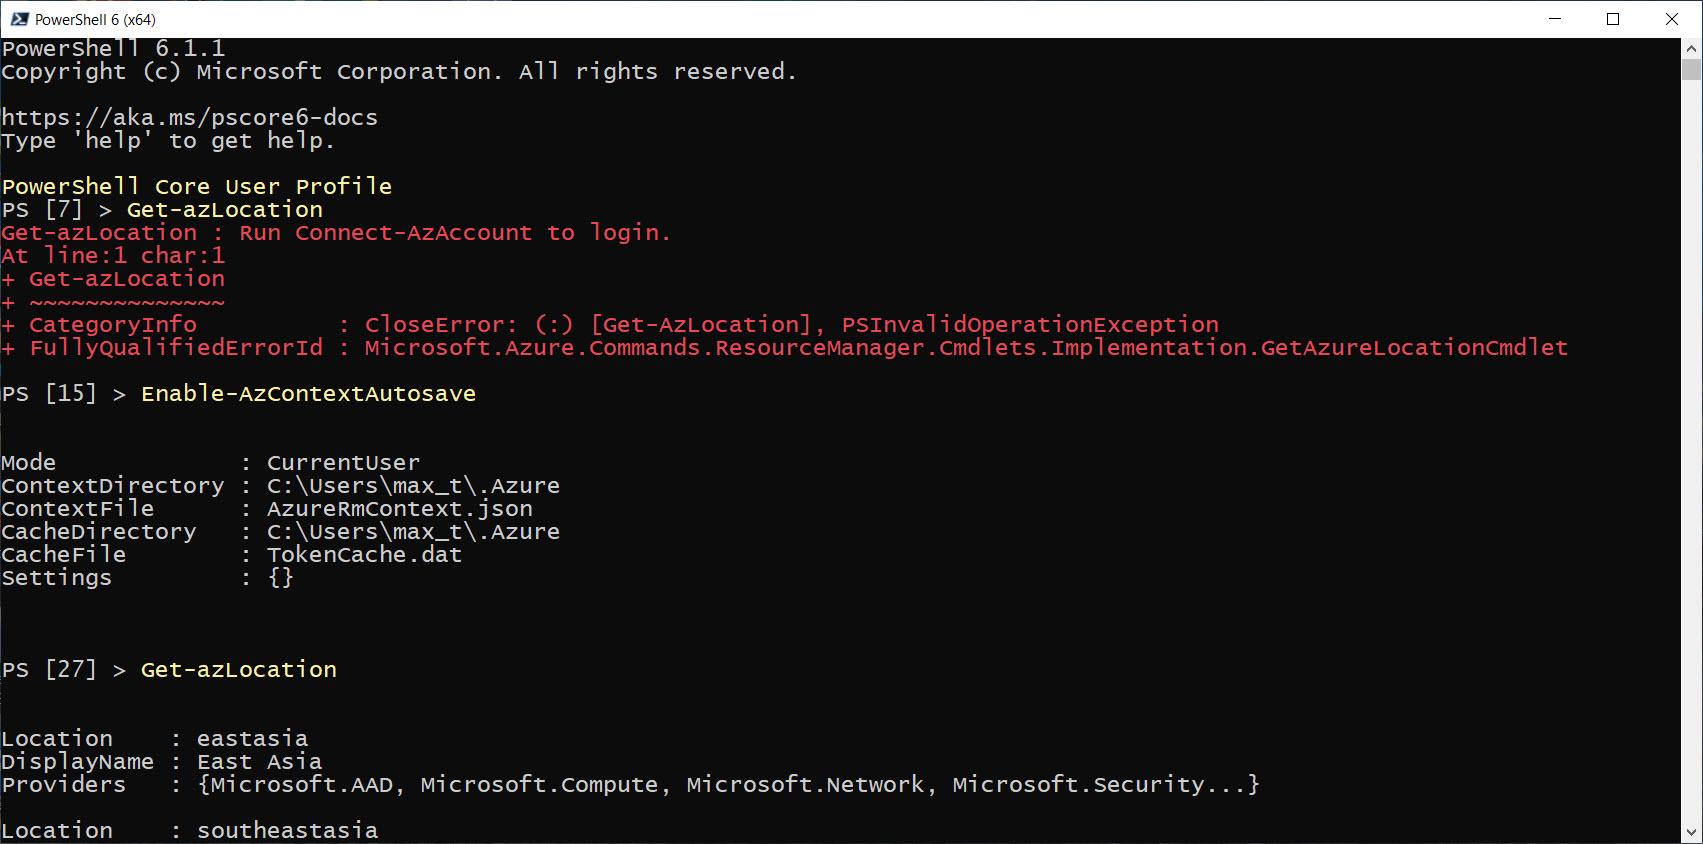
Now, this has been available for awhile using the cmdlets: Enable-AzContextAutoSave, and Disable-AzContextAutoSave. So, if you want to stay connected to your Azure Account, every time you close and reopen a PowerShell Console, you can start working with Azure cmdlets without any delays.

And, because you probably have been working with the Azure modules for some time, just execute the Enable-AzContextAutoSave cmdlet.

That’s it!

Now, you can close and re-open PowerShell Console and immediately start working with Azure.  This will make you feel like you are using the Cloud Shell on your desktop.

Just remember, in order to disable this functionality, just run the Disable-AzContextAutoSave cmdlet and exit the PowerShell Console.

Summary

As you can see, there are many ways to get connected from any system cross-platform to your Azure Account(s) to suit your need. This will work from anywhere from any system!

Just go ahead, experiment and find your own way to work proactive with Azure.

Custom PowerShell function to remove Azure Module

As you probably know by now, “Azure RM” modules has been renamed to “Az” Module. Microsoft want you to start using this module moving forward. Currently, this new release is on version 0.5.0, and you’ll need to remove the any previous module(s) installed. Information about Azure PowerShell can be found on the following link.

Now, there’s always been a tedious task when manually removing module dependencies, and there’s no exception with the “Az” module.  So, we can all take advantage to PowerShell and create a script to work around this limitation.

And, below is a few options.

My Custom Function

I have realized that sometimes I got duplicate modules installed with different versions installed, and this can create some confusion. My solution was to create a custom PowerShell function “Remove-AzureModule” to remove all existing Azure modules.

function Remove-AzureModule {
[CmdletBinding(SupportsShouldProcess)]
param ()

$Modules = Get-Module -ListAvailable Az* `
| Select-Object -unique Name, Version;

$cnt = 1;
ForEach ($Module in $Modules)
{
if ($PSCmdlet.ShouldProcess($Module.name, 'Uninstall'))
{
Write-Host "[$cnt] - Removing module: $($Module.Name) - Version: $($Module.Version)." -ForegroundColor Yellow;
Uninstall-Module -Name $Module.Name -AllVersions -Force;
$cnt++;
};
};
};

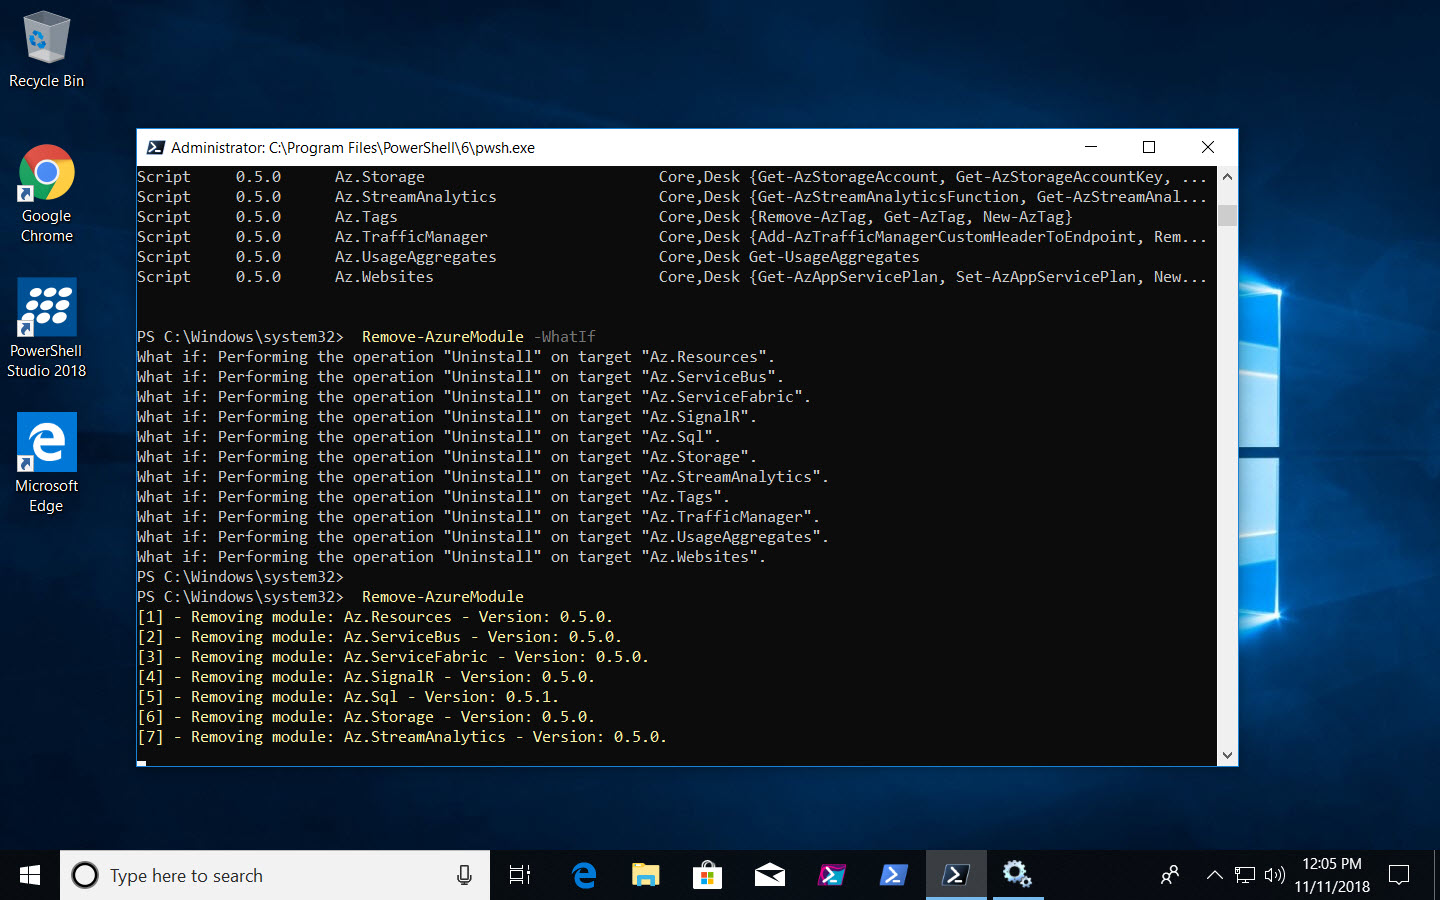
## - Run using the -What If parameter:
Remove-AzureModule -What If

## - Execute to remove Azure modules:
Remove-AzureModule

The purpose of this function to do a full cleanup removing all installed versions of Azure modules from PowerShell.   This function includes a the “-WhatIf” parameter that can be use to run the function without actually performing the “uninstall” process. And, I added a counter for each module when performing the “uninstall” for each of the dependency module.

Then, you can always use the following “Get-Module” command to verify that all modules has been removed.

Get-Module -Listavailable Az* | Select-Object Name, Version

Azure Docs – Uninstall modules with dependencies

Now, while writing this quick blog post, I found in the Microsoft documentation there’s a “Uninstall the Azure PowerShell Module” section. This article provide the “Uninstall-AllModules” function which is a a generic way to remove any previously installed module with dependencies.

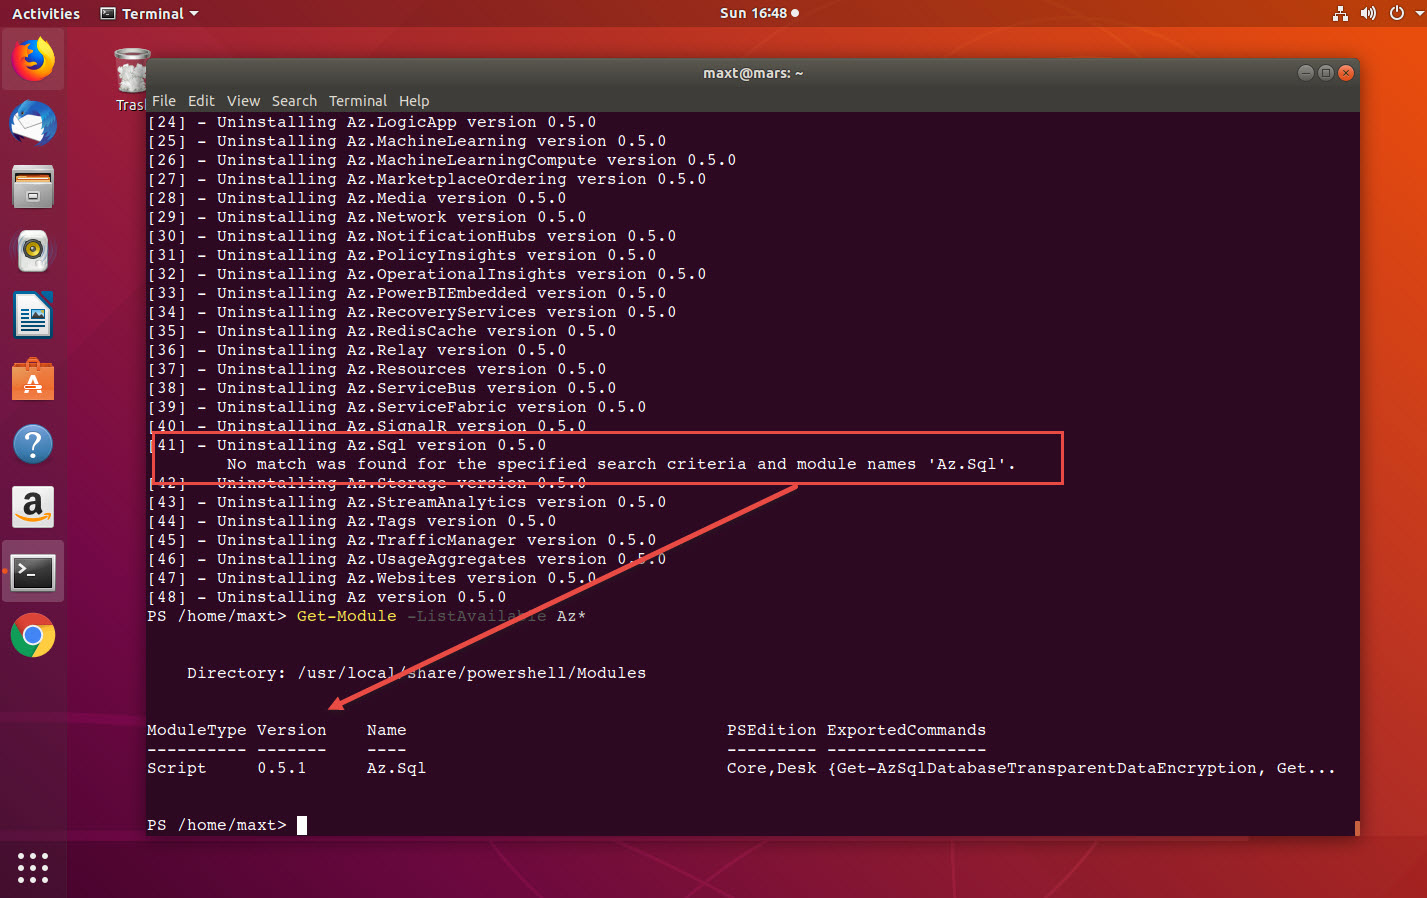
Below, is the modified version of the Microsoft function. I added the code to allow the use of the “-What If” parameter, and to do a count of the modules been removed. I think these are a nice to have changes.

## - Uninstall-AllModules from the Microsoft Docs: https://docs.microsoft.com/en-us/powershell/azure/uninstall-azurerm-ps?view=azurermps-6.12.0#uninstall-from-powershell
## - Modified to include the "-WhatIf" parameter and a module counter.

function Uninstall-AllModules
{
[CmdletBinding(SupportsShouldProcess)]
param (
[Parameter(Mandatory = $true)]
[string]
$TargetModule,
[Parameter(Mandatory = $true)]
[string]
$Version,
[switch]
$Force
)

$AllModules = @()

'Creating list of dependencies...'
$target = Find-Module $TargetModule -RequiredVersion $version
$target.Dependencies | ForEach-Object {
$AllModules += New-Object -TypeName psobject -Property @{ name = $_.name; version = $_.minimumVersion }
}
$AllModules += New-Object -TypeName psobject -Property @{ name = $TargetModule; version = $Version }

$cnt = 1;
foreach ($module in $AllModules)
{
Write-Host ("[$cnt] - " + 'Uninstalling {0} version {1}' -f $module.name, $module.version);
$cnt++;
try
{
if ($PSCmdlet.ShouldProcess($module.name, 'Uninstall'))
{
Uninstall-Module -Name $module.name -RequiredVersion $module.version -Force:$Force -ErrorAction Stop;
};
}
catch
{
Write-Host ("`t" + $_.Exception.Message)
}
}
};

## - Example using -WhatIf parameter:
Uninstall-AllModules -TargetModule Az -Version 0.3.0 -Force -WhatIf

## - Example to remove module with dependencies:
Uninstall-AllModules -TargetModule Az -Version 0.3.0 -Force

Unfortunately, this solution will work as long as all dependencies modules has the same version.  So, a little work still need to be done!

Feel free to test the code in both Windows PowerShell and PowerShell Core.

Another way to Manage PowerShell Modules

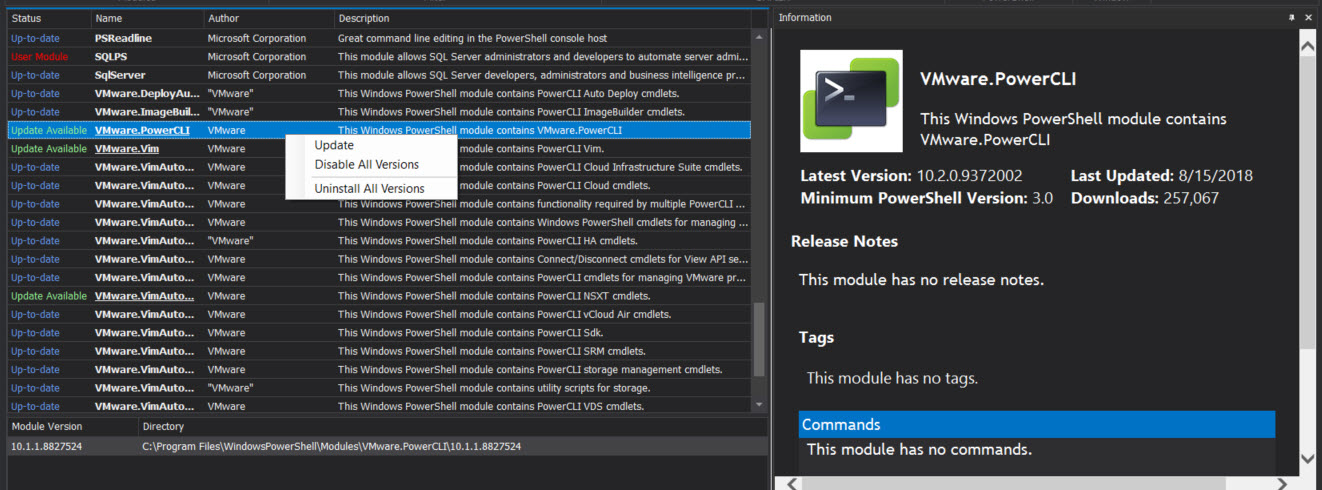
Take a look at SAPIEN Technologies new product “Module Manager“. You’ll be surprise what you can find installed in your system. This GUI application let you manage modules installed in your system making it easy to update, disable/enable, and install/uninstall modules.

For more Module Manager Preview information check on the following SAPIEN Technologies link.

Recap

As you can see, PowerShell can provide the means to workaround issues you’ll experience in a simple way. At the same time there are both community and Microsoft documentation available that will provide assistance.

Finally, check out third-party products, like the ones from SAPIEN Technologies that are available to increase your productivity in many ways. For more information check on the following SAPIEN Technologies products link.

PowerShell Core 6.1.0 GA (Generally Available) for Anything Anywhere

Any System, Anywhere

Finally the next PowerShell Core GA (Generally Available) at: PowerShell Core 6.1.0. Thanks to the strong effort of both the Microsoft Team and the PowerShell Community has help reach this milestone achievement with the next generation of PowerShell.


Announcing PowerShell Core 6.1

Check Jeffrey Snover (Inventor of PowerShell) at MS Ignite 2018 comments about PowerShell (theCube-video)

PowerShell Core will continue to grow providing new features and performance improvements. This version is fully supported.

Anyone can join and contribute at the Microsoft PowerShell Team – Monthly PowerShell Community Call every third Thursday of the month.

To download and install PowerShell Core, go to their Github Repository.

Install Anywhere

Instructions on how to installed it are also available under Microsoft Documentation for both Windows and non-Window systems: MacOS, Ubuntu, Red Hat, CentOS, Fedora, and others Linux distributions.

For more information about installing PowerShell Core, check it out on Microsoft Doc site

For now, this next generation of PowerShell, Windows PowerShell Snap-ins are no longer supported, and the Out-Gridview cmdlet won’t work.

Reporting Issues

Any PowerShell Core feedback should be submitted to its Github repository. And, any Windows PowerShell issues need to be submitted to the UserVoice forum.

Check the Github PowerShell Core landing page, under the “Windows PowerShell vs PowerShell Core” section.

Modules Availability

Only in Windows Systems, Windows PowerShell modules are also available for PowerShell Core. This means that you can open PowerShell Core console and use the existing Microsoft Windows PowerShell modules.

Now, there’s no excuses for not to try using PowerShell Core in Windows Systems.

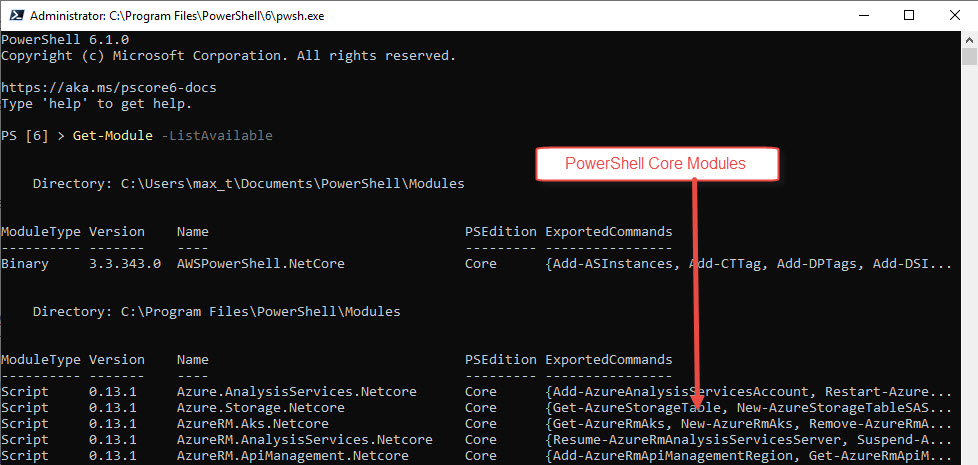
In the PowerShell Core console, just execute the following command line to list all modules listed in Windows:

Get-Module -ListAvailable

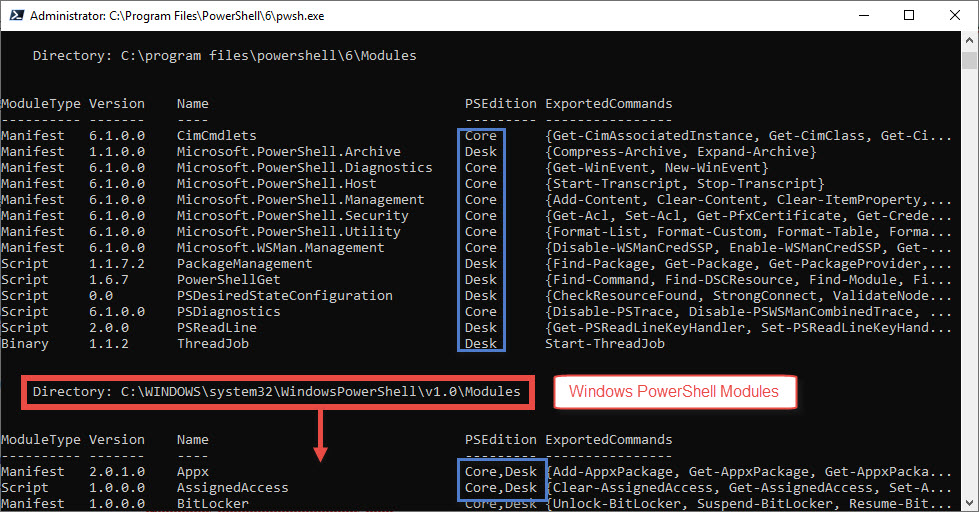
You’ll notice there’s a new column “PSEdition”, which identifies for which version of PowerShell the module will work:
1. Core – for PowerShell Core any system, any where.
2. Desk – for Windows PowerShell.
3. Core\Desk – for PowerShell Core and Windows.

PowerShell Modules location are listed:

1. Users Modules: C:\Users\max_t\Documents\PowerShell\Modules or C:\Users\max_t\Documents\WindowsPowerShell\Modules
2. General Modules for PowerShell Core: C:\Program Files\PowerShell\Modules or C:\program files\powershell\6\Modules
3. General use Modules for Windows PowerShell: C:\WINDOWS\system32\WindowsPowerShell\v1.0\Modules

Things are changing quickly in the PowerShell Gallery, which was recently update. Any PowerShell Module author has the responsibility to make the necessary update to their modules. Notice that some PowerShell Core modules are still labeled “Desk” when in fact should be both “Core\Desk”, like the “SQLServer” module.

Just make sure to check the module information for which version of PowerShell the module was created for.

Azure Cloud Shell GA (Generally Available)

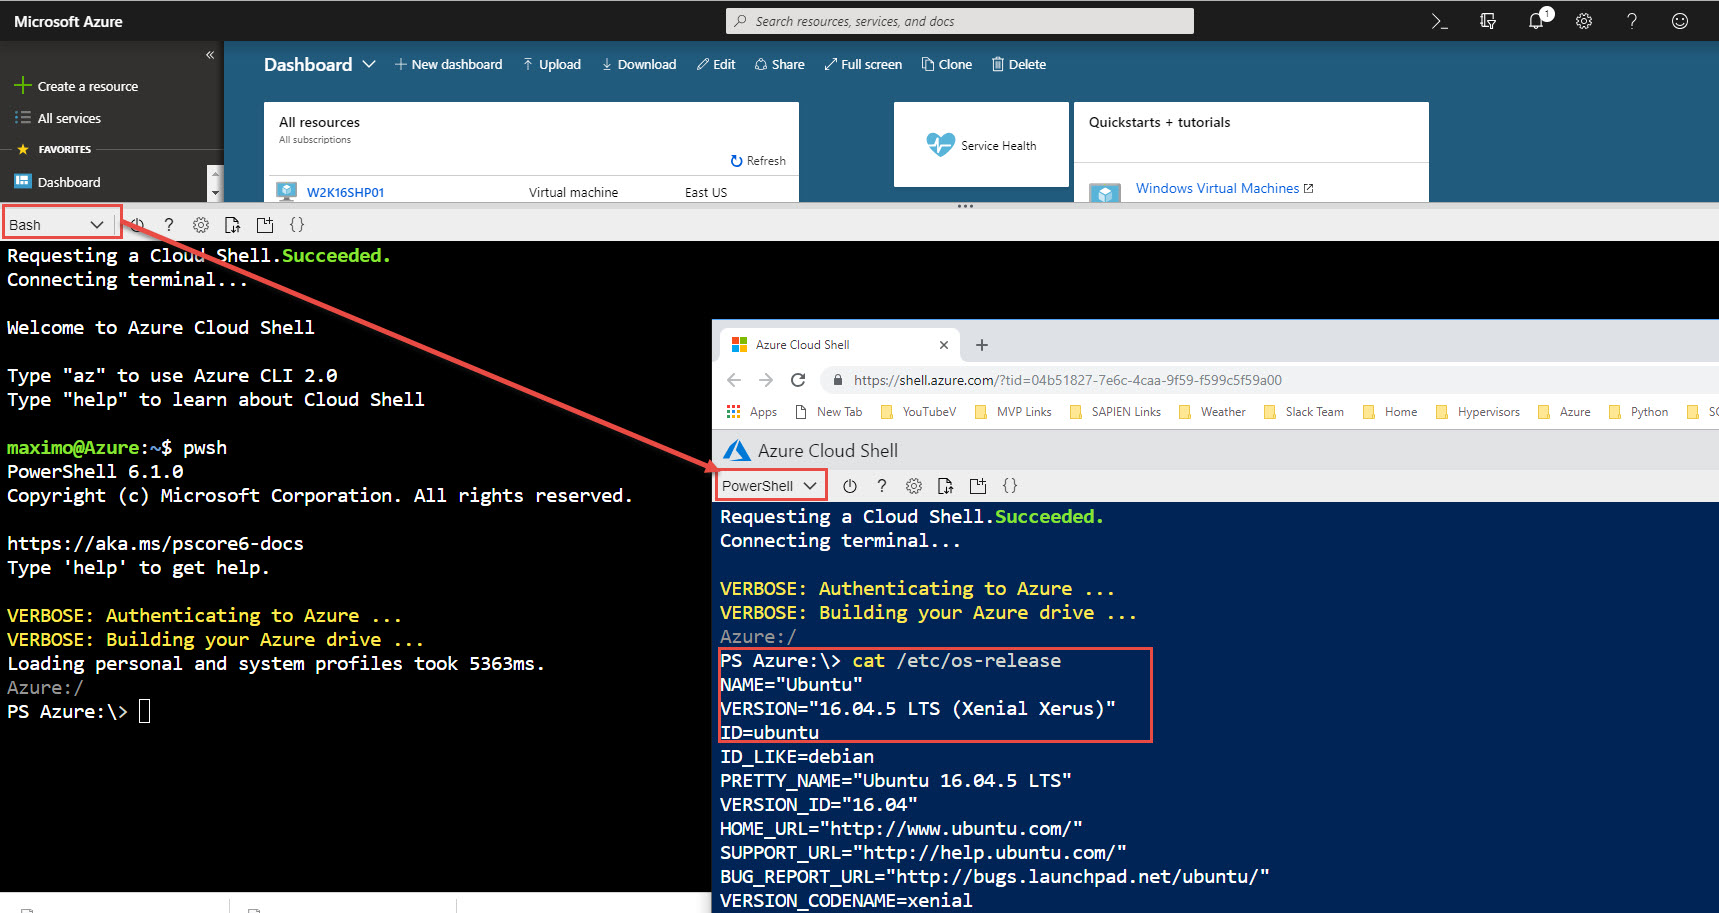
Yes! Microsoft Cloud Shell has been updated to have PowerShell Core 6.1.0 GA, and is on Linux.


This shows the commitment of having cloud reliable solutions running anywhere on any systems.

  • User either Bash or PowerShell in Linux
  • Drag/Drop files into the Browser session
  • AzureRM Module already installed and updated to latest version
  • AzureRM Modules build on .Net Core

In summary

  • PowerShell Core is the next iteration of PowerShell built using .NET Core
  • Run self-contained, side-by-side in Windows systems with Windows PowerShell
  • Cross-platform availability for managing Anything, Anywhere.
  • Microsoft Open Source and Community-support
  • Azure Cloud support

MS Ignite 2018 – PowerShell Videos

Here’s just a couple of interesting videos from the Microsoft Ignite 2018 event in Orlando about PowerShell Core:

Go ahead and try PowerShell Core 6.1 GA! Embrace the change!

PSCore6 – Creating a Hybrid Cross-platform SQLServer Script

There’s some discussion around scripting on using Windows PowerShell vs PowerShell Core. So, just pick one? No.
Just think about supporting a cross-platform environment. Use both!

Following my recent post on “PSCore6 – SQLServer Module Expanding The Barrier Cross-Platform“, here’s a sample Hybrid-Script for cross-platform use.

Why not!

We all know the next generation (or evolution) of PowerShell is PowerShell Core. That’s it!
You are still using PowerShell, and Windows PowerShell is not going to be dropped nor removed any time soon.

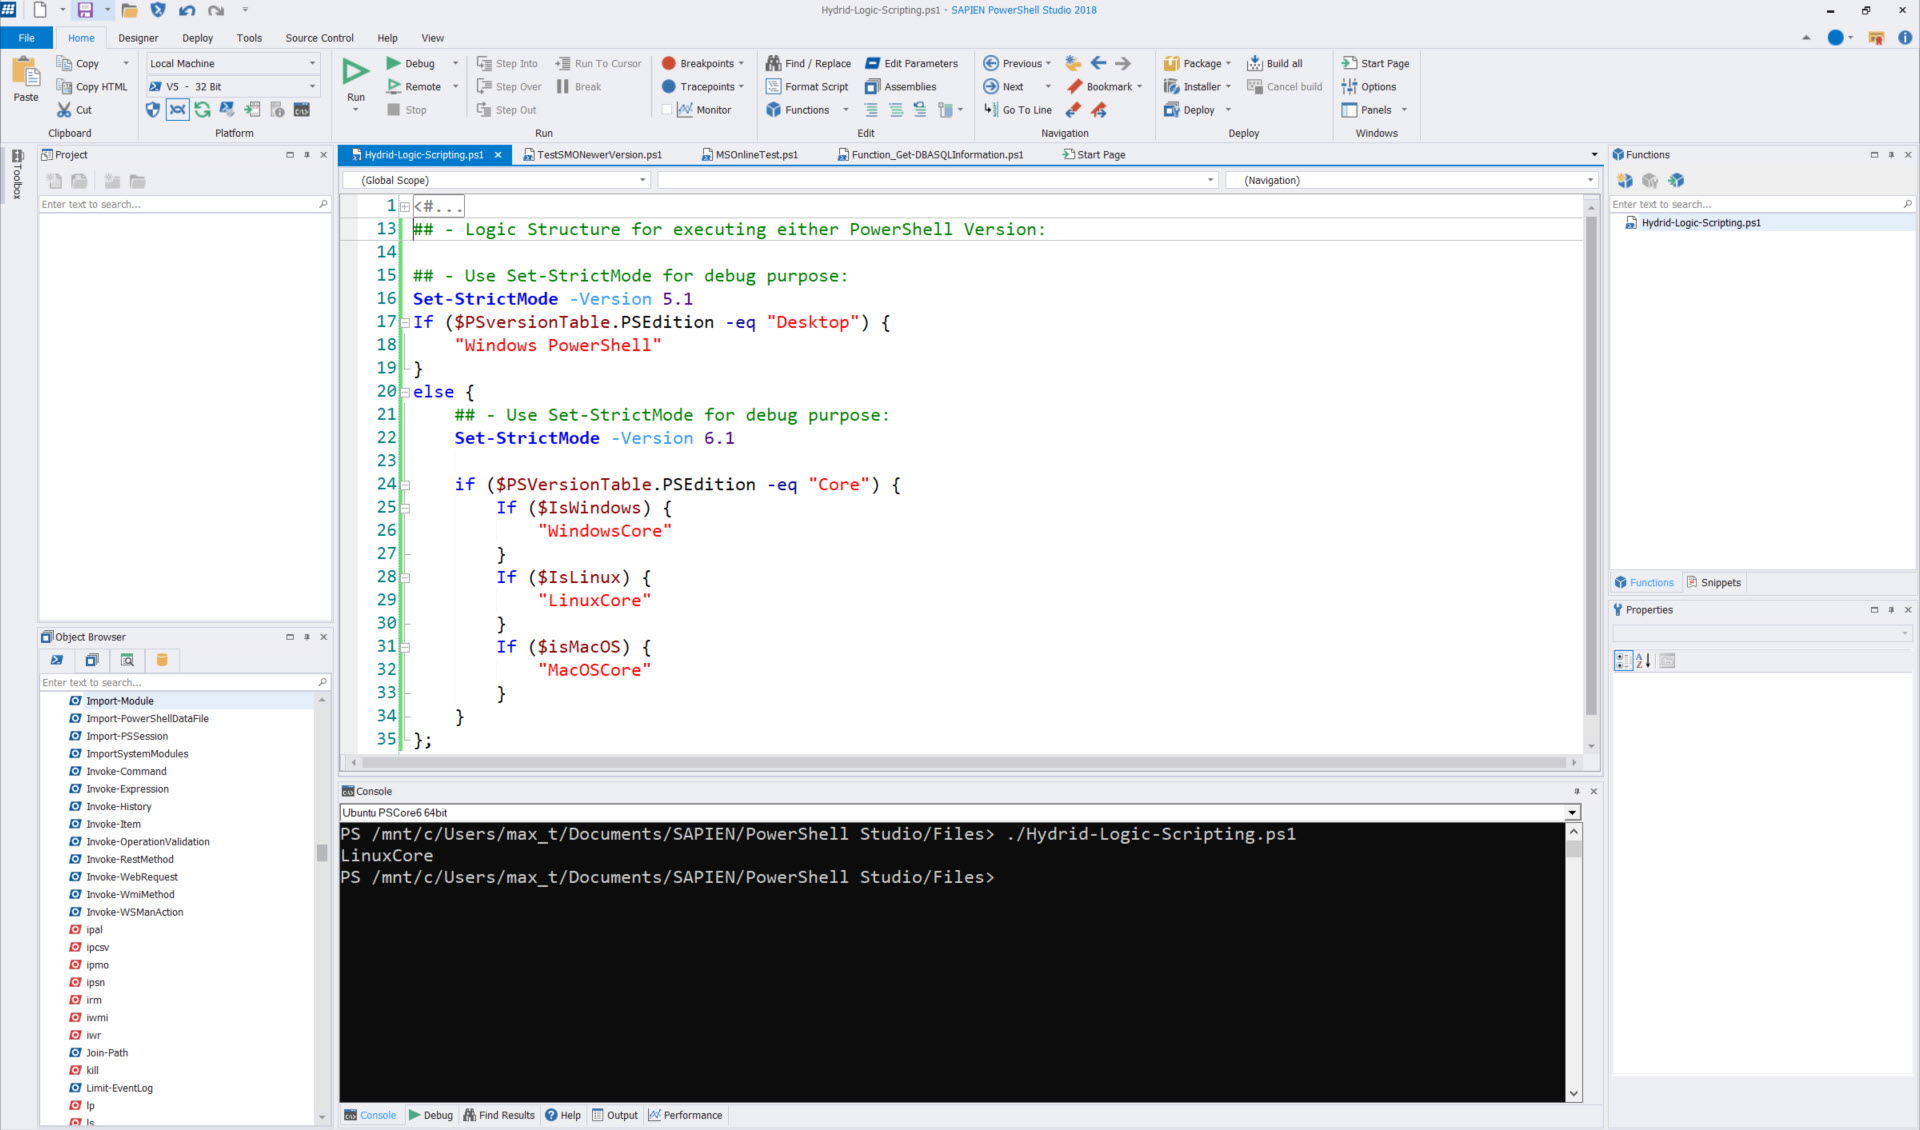
So, why not start working towards, what I call, “Hybrid-scripting”? Powershell Core provides the necessary elements to help with cross-platform scripting.

In it’s basic code form, could look be something like this:

[sourcecode language=”powershell”]

## – Logic Structure for executing either PowerShell Version:

## – Use Set-StrictMode for debug purpose:
Set-StrictMode -Version 5.1

If ($PSversionTable.PSEdition -eq "Desktop") {
"Windows PowerShell"
}
else {
## – Use Set-StrictMode for debug purpose:
Set-StrictMode -Version 6.1

if ($PSVersionTable.PSEdition -eq "Core") {
If ($IsWindows) {
"WindowsCore"
}
If ($IsLinux) {
"LinuxCore"
}
If ($isMacOS) {
"MacOSCore"
}
}
};

[/sourcecode]

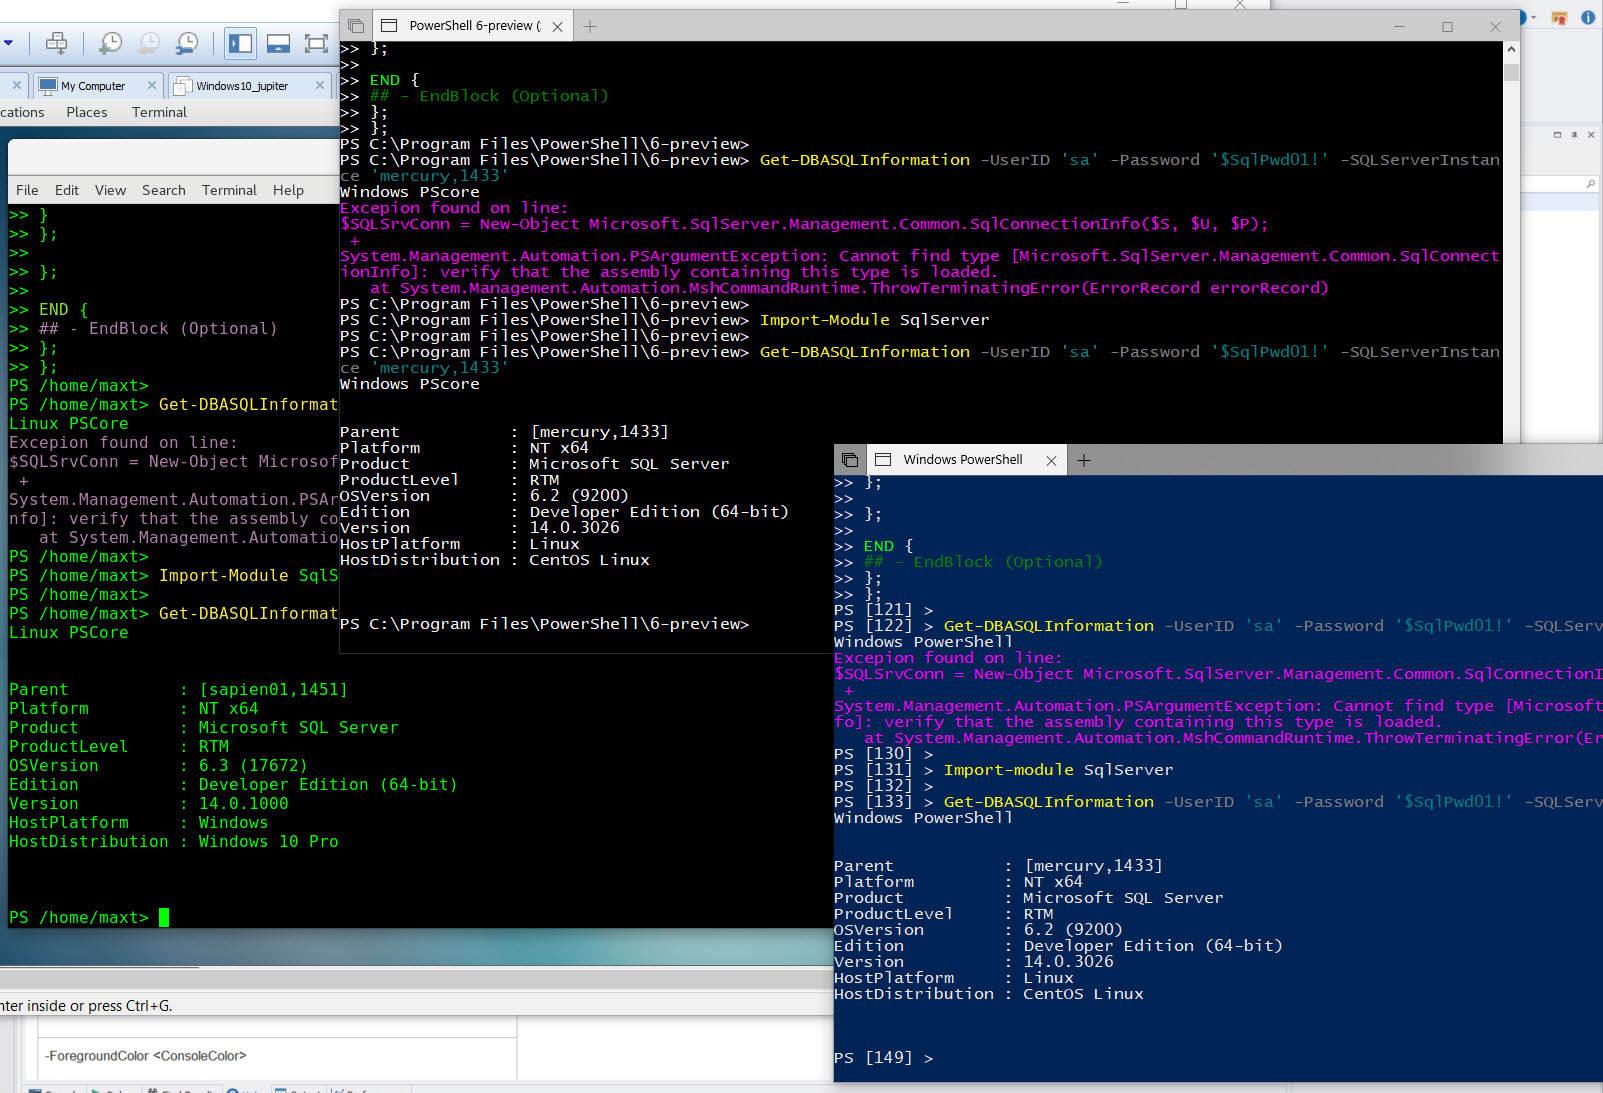
Now, let’s apply this code to a practical sample.

Sample Hybrid-Script

In the following sample script, includes Help information, begin-process-end and with try-catch code structure.
At the same time, the script will output the exception to the screen console with the failed line.

Script function name: Get-DBASQLInformation

[sourcecode language=”powershell”]
Function Get-DBASQLInformation {</pre>
<#
.SYNOPSIS
This is a cross-platform function to Get SQL Server Information.

.DESCRIPTION
This is a cross-platform function to Get SQL Server Information using SQL Authentication.

.PARAMETER UserID
Enter SQL Authentication UserID parameter.

.PARAMETER Password
Enter SQL Authentication Password parameter.

.PARAMETER SQLServerInstance
Enter SQLServerInstance name parameter.

.EXAMPLE
PS> Get-DBASQLInformation -UserID ‘sa’ -Password ‘$SqlPwd01!’ -SQLServerInstance ‘mercury,1433’

.NOTES
===========================================================================
Created with: SAPIEN Technologies, Inc., PowerShell Studio 2018 v5.5.152
Created on: 5/25/2018 8:27 AM
Created by: Maximo Trinidad
Organization: SAPIEN Technologies, Inc.
Filename: Function_Get-DBASQLInformation.ps1
===========================================================================
#>
<pre>[CmdletBinding()]
[OutputType([psobject])]
param
(
[Parameter(Mandatory = $true,
Position = 0)]
[string]
$UserID,
[Parameter(Mandatory = $true,
Position = 1)]
[string]
$Password,
[Parameter(Mandatory = $true,
Position = 2)]
[string]
$SQLServerInstance
)

BEGIN {

## – Internal function:
function GetSqlInfo {
param
(
[parameter(Mandatory = $true, Position = 0)]
[string]
$U,
[parameter(Mandatory = $true, Position = 1)]
[string]
$P,
[parameter(Mandatory = $true, Position = 2)]
[string]
$S
)
Try {
## – Prepare connection passing credentials to SQL Server:
$SQLSrvConn = New-Object Microsoft.SqlServer.Management.Common.SqlConnectionInfo($S, $U, $P);
$SQLSrvObj = new-object Microsoft.SqlServer.Management.Smo.Server($SQLSrvConn);

## – SMO Get SQL Server Info:
$SQLSrvObj.Information `
| Select-Object parent, platform, product, productlevel, `
OSVersion, Edition, version, HostPlatform, HostDistribution `
| Format-List;

}
catch {
## – Write Exception to Console:
Write-Host `
"Excepion found on line:`r`n$($error[0].InvocationInfo.line)"+ `
"`r`n$($Error[0].Exception)" `
-ForegroundColor Magenta;

}
}

};

PROCESS {

## – Cross-platform logic:
If ($PSversionTable.PSEdition -eq "Desktop") {
Write-Host "Windows PowerShell"
GetSqlInfo -U $UserID -P $Password -S $SQLServerInstance;
}
else {

if ($PSVersionTable.PSEdition -eq "Core") {
If ($IsWindows) {
Write-Host "Windows PScore";
}
If ($IsLinux) {
Write-Host "Linux PSCore";
}
If ($isMacOS) {
Write-Host "MacOS PSCore";
}
## – execute on non-Windows:
GetSqlInfo -U $UserID -P $Password -S $SQLServerInstance;
}
};

};

END {
## – EndBlock (Optional)
};
};

[/sourcecode]

The heart of the code are stored in the “Begin” section as a Internal-Function GetSQLInfo(). The internal-function will be only executed if it the criteria for each of the different platforms. The Try-Catch is just to trap the error if the SMO connection failed, or to indicate the SMO .NET wasn’t loaded.

Go ahead! Create a script file, copy/paste this code, and load this function. Give it a try cross-platforms: Windows, Linux, and MacOS.

Remember, SQLServer module is a replacement for SQLPS module. I won’t recommend having both modules installed unless you use the namespace_module/cmdlet to identify which module is going to execute the cmdlet.

So make sure to always test your scripts.

What’s Next!

This function still need to worked on, but is functional enough to test-drive and see the results. So, it be modified to support Windows Authentication. Once you start scripting and building functions, you won’t stop thinking what else can be added.

Just keep working on it and learning from the PowerShell Community.

Go Bold! Learn PowerShell Core!

PSCore6 – Installing Latest OpenSSH-Win64 v1.0.0.0beta

This next version of OpenSSH bring more changes and here’s how to configured it.
So, let’s refresh the installation steps so we can remote connect from Windows to Windows, or any other non-Windows Systems using ssh protocol.

For now, this applies to Microsoft Windows [Version 10.0.16299.248].

Where To Get It

Use Chocolatey package manager for Windows to install OpenSSH-Win64. On a new windows system, it will need to be install. Make sure to open PSCore6 console “Run as administrator“.

Then, in PowerShell, execute the following command to install Chocolatey Package Manager for Windows:

[Sourcecode language=”powershell”]
Set-ExecutionPolicy Bypass -Scope Process -Force; iex ((New-Object System.Net.WebClient).DownloadString(‘https://chocolatey.org/install.ps1’))
[/Sourcecode]
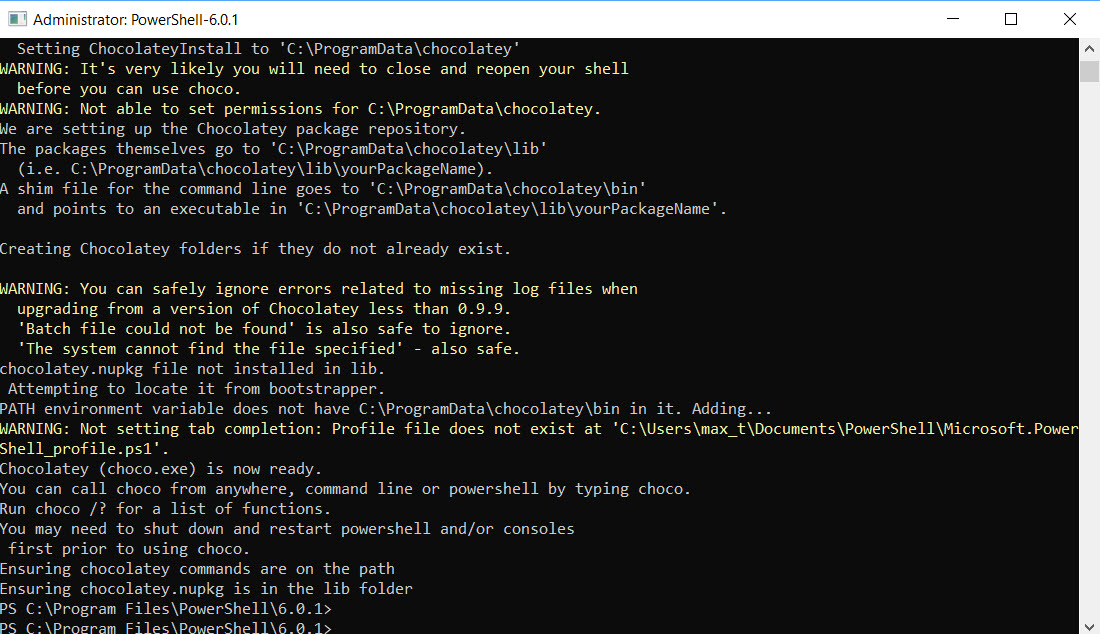
When the installation is completed, make sure to exit and open again a PSCore6 console “Run as administrator

Next, check what OpenSSH version is available by execute the following command in PowerShell:

[Sourcecode language=”powershell”]
choco info openssh
[/Sourcecode]
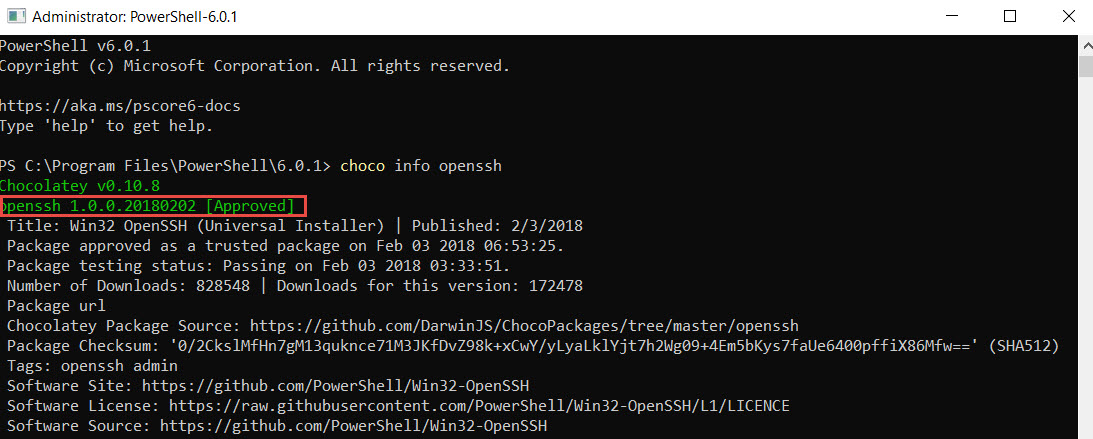
The result on screen will provide with the latest version available with the release notes for this package. One of the fixes, clears the issue with setting the ssh services permission it is set back to “Local System“.

Installing OpenSSH from Chocolatey

After verifying and reading the release notes, continue with installing the package. The following command will install OpenSSH-Win64 on the new system.

[Sourcecode language=”powershell”]
choco install openssh
[/Sourcecode]
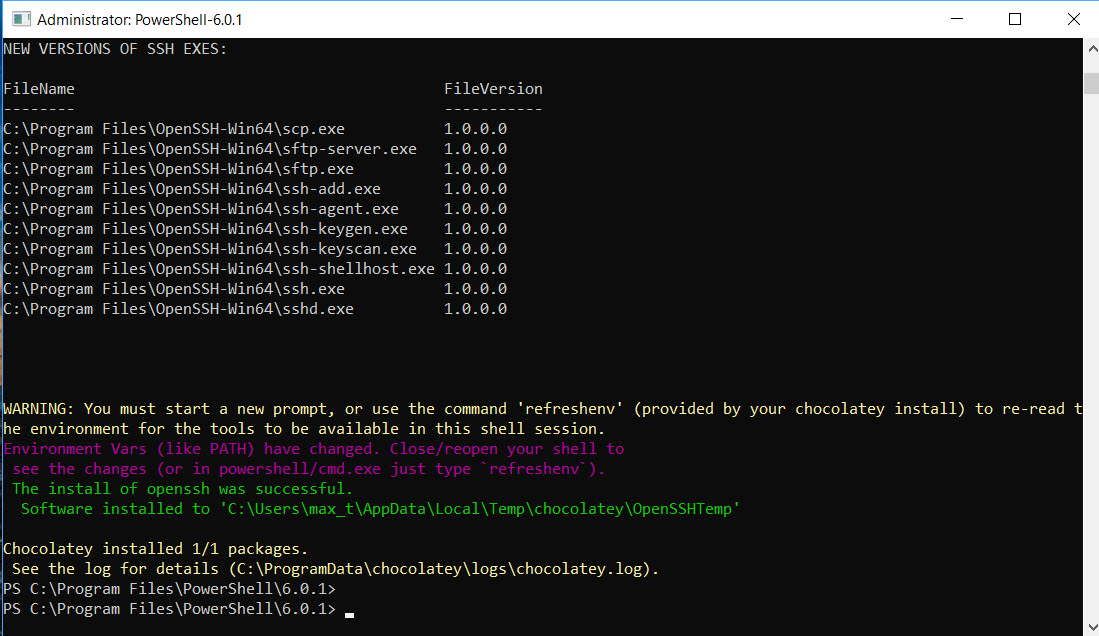
Now that we got the module installed, we need to make some configuration changes before installing the ssh services.

Check Configuration settings

On this latest OpenSSH version 1.0.0.0beta there has been changes to the configuration file. There are two configuration files available:

1. sshd_config-default – located on: “C:\Program Files\OpenSSH-Win64“.

The second configuration file will be available after complete the script ssh installation:

2. sshd_config – located on: “C:\ProgramData\ssh”

3. Also, all security key files are copied over from the “C:\Program Files\OpenSH-Win64” folder into the “C:\ProgramData\ssh“.

Remember, before the ssh services installation, the folder “C:\ProgramData\ssh” doesn’t exist.
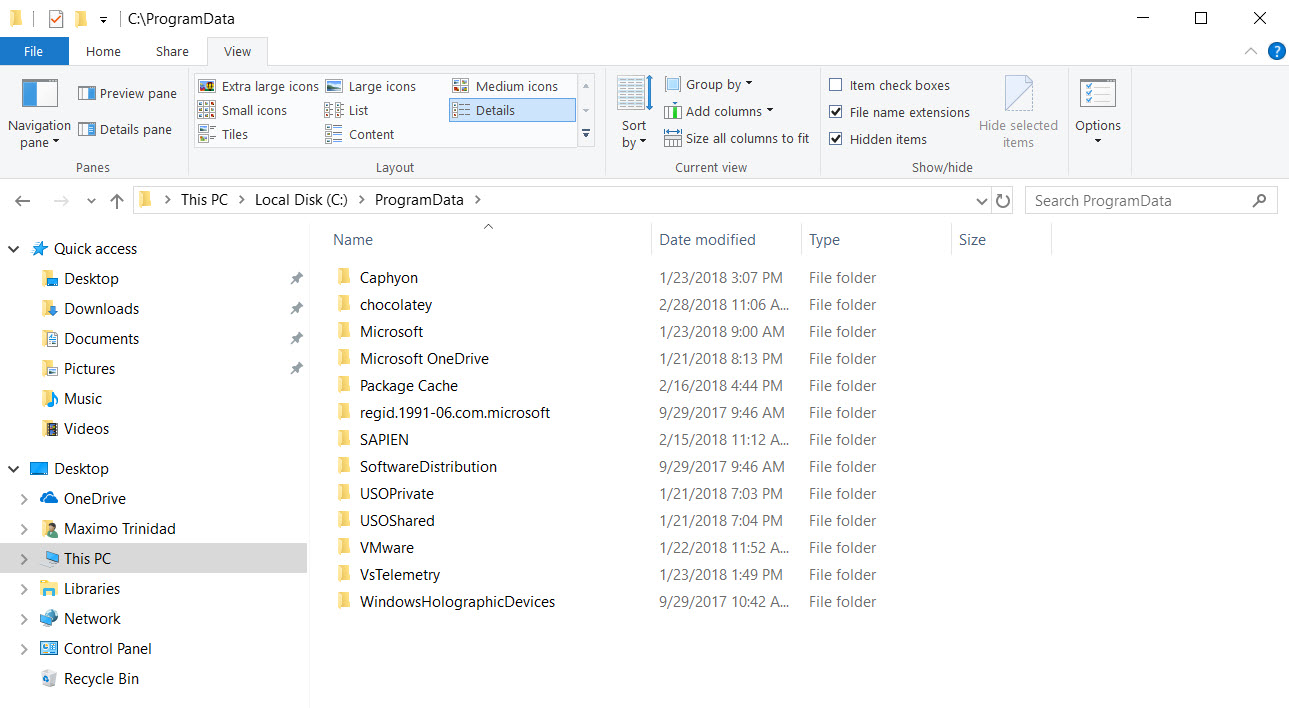
Remember that any changes to the sshd_config file will requires both ssh services to be restarted.

Steps for Installing SSH Services

So, before executing the “Install-sshd.ps1” script. I’ll make the needed changes are in place in the sshd_config_default file using Notepad:

1. Enable: Port 22
2. Enable: PubkeyAuthentication yes
3. Enable: PasswordAuthentication yes
4. Add PSCore6 Subsystems:

[sourcecode language=”text”]
Subsystem powershell C:\Program Files\PowerShell\6.0.1\pwsh.exe -sshs -NoLogo -NoProfile

[/sourcecode]

Also, if it doesn’t already exist, add the Firewall Rule for Port 22:

[sourcecode language=”powershell”]
netsh advfirewall firewall add rule name=SSHPort22 dir=in action=allow protocol=TCP localport=22

[/sourcecode]

Now, we can proceed with the installation of the SSH Services. And, this installation will include the SSH-Agent Service.

[sourcecode language=”powershell”]
## – Install both ssh services: sshd and ssh-agent:
.\install-sshd.ps1 /SSHAgentFeature

[/sourcecode]

Both the ssh and the ssh-agent service are installed but remains stopped.

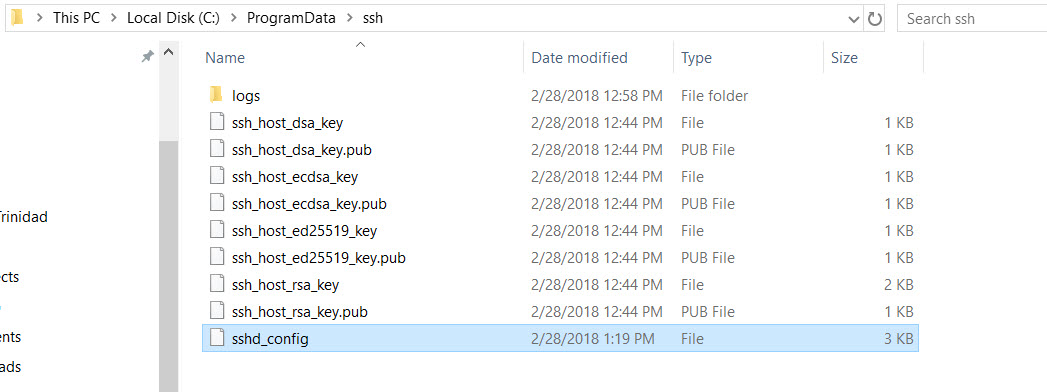
The installation also created a ssh folder under “C:\ProgramData” and the sshd_config file with the change we did previously to the sshd_config_default file.

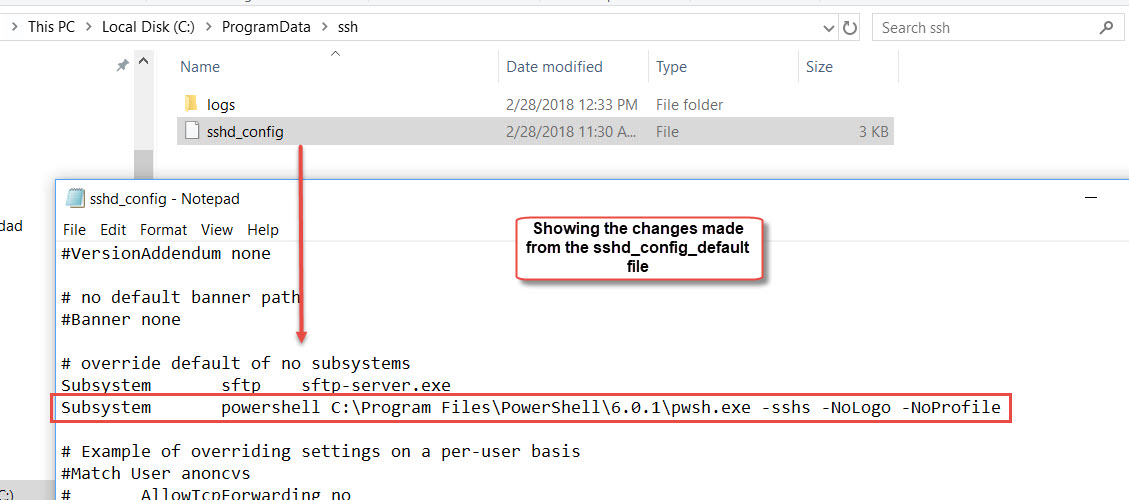
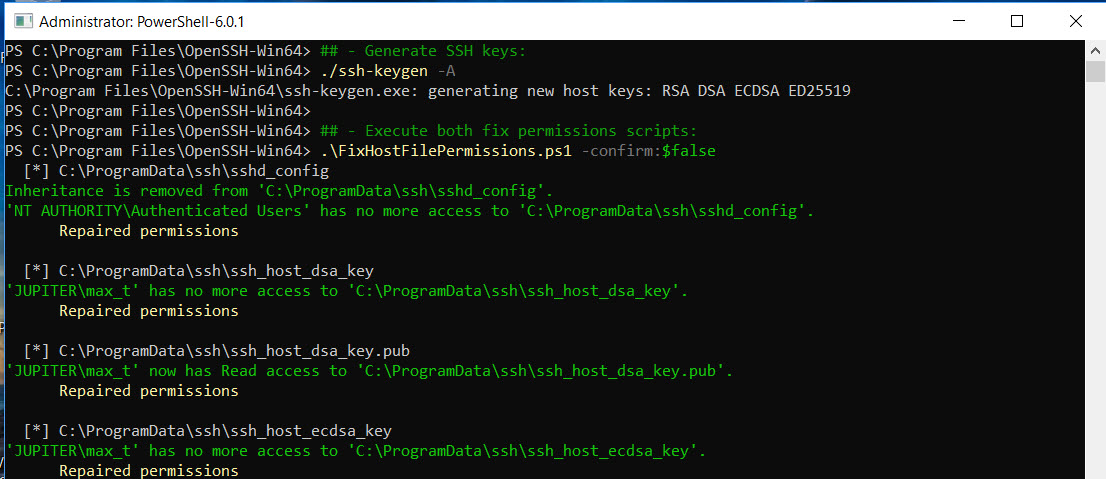
Now, to complete the OpenSSH setup, we execute the following commands:

[sourcecode language=”powershell”]
## – Generate SSH keys:
./ssh-keygen -A

## – Execute both fix permissions scripts:
.\FixHostFilePermissions.ps1 -confirm:$false
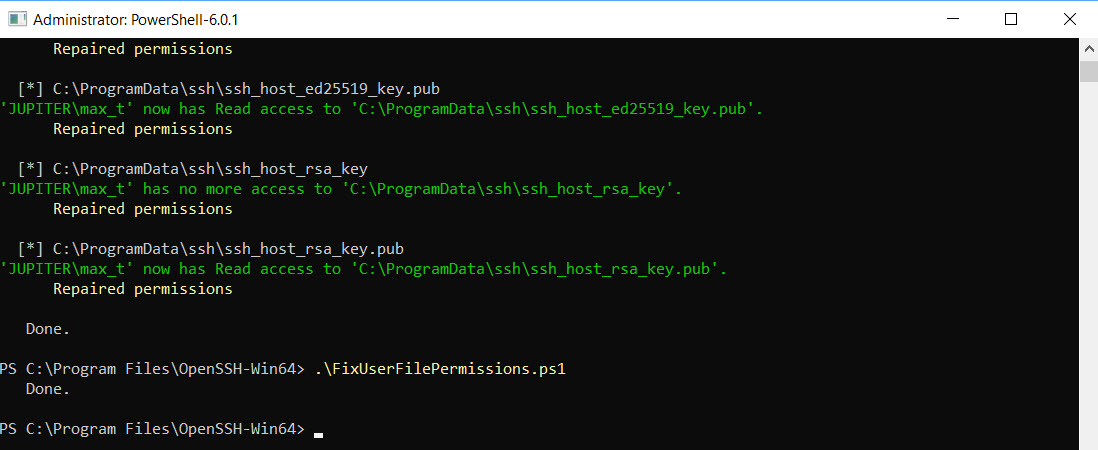
.\FixUserFilePermissions.ps1

[/sourcecode]
Notice, now we got the folder “C:\ProgramData\ssh” populated with all the ssh keys need for connectivity.
We are ready to work with the installed SSH Services.

Starting SSH Services

Here are some final adjustments to make sure both SSH Services will start automaticaly after the system reboots.

[sourcecode language=”powershell”]
## – Set from the Service Startup from “Manual” to “Automatic”:
Set-Service sshd -StartupType Automatic
Set-Service ssh-agent -StartupType Automatic

## – Start the SSH services:
Start-Service sshd
Start-Service ssh-agent

[/sourcecode]

Finally, we are ready to test SSH connection to another system.

Testing OpenSSH Connectivity

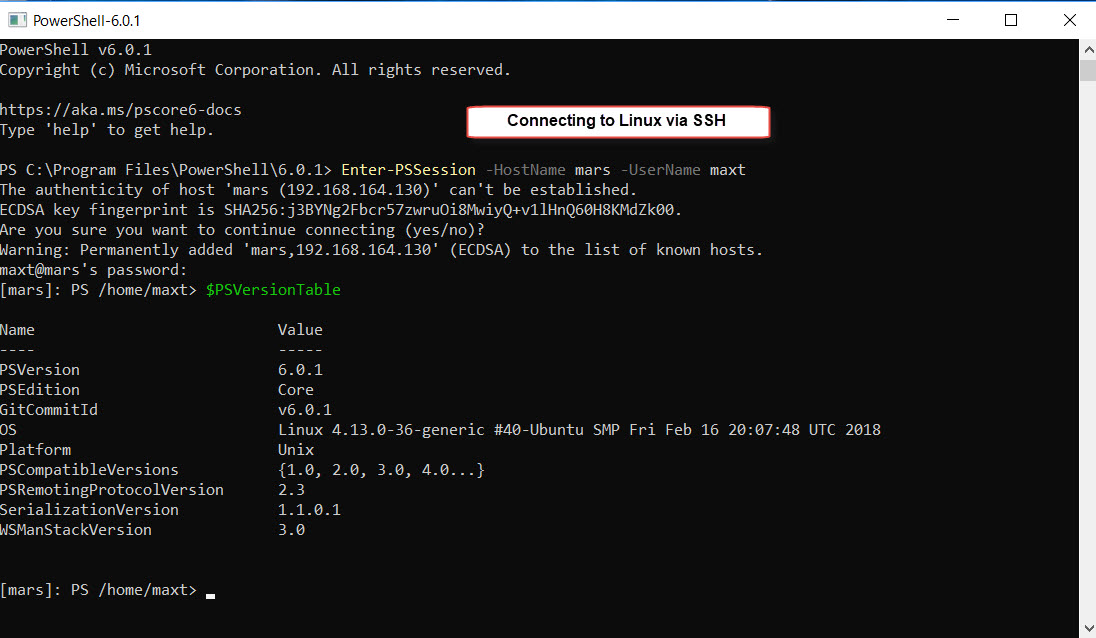
The installation is complete and both SSH Services are running. In order to test, we open PSCore6 console and use the “Enter-PSSession” command to connect to a Linux system or Windows system using SSH protocol.

[sourcecode language=”powershell”]
## – Connecting to Windows:
Enter-PSSession -HostName sapien01 -UserName max_t

## – Connecting to Windows:
Enter-PSSession -HostName mars -UserName maxt

[/sourcecode]
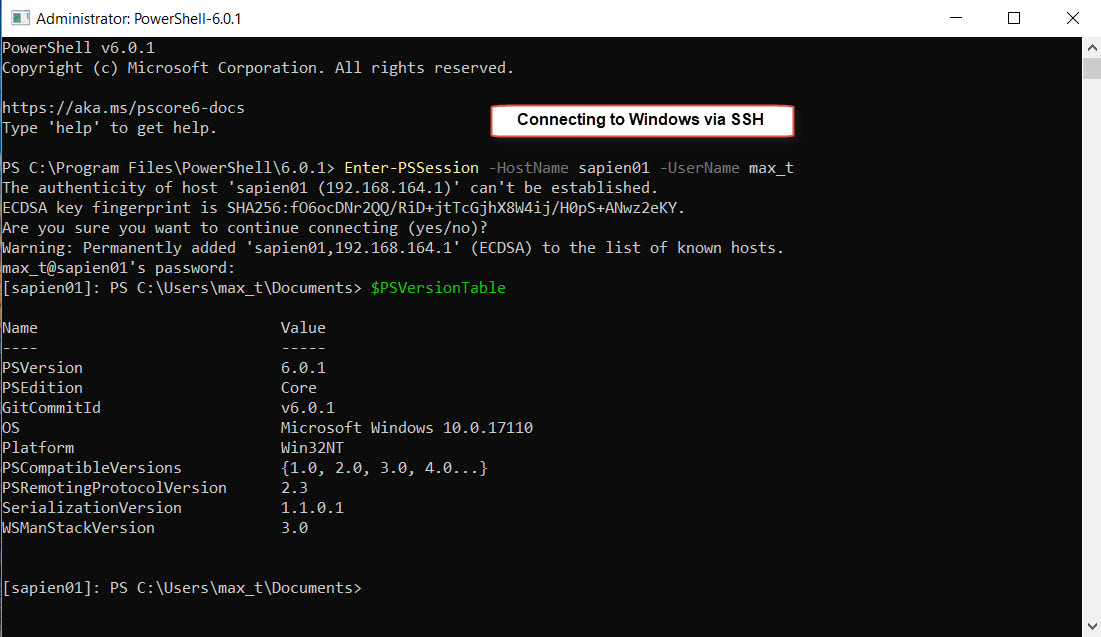
Now, we are successfully connected to another system using OpenSSH.

Word Of Caution!

All Windows System need to have the same version of OpenSSH in order to connect via ssh protocol, or the connection will failed with the following error message: “Enter-PSSession : The background process reported an error with the following message: The SSH client session has ended with error message: Connection reset by 192.168.164.128 port 22.”

Be Bold!! Learn PowerShell Core!!