Recently, Microsoft Azure team release the new version of the AzureRM Module can be install in both Windows PowerShell and PowerShell Core. Now, with the new version renamed from AzureRM to ‘Az‘, Microsoft is encouraging everyone to download and start using this refreshed module moving forward. Just make sure to keep reporting any issues on this module.
Don’t forget to check out the recent blog about the Azure PowerShell ‘Az’ Module version 1.0.
One of the most important fix was the issue experiencing with the TokenCache Initialization when using the cmdlet Import-AzContext. This issue was causing many DevOps to go back and use older version of the AzureRM module to get their script to work again.
The “TokenCache initialization” issue was reported in Github for some time, and finally it has been fixed.
Now, let’s take a look on how to connect to Azure.
Azure Connection CLI options
The following cmdlets can assist you with Azure connectivity:
- Connect-AzAccount
- Save-AzContext
- Import-AzContext
- Enable-AzContextAutoSave
- Disable- AzContextAutoSave
All of these cmdlets belongs to the “Az.Account” module which is included in the Az Module. Here’s where you can use find different ways to connect to Azure.
Below is the full list of all Az modules installed from the PowerShell Gallery:
PS [118] > Get-Module -ListAvailable Az.* | Select Name, Version

Name Version
---- -------
Az.Accounts 1.0.0
Az.Aks 1.0.0
Az.AnalysisServices 1.0.0
Az.ApiManagement 1.0.0
Az.ApplicationInsights 1.0.0
Az.Automation 1.0.0
Az.Batch 1.0.0
Az.Billing 1.0.0
Az.Cdn 1.0.0
Az.CognitiveServices 1.0.0
Az.Compute 1.0.0
Az.ContainerInstance 1.0.0
Az.ContainerRegistry 1.0.0
Az.DataFactory 1.0.0
Az.DataLakeAnalytics 1.0.0
Az.DataLakeStore 1.0.0
Az.DevTestLabs 1.0.0
Az.Dns 1.0.0
Az.EventGrid 1.0.0
Az.EventHub 1.0.0
Az.HDInsight 1.0.0
Az.IotHub 1.0.0
Az.KeyVault 1.0.0
Az.LogicApp 1.0.0
Az.MachineLearning 1.0.0
Az.MarketplaceOrdering 1.0.0
Az.Media 1.0.0
Az.Monitor 1.0.0
Az.Network 1.0.0
Az.NotificationHubs 1.0.0
Az.OperationalInsights 1.0.0
Az.PolicyInsights 1.0.0
Az.PowerBIEmbedded 1.0.0
Az.RecoveryServices 1.0.0
Az.RedisCache 1.0.0
Az.Relay 1.0.0
Az.Resources 1.0.0
Az.ServiceBus 1.0.0
Az.ServiceFabric 1.0.0
Az.SignalR 1.0.0
Az.Sql 1.0.0
Az.Storage 1.0.0
Az.StreamAnalytics 1.0.0
Az.TrafficManager 1.0.0
Az.Websites 1.0.0

PS [169] >
There’s a total of 45 ‘Az‘ modules are installed in your system.
Simple Connection
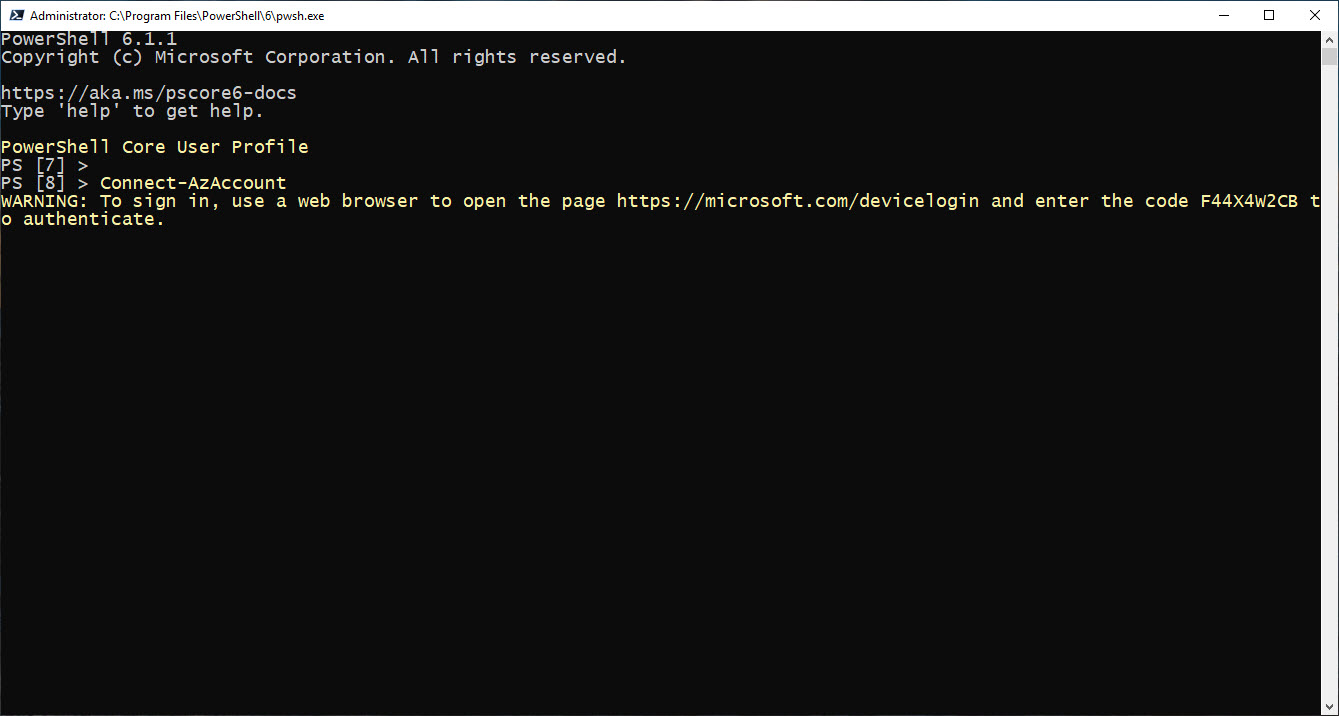
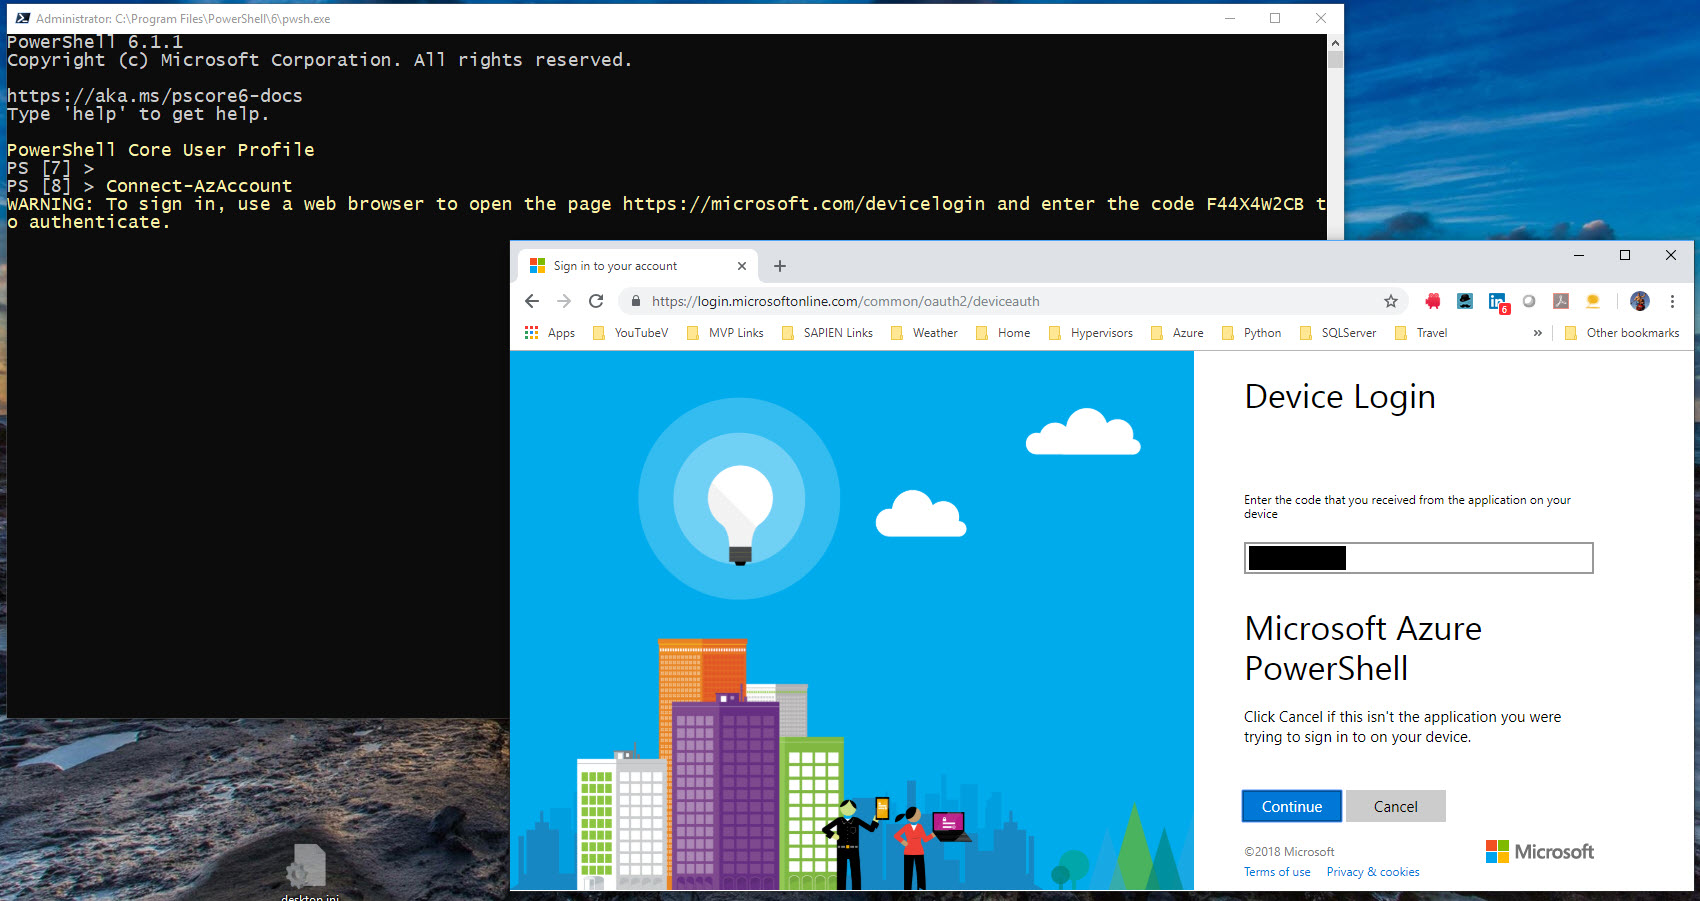
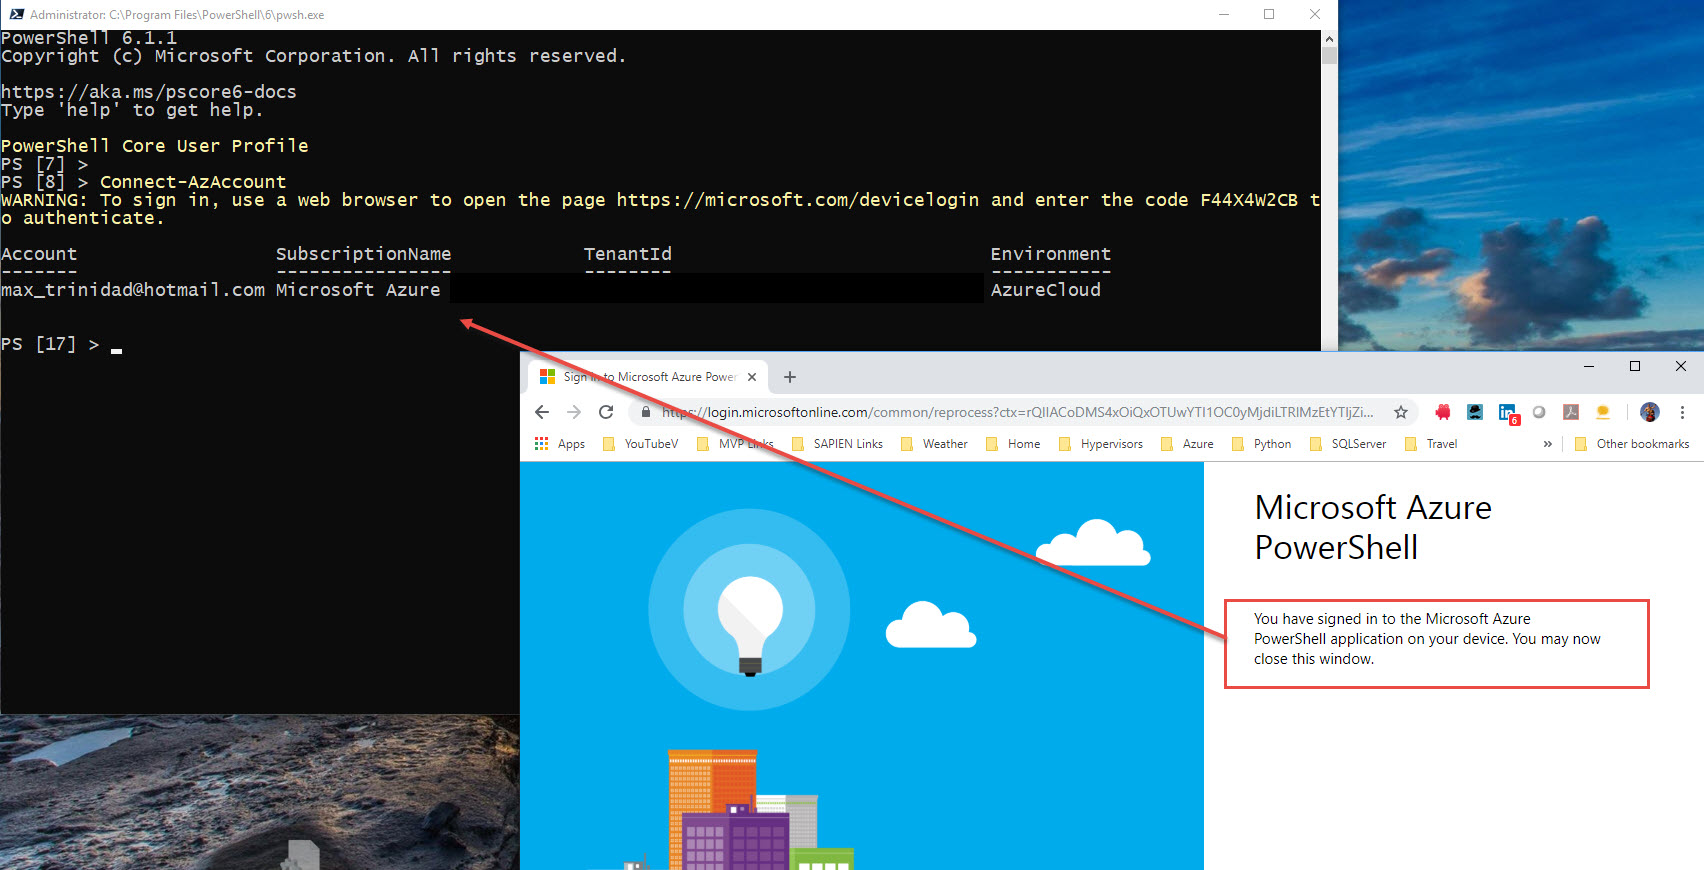
First time connecting to your Azure subscription, you’ll use the “Connect-AzAccount” cmdlet. This cmdlet will asked you to open a browser, then copy/paste a URL and a code that will authorized your device to connect to azure.
So, after the device has been authorized, you can start start working with Azure commands from any of the PowerShell Consoles.
Now, using this cmdlet will create the “.Azure” folder under the user profile directory containing the following files:
c:\Users\username\.Azure
AzInstallationChecks.json
AzurePSDataCollectionProfile.json
AzureRmContext.json
AzureRmContextSettings.json
TokenCache.dat
But, using the Connect-AzAccount cmdlet, the connection only last while your PowerShell session is active. So, as soon as you close the console, and you’ll have to repeat the whole process to connect to Azure again.
Reusing Azure Authentication
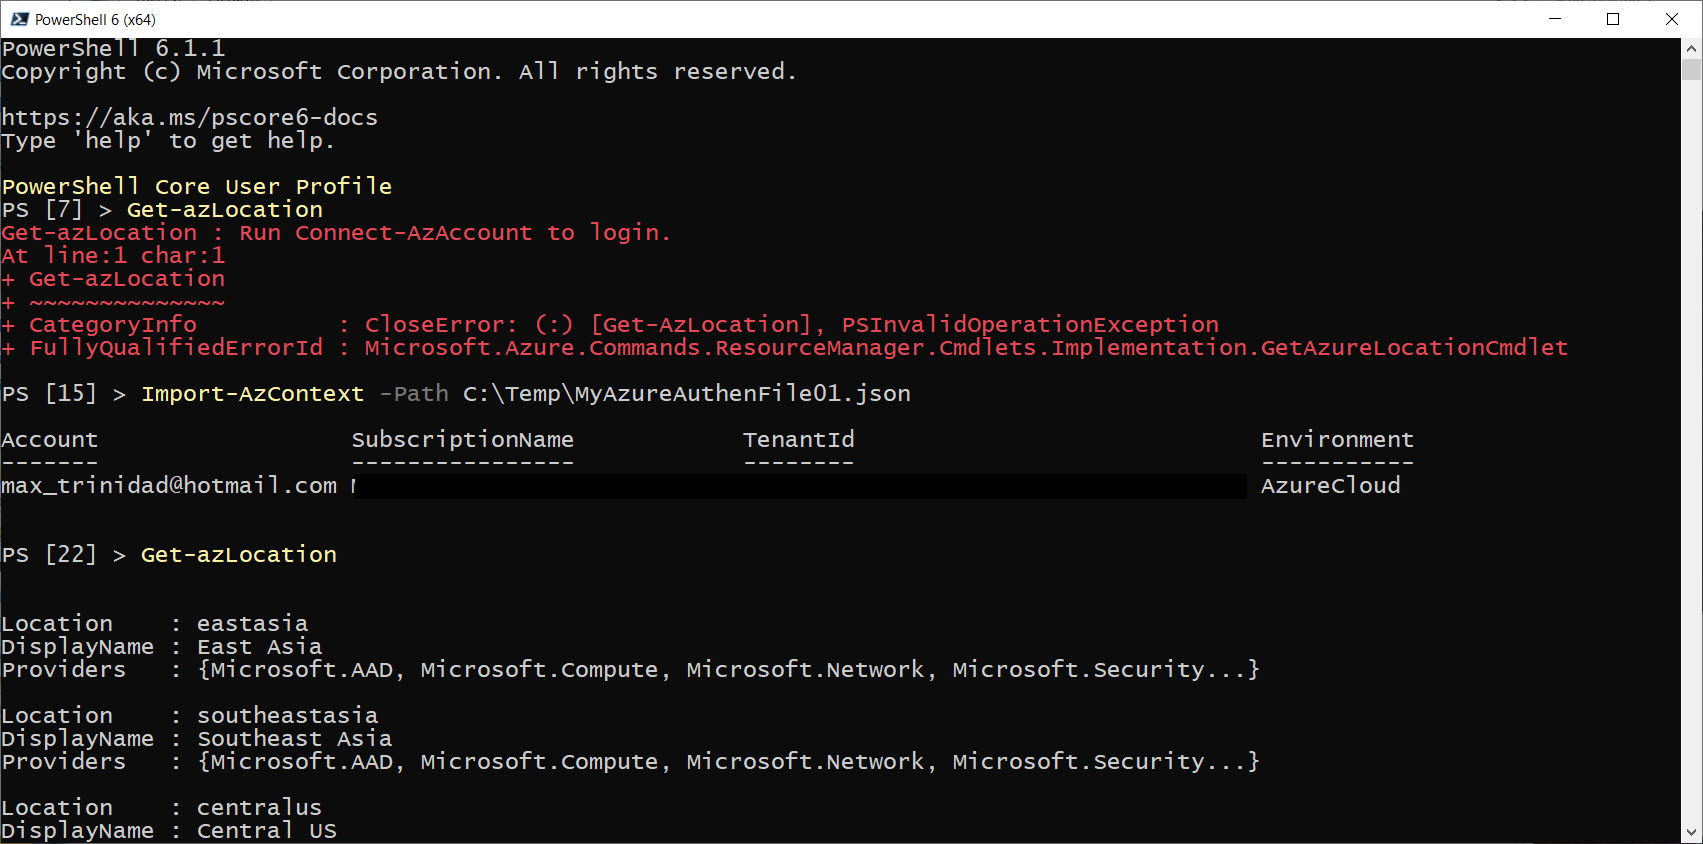
We can reuse Azure Authentication in order to avoid the steps of re-opening the browser. Using the following cmdlets: Save-AzContext and Import-AzContext. These two cmdlets are very useful, as the Import-AzContext loads Azure authentication information from a JSON previously saved when using the Save-AzContext cmdlet.
So, as soon as initially set the connection with the Connect-AzAccount and setup all the necessary configuration (resource groups, storage accounts, Availability Sets…), proceed to use the Save-AzContext to save the Azure Authentication information to a folder location of your choosing.
Then, after exiting your PowerShell session, in order to reconnect again, just use the Import-AzContext cmdlet. I’m sure this one of the way many Azure DevOps are using the Import-AzContext to automate script in PowerShell.
Just make sure to occasionally refresh the file as you’ll be making changes the Azure account(s) by adding/removing resources.
Staying Connected to Azure Account
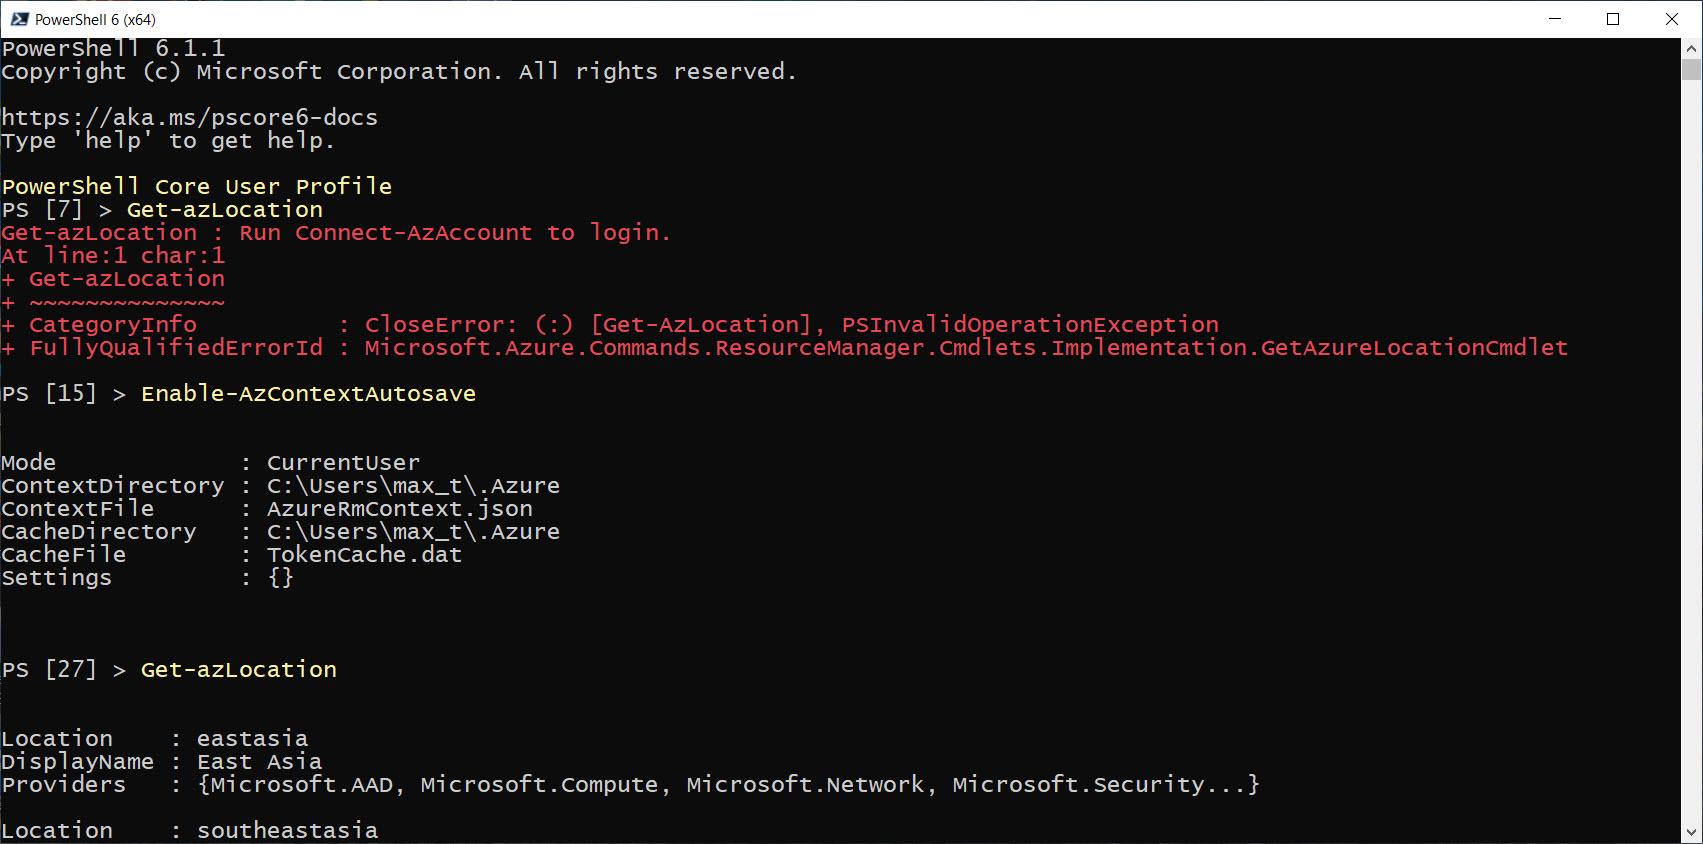
Now, this has been available for awhile using the cmdlets: Enable-AzContextAutoSave, and Disable-AzContextAutoSave. So, if you want to stay connected to your Azure Account, every time you close and reopen a PowerShell Console, you can start working with Azure cmdlets without any delays.
And, because you probably have been working with the Azure modules for some time, just execute the Enable-AzContextAutoSave cmdlet.
That’s it!
Now, you can close and re-open PowerShell Console and immediately start working with Azure. This will make you feel like you are using the Cloud Shell on your desktop.
Just remember, in order to disable this functionality, just run the Disable-AzContextAutoSave cmdlet and exit the PowerShell Console.
Summary
As you can see, there are many ways to get connected from any system cross-platform to your Azure Account(s) to suit your need. This will work from anywhere from any system!
Just go ahead, experiment and find your own way to work proactive with Azure.
