PowerShell working with SQLPS or SMO…

Today, while help @meltondba with his SQLPS question on the enumerating jobs history, @LaerteSQLDBA provided a oneliner to provide this result.  There’s one concern, should we use SQLPS instead of SMO.   For this answer I’m going to point out MSDN article regrading the future of SQLPS in upcoming SQL Server releases: http://msdn.microsoft.com/en-us/library/cc280450(v=SQL.110).aspx

This article states that “… This feature will be removed in a future version of Microsoft SQL Server.  Avoid using this feature in new development work, and plan to modify applications that currently use this feature. Use the sqlps PowerShell module instead. For more information about the sqlps module, see Import the SQLPS Module. …”

So, during this exercise I found out that I can out with the same number of line for either SQLPS and SMO.  Both giving me the same results.

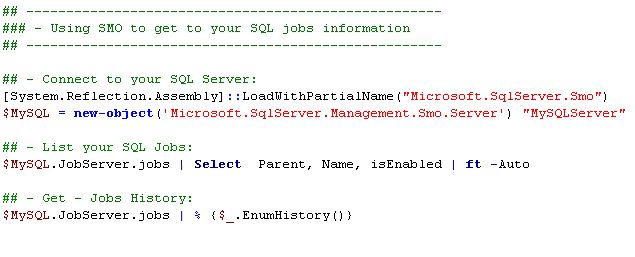
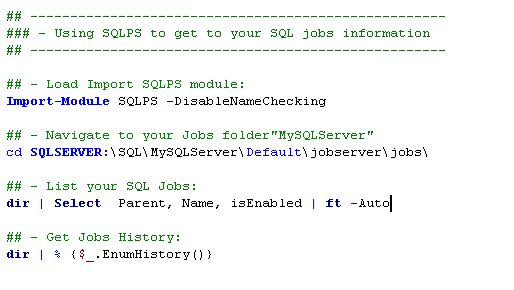
Here’s some picture ilustrating basic code snippet of both SQLPS and SMO to get some SQL Server Jobs information:

SQLPS sample of getting jobs information
SMO sample of getting jobs information

This pictures shows, it look simple enough.  So, if you’re building SQLPS scripts, you can easily start transitioning your code to SMO.

Windows Developer Preview – Looking at the Eye of the Storm

There’s no doubt, there’s a bright future with Windows 8 and it does have lots of exciting features.  But,  did everything looks good and easy.  Well, easy!! Not really.

I’m sure I will not be the only person who have experience problems installing Windows 8.  Now, please understand, this not to critize Microsoft in any way.  Every IT PRO and/or Developer will have different scenario, and in one point in time, will have installation issues.

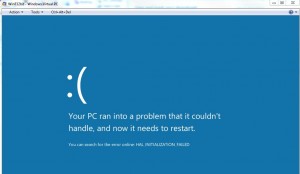
I had a problem trying to install from Windows 7 the new “Windows 8 Developer Previewclient.  At first I thought it was my download was corrrupted.   I didn’t have any problems with the Server version.

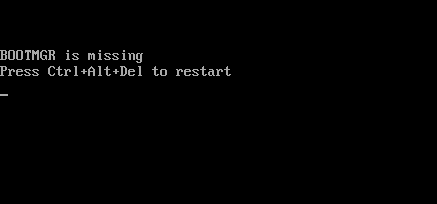
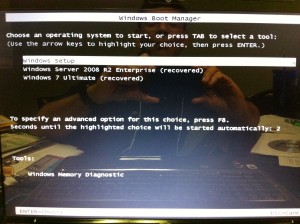
But then, after restarting my computer, I lost my “Bootmgr”.

Now, this happened because I boot to multiple OS’s: Windows Server 2008 R2 and Windows 7.  I had one successfull installation of the “Windows 8 Server Developer Preview” but on my Windows 7 the installation failed to install over.  The problem is, you will not notice your “BootMgr is missing” error after a reboot was performed.

So, what precautions you should take to prevent this issue:

  1. Make sure you have create a “System Repair Disk” for you Operating System.
  2. Also, do a Windows Backup.

In most cases, using the “System Repair Disk” will get you out of the hold.  In my situation, I had to delete all my System, and my Windows 7 Partition.  This way I took a longer route and able to put back a clean Windows 7 OS, and only then I could successfully install “Windows 8 Developer Preview” client.

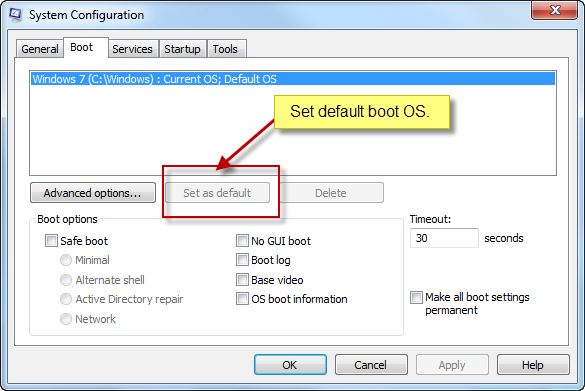
Now,  looking back to what I had done, I realized that MAYBE I would have avoided this issue if I had paid attention to the Windows 7System Configuration“.  And, here’s why:

There’s a possibility the failed installation of the Windows 8 client was due to not having my Windows 7Set as Default” boot OS.   Now, if this doesn’t work, then delete the partitions and try again.

At the end, I finally got my BootMgr working with two OS’s: Windows 8 Server and Windows 8 Developer Preview working fine.

I’m ready!! To continue install applications, and doing more test with Windows 8.

To download Windows 8 Editions, go to your MSDN subscription, or get it at this link: http://msdn.microsoft.com/en-us/windows/home/

Happy Testing!!

Yes! Windows 8 Editions with PowerShell V3 included

Tonight I was able to download both Windows 8 Server with Hyper-V and the Windows Developer Preview ISO.  I will create VM using the Developer Preview ISO, and then take a look at PowerShell V3 new cmdlets.  As, everyone got an early start downloading the Windows Developer Preview edition, I will be working on the server version.

As you already know by now, PowerShell V3 is here with lots of new command to help manage your computer system.  But, don’t take my word for it, if you’re at the BUILD Conference, don’t forget to attend Jeffrey Snover PowerShell Sessions: http://www.buildwindows.com/Sessions?q=PowerShell&x=0&y=0

There’s a possibility that Jeffrey’s BUILD sessions will be recorded and can be viewed later on the following address: http://channel9.msdn.com/Events/Speakers/jeffrey+snover

To download Windows 8 Server and/or Developer Preview editions, look in both your MSDN Subscription, and/or at the following link: http://msdn.microsoft.com/en-us/windows/home/

Windows 8 Server w/Hyper-V

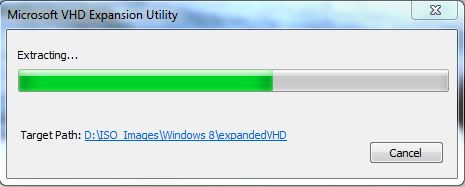
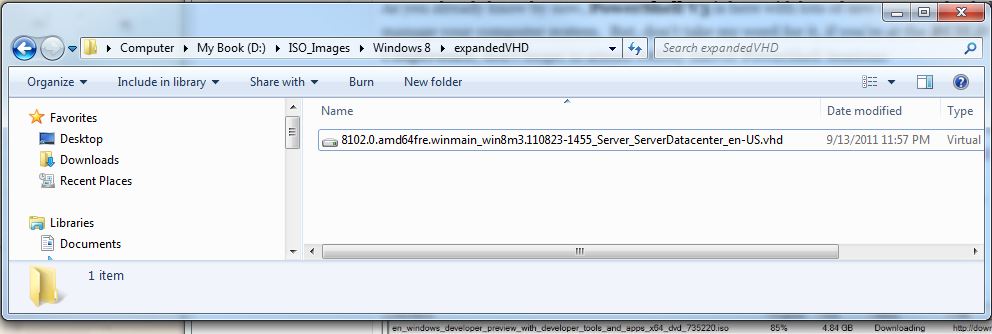
The installation started with executing the downloaded *exe: en_windows_server_developer_preview_with_hyper-v_virtual_machine_x64_735222.exe

This executable will extract a VHD file:

Now, this VHD is good if you a media were you can boot from a thump-drive, or use the Windows 7 Boot from VHD feature.

Now, you’re better off downloading the ISO and burned it into a DVD.  So, look for the “Windows Server Developer Preview (x64) – DVD (English)” in your MSDN Subscription.

I lost my BootMgr!

Yeap! I was trying to use the Boot from VHD in Windows 7 but the documentation out there doesn’t tell you to activate the attached VHD and make it active to boot.  So, I try a couple fo things but to end up with “… Bootmrg is missing …” message.  Well, how can I resolved this new issue.  The answer was found in Microsoft Answer: “windows 7 bootmgr is missing– resolved using WinRE” – http://answers.microsoft.com/en-us/windows/forum/windows_7-system/windows-7-bootmgr-is-missing-resolved-using-winre/8bb148bc-8035-4847-9696-888f7a0a9720

So, I prepare a recovery DVD using the “Create a system repair disc” found in the “Backup and Restore” section.  It works like a charm!

Back to Windows Virtual Machnes

By the way, I did try to create Windows 8 VM’s in both Windows 2008 R2 Hyper-V and Windows 7 “Windows Virtual PC” but didn’t work.

Now, I’ve heard that it’s possible to create a Windows 8 VM using VirtualBox.  Try it!

On my laptop, I decided to install “Windows 8 Server w/Hyper-V” over my “Windows Server 2008 R2 SP1”.  This way I can start setting up my new VM’s and see how the my older ones work under this new OS.  This installation took about a couple of hours with a series of reboots.

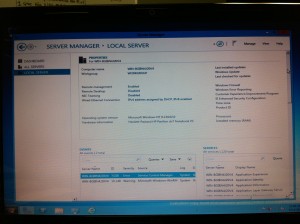
Before, creating my VM’s, I needed to install the Hyper-V role and enable PowerShell ISE using the new Server Manager dashboard:

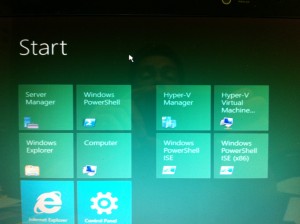
When you click on the Windows Flag to look for your application, it will take you to the new Start menu:

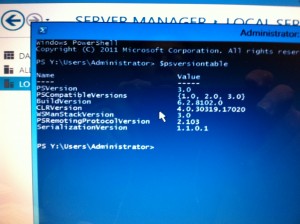
You will notice that “PowerShell” is available next to”Server Manager“.  We click on Powershell and enter the $PSVersionTable to check version:

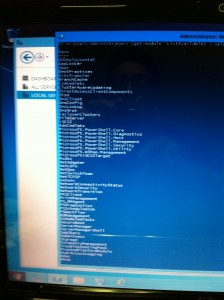
As you can see, this is PowerShell Version 3.  This version comes with a total of 56 available Modules, 521 Cmdlets (excluding Modules command), 637 functions, and 146 Aliases.  You got plenty of learning opportunities with this new version.

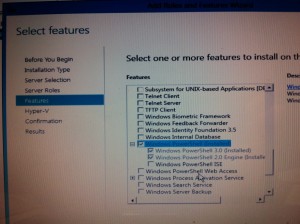
Now, As you all know, under the server features you need to “enable” PowerShell ISE.  I try to use the Classic “Control Panel” but it didn’t work for me.  So, you need to use the Server Manager, and click on the Manager Menu to get to “Add Feature” option:

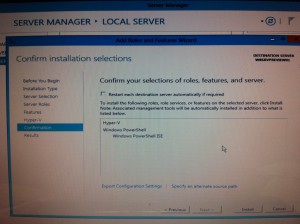
After you have selected both Role(s),and Feaures then you’re ready to install them:

When the installation is completed, you will find PowerShell ISE ready to use from the new START menu:

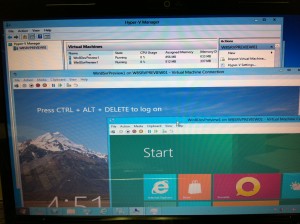
After having installed Hyper-V, I was able to create both 64bit version of Window 8 Server and Desktop.

Now, how do you Shutdown your Windows 8 Server?  Just do a Ctrl-Alt-Del and then at the “Shutdown” button found at the bottom right of the screen.

Let’s the fun begin!!

Big Hint!!  Just found this tweet about booting from VHD: “New Blog: How to Boot from VHD with Windows 8 Developer Preview: http://t.co/JIBBQze3

Additional Note:  The client version of Windows Developer Preview, altought PowerShell V3 is included, it doesn’t show in your Start Menu.

Presenting at Orlando SQL Saturday #85: Extend your T-SQL Scripting w/PowerShell

Date: Saturday, September 24th – Session starts at: 2:45PM

Session Level: Intermediate

I’ll be covering some of the different way we can use PowerShell to extend our T-SQL scripting.  This session will include a mix of using SMO, .NET classes, and SQLPS to help you understand the power for new scripting technology.  At the end, we’ll be creating a solution that put together all this techniques.

See You all there!!


No-Hassle SQL Server Remoting with PowerShell V2

Although, PowerShell give the whole remoting experience, you may still need to ask you network administrator to let you configure remoting on all the machines you need to access.  Of course, unless you hold the keys of the kingdom.  But, it is much  simpler without PowerShell Remoting.

When you use the SQLPS Module it automatically let you connect to any of your SQL Servers on your network.  So, YES!! As long as you have permission to manage these servers, SQLPS already gives you the ability to remotely connect to other machines.  There’s no need to setup the Remoting with  Enable-PSRemoting or Set-WSManQuickConfig commands.

Simple Remoting #1

So, How can I change from my SQL Server local prompt to another instance?  Here’s an example how:

1. First load the SQLPS Module:

[sourcecode language=”powershell”]
Import-Module SQLPS -DisableNameChecking
[/sourcecode]

2. Confirm you have the SQL Server drive available:

[sourcecode language=”powershell”]
Get-PSDrive SQL*
[/sourcecode]

3. Let’s navigate to your SQL Server Instance:

[sourcecode language=”powershell”]
cd SQLServer:\SQL\Your-Machine-name\Default  #or

cd SQLServer:\SQL\Your-Machine-name\Your-InstanceName
[/sourcecode]

4. Now you can continue and navigate through your SQL Server drive like in DOS filesystem.

[sourcecode language=”powershell”]
Dir Databases -force
[/sourcecode]

5. Finally, to remote connect top another session just change the “Your-Machine-name”, and your “Your-InstanceName”.

Simple Remoting #2

One thing you need to understand, after you load SQLPS module, now you have access to all SMO (SQLServer Management objects) .NET Classes. This will help you build short and very effective .NET that extend the scripting of PowerShell.  Also, you don’t need to be at the SQLServer: drive to use it.

Here’s a basic example using SMO:

1. First load the SQLPS Module:

[sourcecode language=”powershell”]
Import-Module SQLPS
[/sourcecode]

2. Create a variable to hold your local SQL Server objects:

[sourcecode language=”powershell”]
$MySQL = new-object Microsoft.SqlServer.Management.Smo.Server
[/sourcecode]

3. Now that your .NET object has been create you need to see all what you can grab from it:

[sourcecode language=”powershell”]
$MySQL | Get-member | Out-GridView
[/sourcecode]

4. I decided to grab the “Information” property so I can display all the information, and verify that this is my local SQL instance:

[sourcecode language=”powershell”]
$MySQL.Information
[/sourcecode]

5. Finally, to remote connect to another machine, I just add the SQL Server InstanceName to the line creating my variable:

[sourcecode language=”powershell”]
$MySQL = new-object Microsoft.SqlServer.Management.Smo.Server "Your-Machine-name"Â
[/sourcecode]
Or
[sourcecode language=”powershell”]
$MySQL = new-object Microsoft.SqlServer.Management.Smo.Server "Your-Machine-name\Your-Instancename"
[/sourcecode]

Keep in mind, you can another variable holding your SQL Server name with the instancename and do something like:

[sourcecode language=”powershell”]
$SQLInstanceName = "Your-Machine-name\InstanceName"
$MySQL = new-object Microsoft.SqlServer.Management.Smo.Server $SQLInstanceName
$MySQL.Databases[$SourcedbName].tables | sort -desc dataspaceused | select Parent, `
@{Label="DisplayName";Expression={$_.Schema+"."+$_.Name};} | `
sort DisplayName;
[/sourcecode]

Again, no need to setup PSRemoting.

Simple Remoting #3

And this is the simplest of all, if you like to reuse your T-SQL scripts.  This will be your most used PowerShell SQLPS cmdlet “Invoke-SQLcmd“.

1. Load the SQLPS module:

[sourcecode language=”powershell”]
Import-Module SQLPS
[/sourcecode]

2. Just start using the SQLPS “Invoke-SQLcmd” command: (basic form)

[sourcecode language=”powershell”]
Invoke-Sqlcmd -Query "SELECT GETDATE() AS TimeOfQuery;" -ServerInstance "."  #or

$SaveResult = Invoke-Sqlcmd -Query "SELECT * FROM [AdventureWorks].[dbo].[AWBuildVersion];" -ServerInstance "Your-Machine-name\InstanceName"

$SaveResult
[/sourcecode]

Again, there’s no need to be at the SQLServer: drive in order for this to work.  As you can see, with just a few lines of code you can connect to another SQL Server instance.

Go ahead and try it!
Creating your own ExitCode in PowerShell and use it in SSIS package

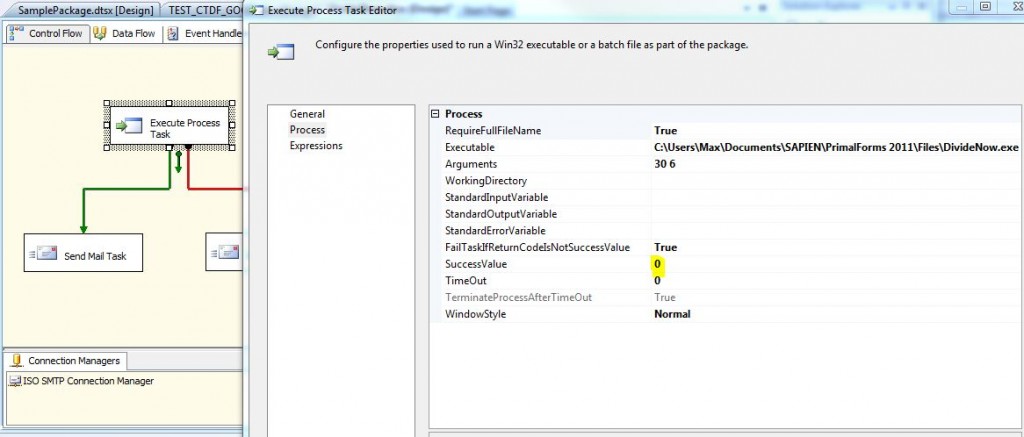
As I started to build executable solutions in PowerShell for my SSIS packages, now I need to take advantage of providing an Exit Code value within the application.  Creating your own exit code can be very useful for providing a Success or Failure of a task.  This is way you can take the correct action on how your flow is going to behave.
I found a great blog article from one of my MVP college – MOW that got me started:
# http://thepowershellguy.com/blogs/posh/archive/2008/05/20/hey-powershell-guy-how-can-i-run-a-powershell-script-from-cmd-exe-and-return-an-errorlevel.aspx
Also, here’s an MSDN blog article: # http://msdn.microsoft.com/en-us/library/system.environment.exit(v=VS.80).aspx.  These article lead me to find multiple ways to introduce an Exit Code in PowerShell.
In its basic form:
1. Exit N – as shown on MOW’s blog (link above), only work in PowerShell
2. Exit (“N”) – I just try it but only work with PowerShell.
3. [Environment]::Exit(“N”) – Following the MSDN article (link above), it work in both PowerShell and DOS.
Here’s where “N” equals the Exit Number you want to provide.  Also, you need to understand that this only work when executing your script with the PowerShell.exe at any command prompt: DOS or PowerShell.
Now, as you notice and probably wondering, I found out that “Exit N” and Exit(“N”) behave differently when is executed in both as a script, and compiled under PrimalForms 2011.  I will show this in my examples.
In PowerShell V2, I found some different behaviour when using the above methods.  My goal in these exercise is to provide an Exit Code that can be use in either PowerShell (as a Script and as Executable) and DOS (as executable).  The reason is that you want to eventually convert your script as an executable in the future.
Here’s the basic structure on how this is done taking an example of a Division process where we’ll be trapping the “Divided by 0″ exception using “Try-Catch“.  Then, after testing our script we can create the executable that can be included in an SSIS solution.
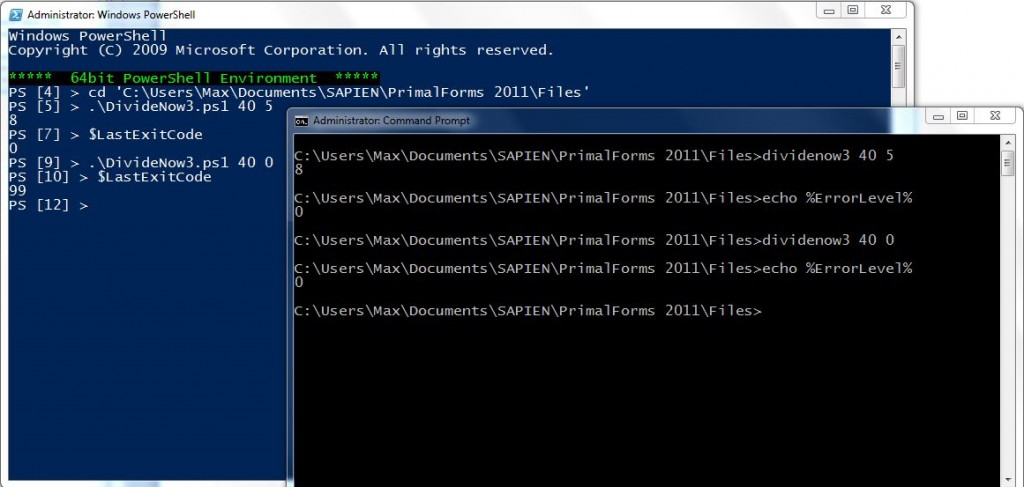
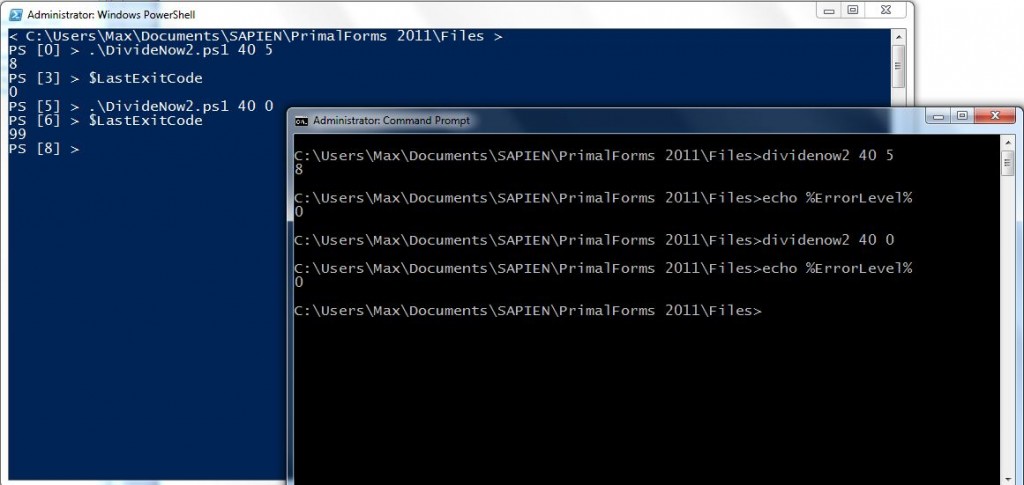
To validate the Exit Code has a value, we need to create en executable using PrimalForms 2011, then use the $LastExitCode in PowerShell and the %ErrorLevel% in DOS to confirm we have the values we want.  Both Exit Code values need to match in PowerShell and DOS.  These samples scripts will run under PowerShell console, and the compiled *.exe version will run under DOS.
Sample Script 3 – DivideNow3.ps1 – using “Exit N”.

[sourcecode language=”powershell”]
#========================================================================
# Created with: SAPIEN Technologies, Inc., PrimalForms 2011 v2.0.12
# Created on: 8/31/2011 6:33 PM
# Created by: Max Trinidad
# Organization: PutItTogether
# Filename: DivideNow3.ps1
# http://thepowershellguy.com/blogs/posh/archive/2008/05/20/hey-powershell-guy-how-can-i-run-a-powershell-script-from-cmd-exe-and-return-an-errorlevel.aspx
# http://msdn.microsoft.com/en-us/library/system.environment.aspx
#========================================================================
Param([Int] $arg1, [Int] $arg2)
Try
{
[Double] $result = $arg1 / $arg2;
}
Catch
{
#Write-Host "Error in function";
$err1 = 1;
}
Finally
{
if($err1 -eq 1)
{
## – Custom Exit Code:
Exit 99;
}
Else
{
Write-Output $result;
Exit 0;
}
}

[/sourcecode]

Results for DivideNow3.ps1
Sample Script 2 – DivideNow2.ps1 – using “Exit(“N”).
[sourcecode language=”powershell”]
#========================================================================
# Created with: SAPIEN Technologies, Inc., PrimalForms 2011 v2.0.12
# Created on: 8/31/2011 6:33 PM
# Created by: Max Trinidad
# Organization: PutItTogether
# Filename: DivideNow2.ps1
# http://thepowershellguy.com/blogs/posh/archive/2008/05/20/hey-powershell-guy-how-can-i-run-a-powershell-script-from-cmd-exe-and-return-an-errorlevel.aspx
# http://msdn.microsoft.com/en-us/library/system.environment.aspx
#========================================================================
Param([Int] $arg1, [Int] $arg2)
Try
{
[Double] $result = $arg1 / $arg2;
}
Catch
{
#Write-Host "Error in function";
$err1 = 1;
}
Finally
{
if($err1 -eq 1)
{
## – Custom Exit Code:
Exit("99");
}
Else
{
Write-Output $result;
Exit("0");
}
}

[/sourcecode]

Results for DivideNow2.ps1
Sample Script 1 – DivideNow.ps1 – using .NET “[Environment]::Exit(“N”)”.
[sourcecode language=”powershell”]
# Organization: PutItTogether
# Filename: DivideNow.ps1
# http://thepowershellguy.com/blogs/posh/archive/2008/05/20/hey-powershell-guy-how-can-i-run-a-powershell-script-from-cmd-exe-and-return-an-errorlevel.aspx
# http://msdn.microsoft.com/en-us/library/system.environment.aspx
#========================================================================
Param([Int] $arg1, [Int] $arg2)
Try
{
[Double] $result = $arg1 / $arg2;
}
Catch
{
#Write-Host "Error in function";
$err1 = 1;
}
Finally
{
if($err1 -eq 1)
{
## – Custom Exit Code:
[Environment]::Exit("99");
}
Else
{
Write-Output $result;
[Environment]::Exit("0");
}
}

[/sourcecode]

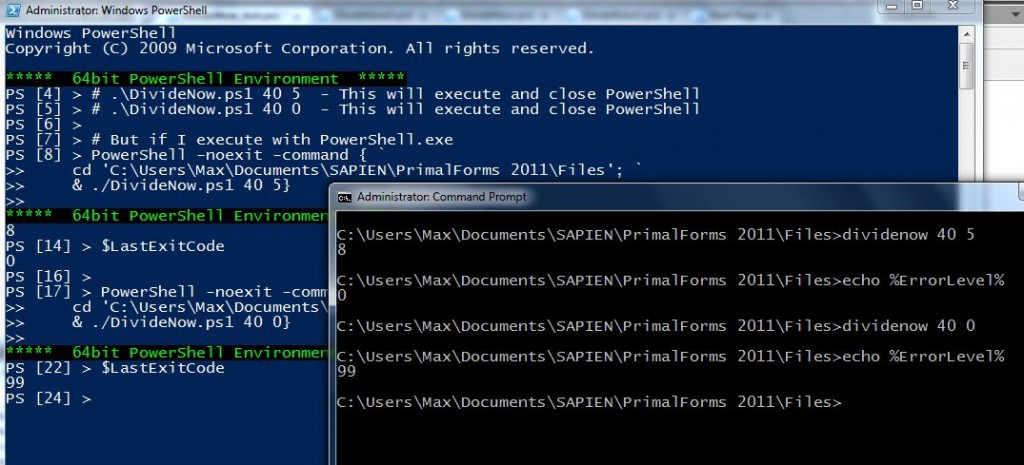
Results for DivideNow.ps1

This is the results we want to get.  Both DOS and PowerShell will show the correct assigned Exit Codes.  This script and executable will work and can be integrated in an SSIS package.
Bonus Script – Executing a PS Script from PowerShell.exe in the PowerShell Console to execute DivideNow.ps1

[sourcecode language=”powershell”]
#========================================================================
# Created with: SAPIEN Technologies, Inc., PrimalForms 2011 v2.0.12
# Created on: 9/2/2011 9:21 AM
# Created by: Max Trinidad
# Organization: PutItTogether
# Filename: DivideNow_test.ps1
#========================================================================

# .\DivideNow.ps1 40 5 – This will execute and close PowerShell immediately
# .\DivideNow.ps1 40 0 – This will execute and close PowerShell immediately

# But if I execute with PowerShell.exe
PowerShell -noexit -command { `
cd ‘C:\Users\Max\Documents\SAPIEN\PrimalForms 2011\Files’; `
& ./DivideNow.ps1 40 5}

$LastExitCode

PowerShell -noexit -command { `
cd ‘C:\Users\Max\Documents\SAPIEN\PrimalForms 2011\Files’; `
& ./DivideNow.ps1 40 0}

$LastExitCode
[/sourcecode]

Happy PowerShelling